
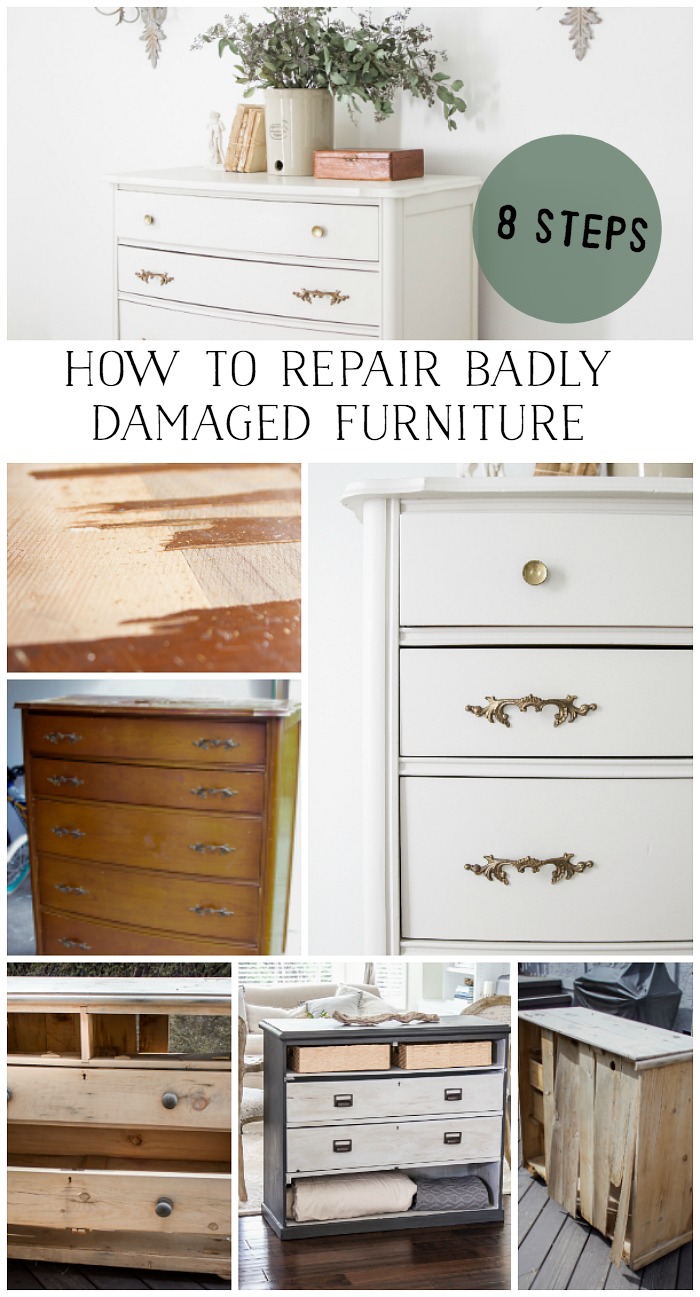
8 Techniques to Fix Badly Damaged Furniture + Video
These are 8 techniques for how to fix badly damaged furniture including a video.
When I renovated this house I knew I wanted to have some painted dressers in the bedroom. Dressers are always best if you can find them second-hand, hand-me-downs or free on the side of the road. Why? Because they are usually solid wood and it’s very rare to find solid wood dressers anymore. Most new dressers, even expensive ones, usually have some form of MDF or veneer parts to it, usually the backs or drawers.
Every time I finish a dresser, there’s always something new to fix on it that I haven’t done on the last dresser. I’ve learned a ton along the way through trial and error and I’m sharing those tips with you today.
So you can have a stunning piece of furniture in your house for almost nothing but time and sweat and maybe a few tears. Okay, it really isn’t that bad, but if you are willing to be patient with a piece of furniture, it can be done.
Here are 8 techniques on how to fix badly damaged furniture.
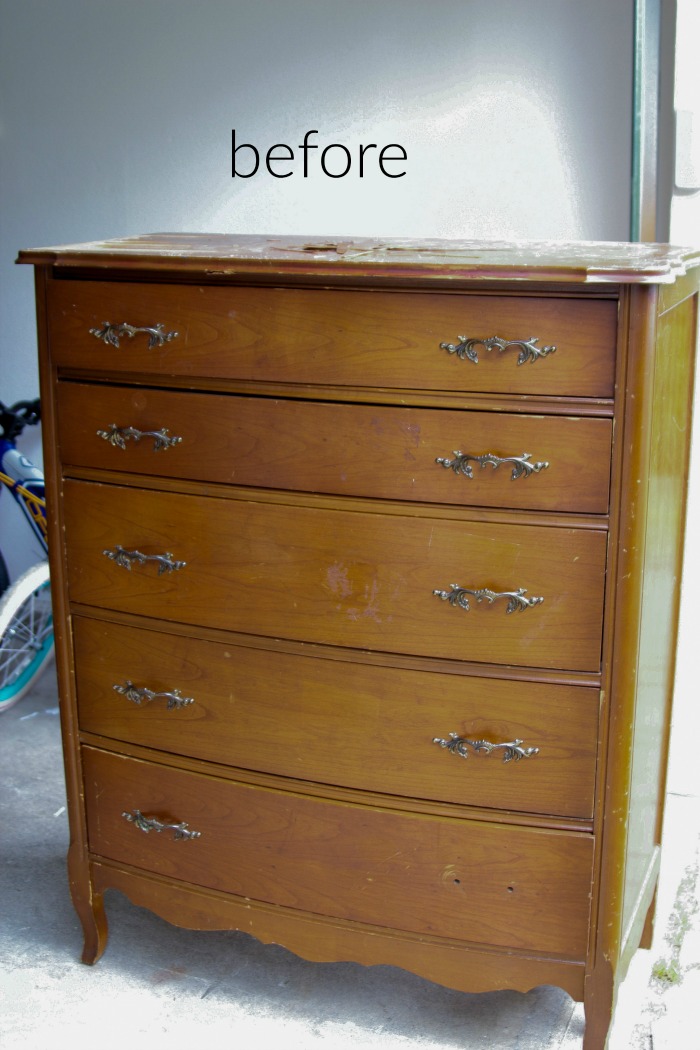
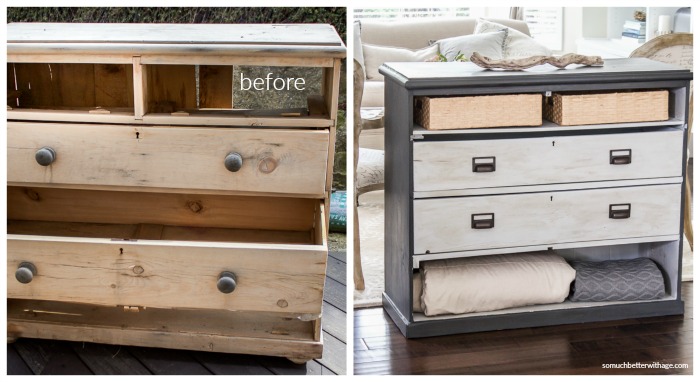
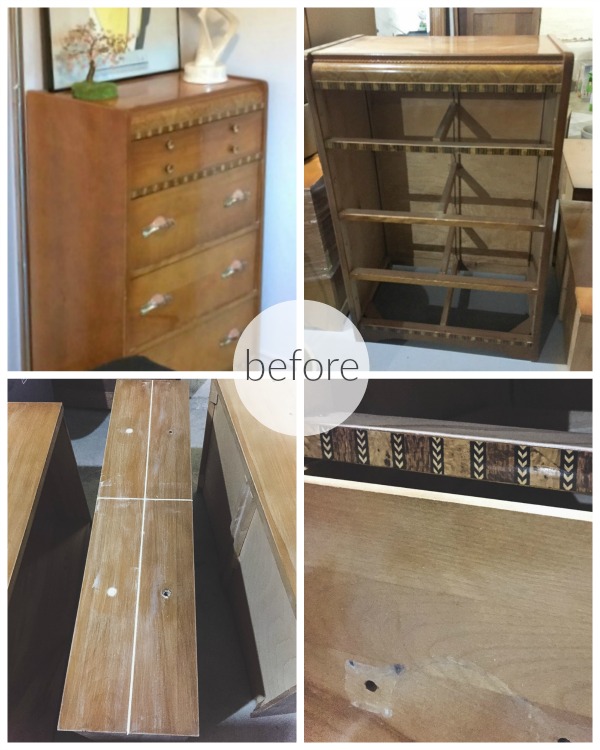
The first photo above shows the after of this bad dresser. It really was in bad condition but I have seen worse (wait until you get to the bottom of my post!).
Disclosure: This post may contain affiliate links. Please read my disclosure policy.
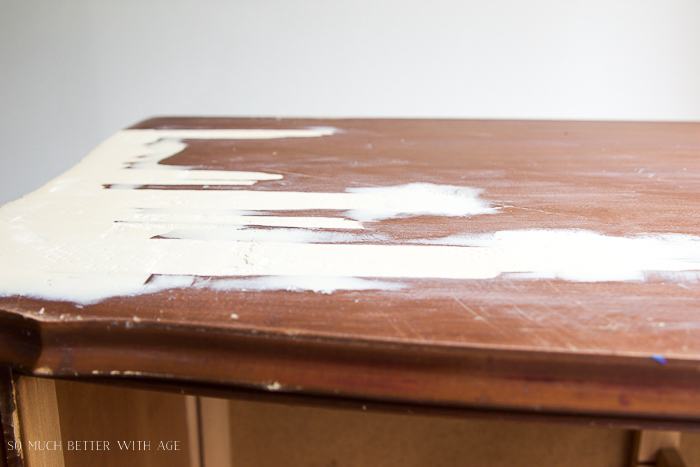
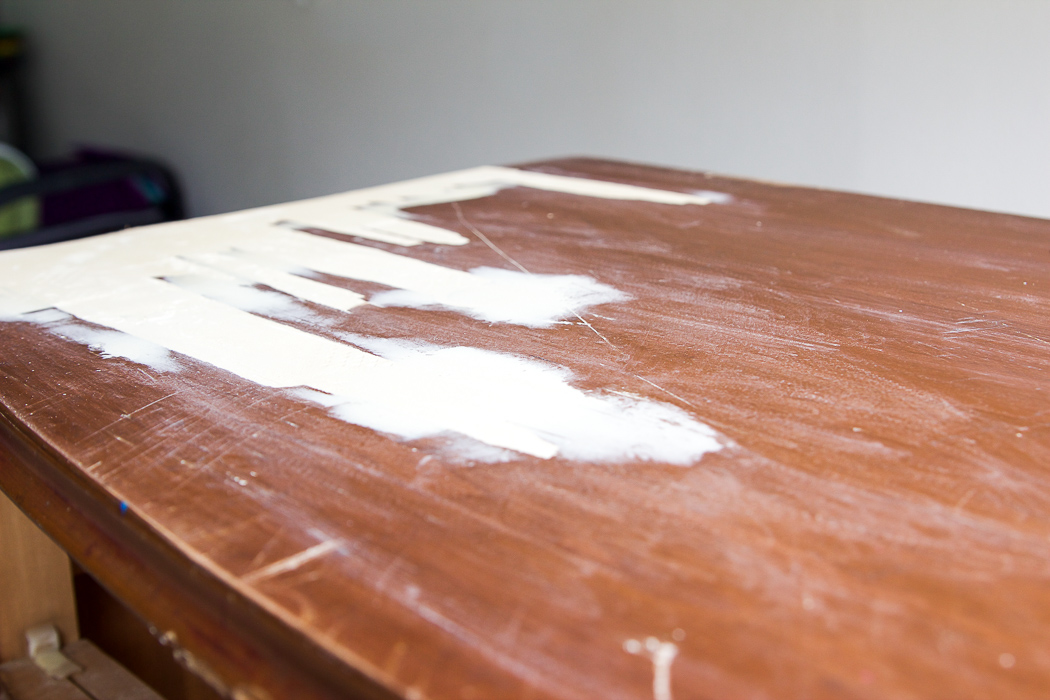
1. What to do when veneer is coming off:
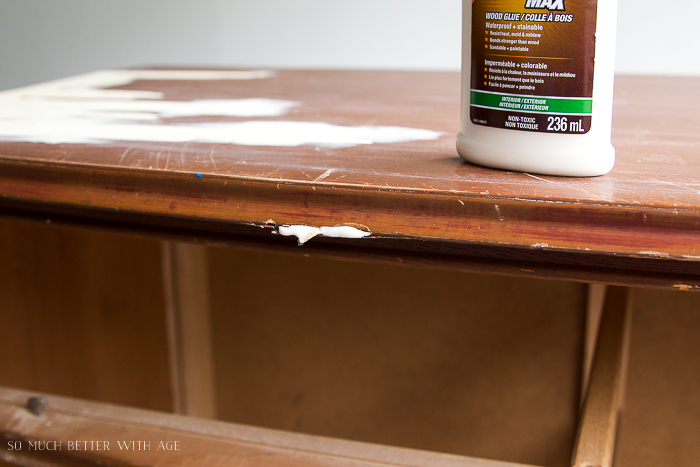
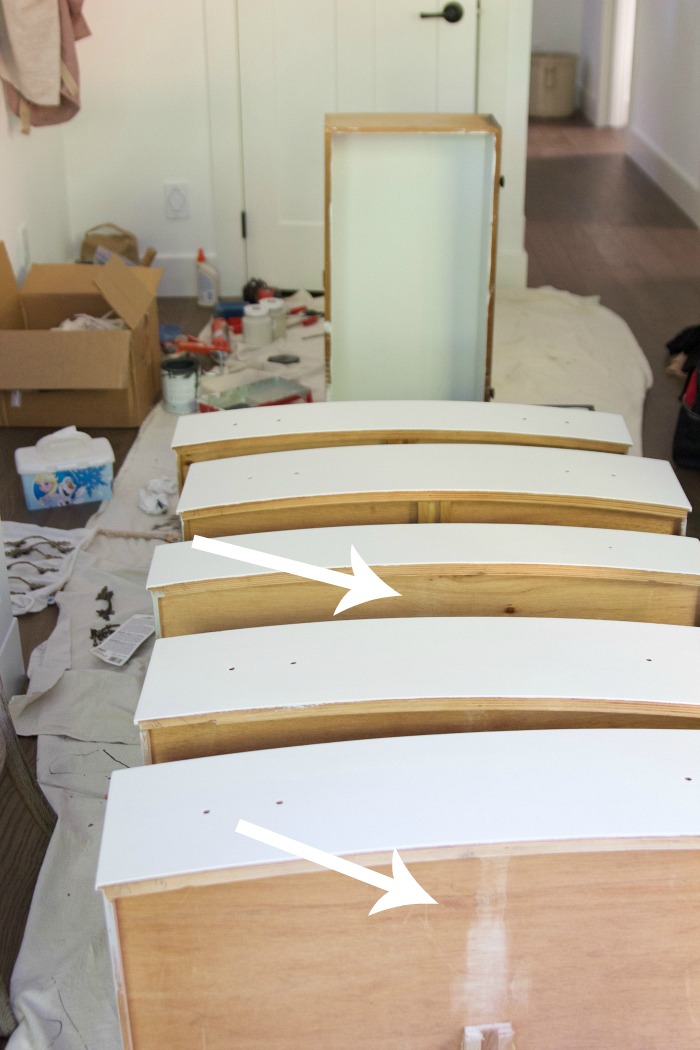
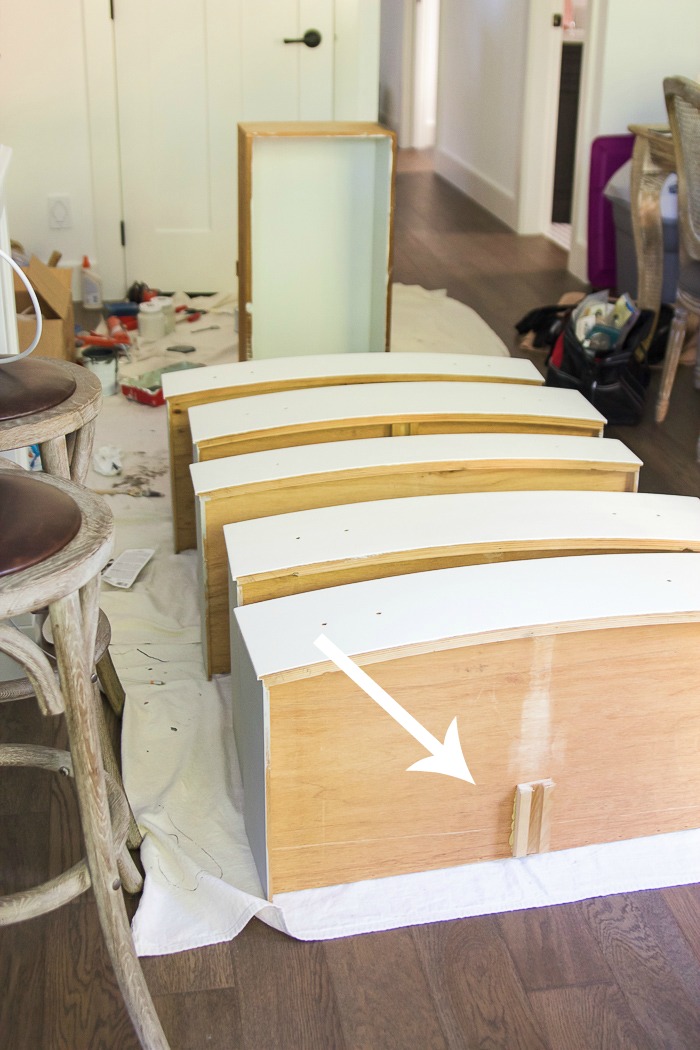
This dresser didn’t look like this when I bought it. There was some small flaking on the one side and when I touched it, it easily lifted off. So instead of puttying it down, I just lifted off all the loose bits.
Yikes.
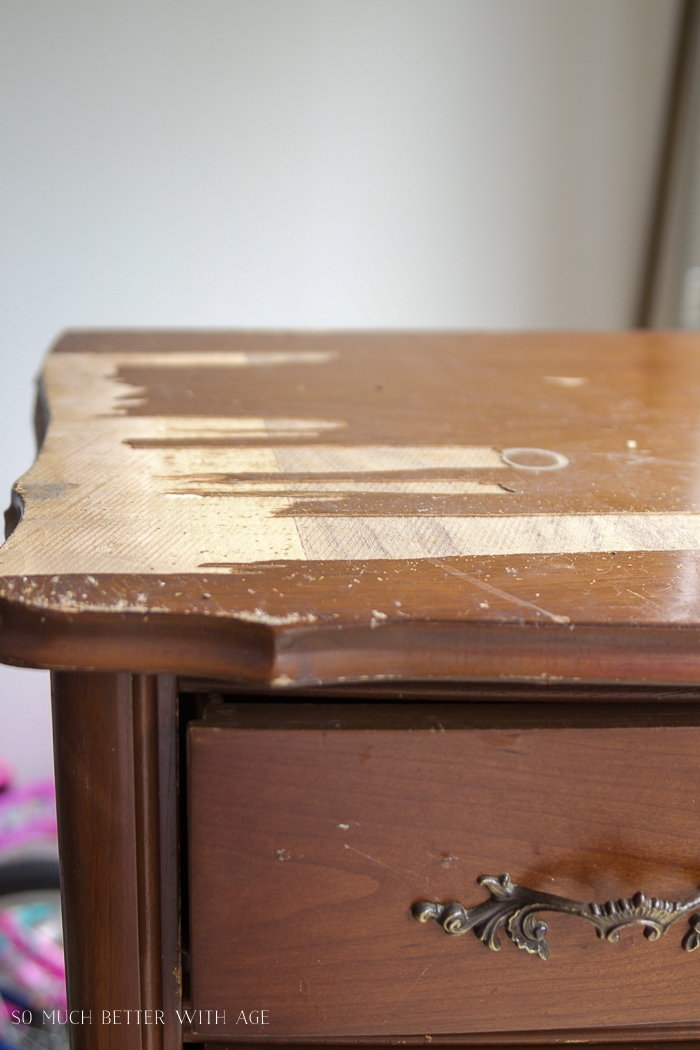
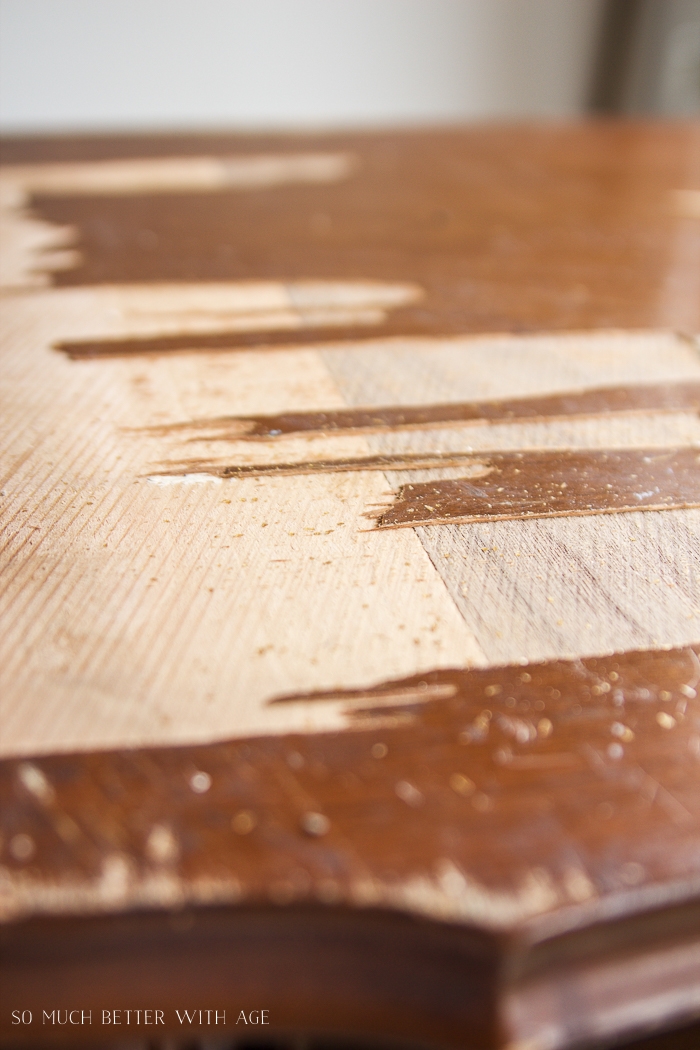
Now what? You fill like mad. Buy yourself a few tubs of wood filler and give yourself a couple of days. Apply the mud with a putty knife, let it dry and sand it (I used a hand sander for this job). You’ll repeat this process over and over until you achieve a nice smooth finish.

You may need to repeat this step by adding wood filler, letting dry and sanding down a couple of times depending on how bad the repair is.
Wood filler works like magic and will still stand up to wear and tear. So don’t be afraid to use it! It’s your best friend in furniture repair when you are going to paint it after.
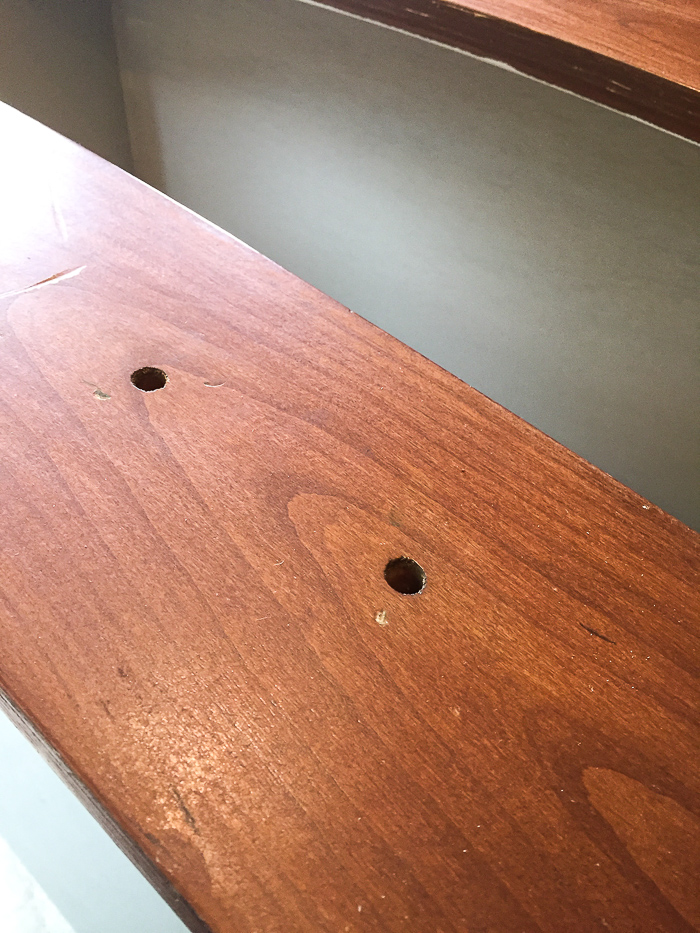
2. What to do with cracks and holes:
You’ll come across all sorts of little cracks and holes and it will be difficult to get your putty knife into. Just dab your finger into the mud and push it into the cracks.
Using a sanding sponge after its dried will be easiest to get a smooth finish.
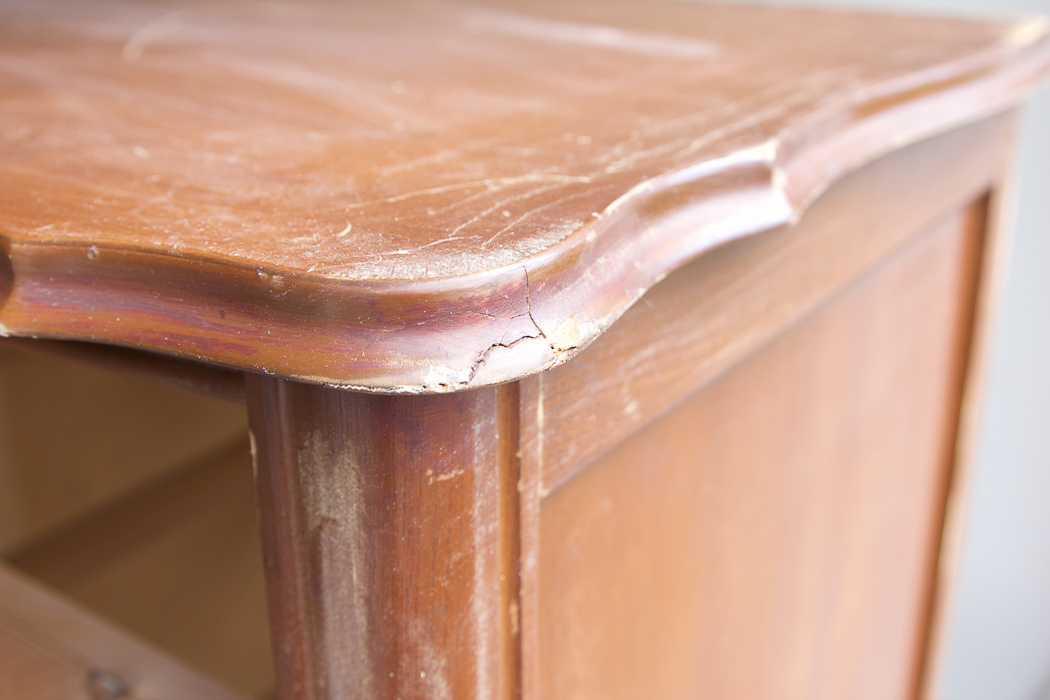
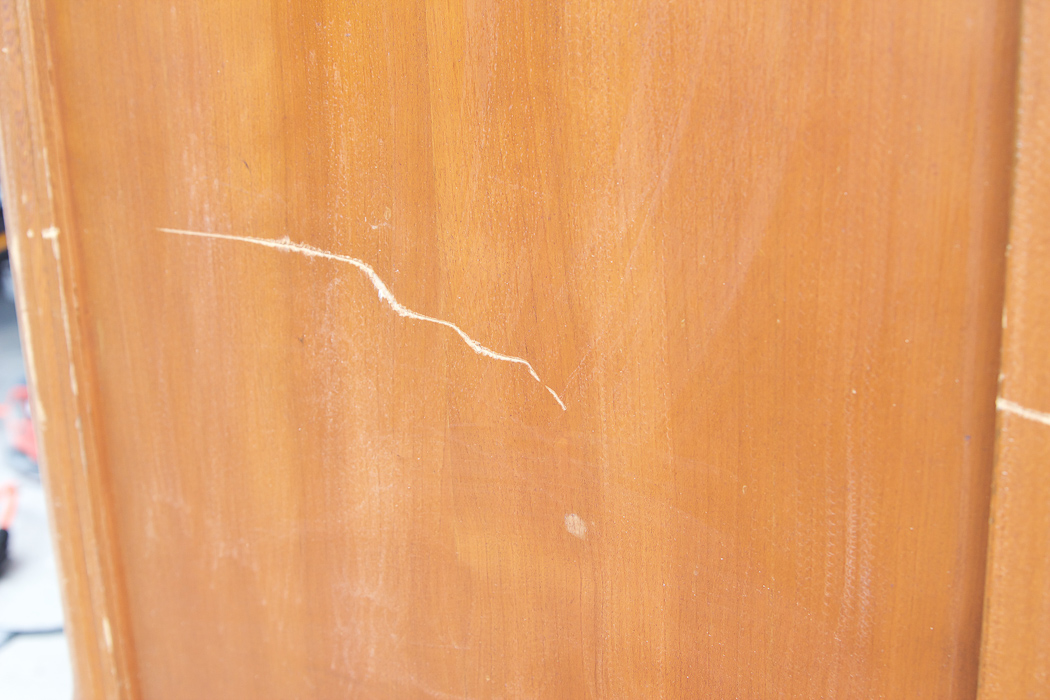
For larger cracks, use wood glue and hold together with clamps for 24 hours.


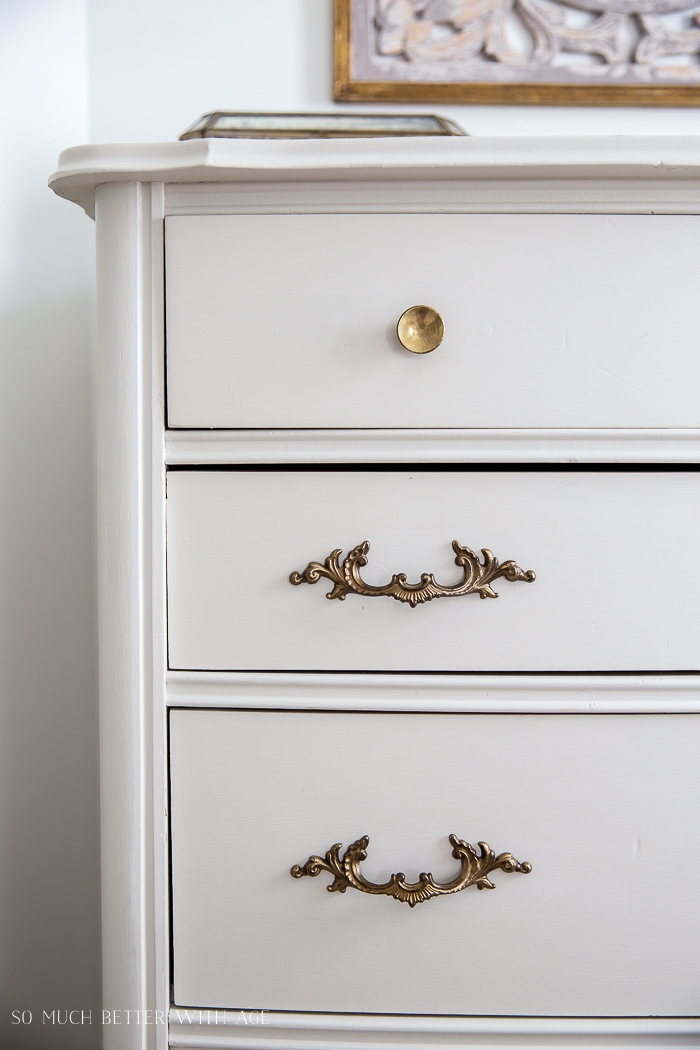
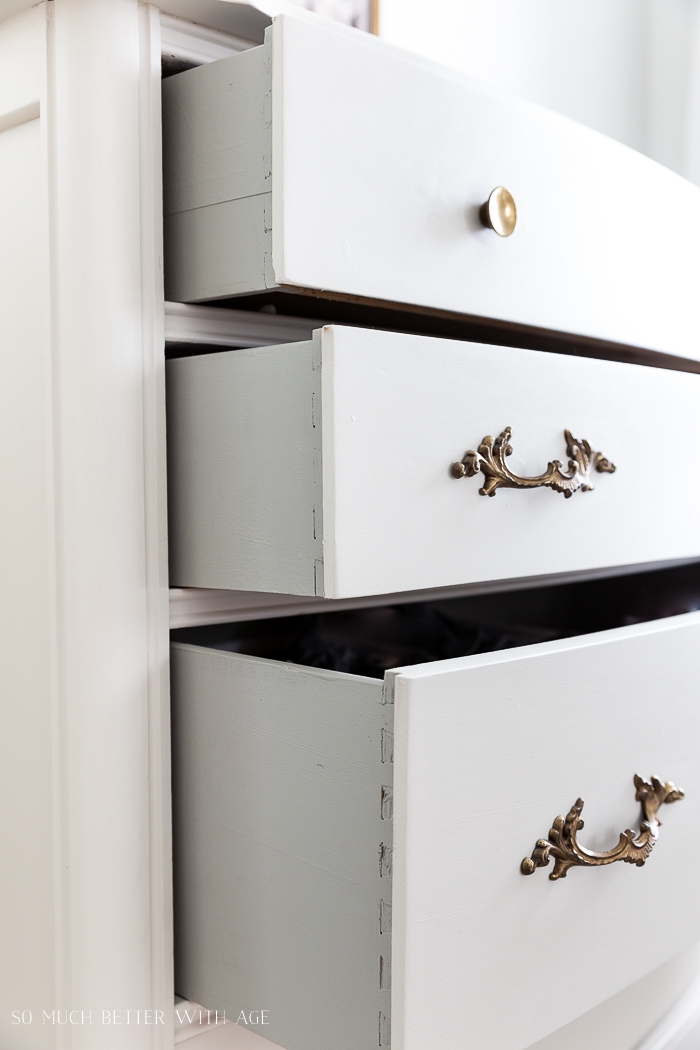
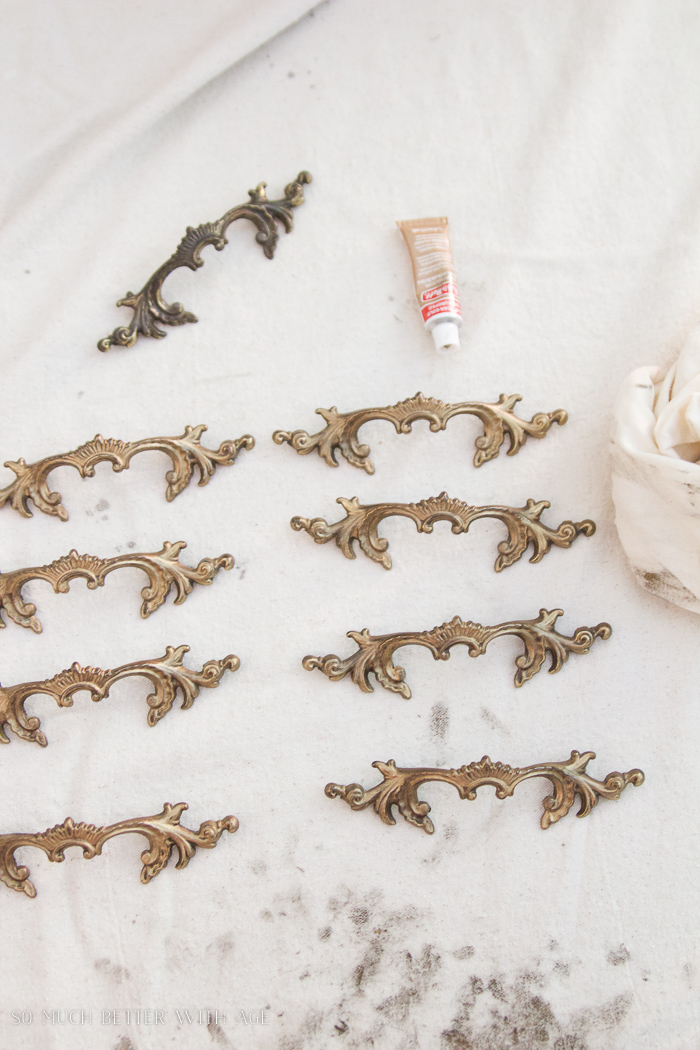
3. What to do when the hardware is missing:
There was one handle missing on this dresser (of course, just one!) and I had some leftover knobs from the vintage pink dresser so I added two similar knobs to just the top drawer.
You can find vintage knobs at thrift stores or antique stores or new knobs that look old at places like Anthropologie.
Use wood filler again to cover up these holes and sand after drying until you have a smooth finish. You may need to repeat this step two to three times to get a smooth finish. Then drill a new hole in the centre for the single knob.
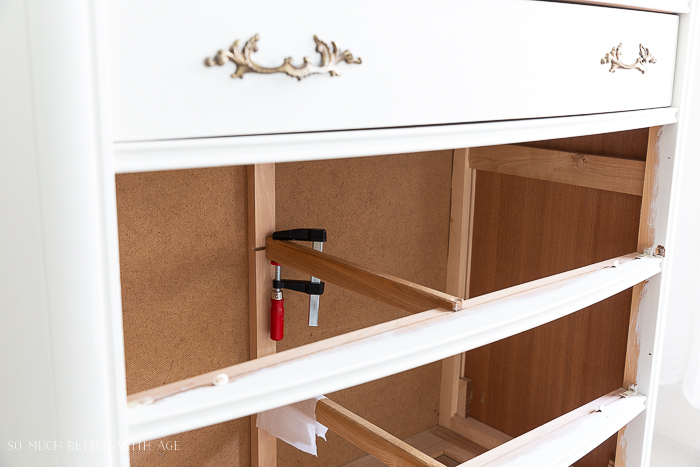
4. What to do when the inner drawer guides have fallen off:
Drawer guides are a two-part mechanism. One part stays on the bottom of the drawer and the other part is attached inside the dresser guiding in the drawer.
When the inner drawer guide is loose, the drawer won’t guide in straight and sit flush . so annoying).
Using Gorilla Glue, dab the parts that are loose and clamp into place and let dry for 24 hours. Put a rag or paper towel underneath as the glue will ooze before it completely dries.
5. What to do when there are missing drawer guides:
For this dresser, there were two missing drawer guides on the bottom of some drawers. New drawer guides are plastic and won’t fit to old wood furniture so I came up with this easy solution!
I took some existing drawer guides from the same dresser that were nearly falling off anyway and cut them in half with a jigsaw. I attached the cut guides with an adhesive silicone and glued it to the back part of each drawer. I sat bricks on them overnight to secure into place.
Half or a portion of a guide is all you need to guide the drawer in on the rail and the drawer will still align up flush.
6. What to do when the finish is bad:
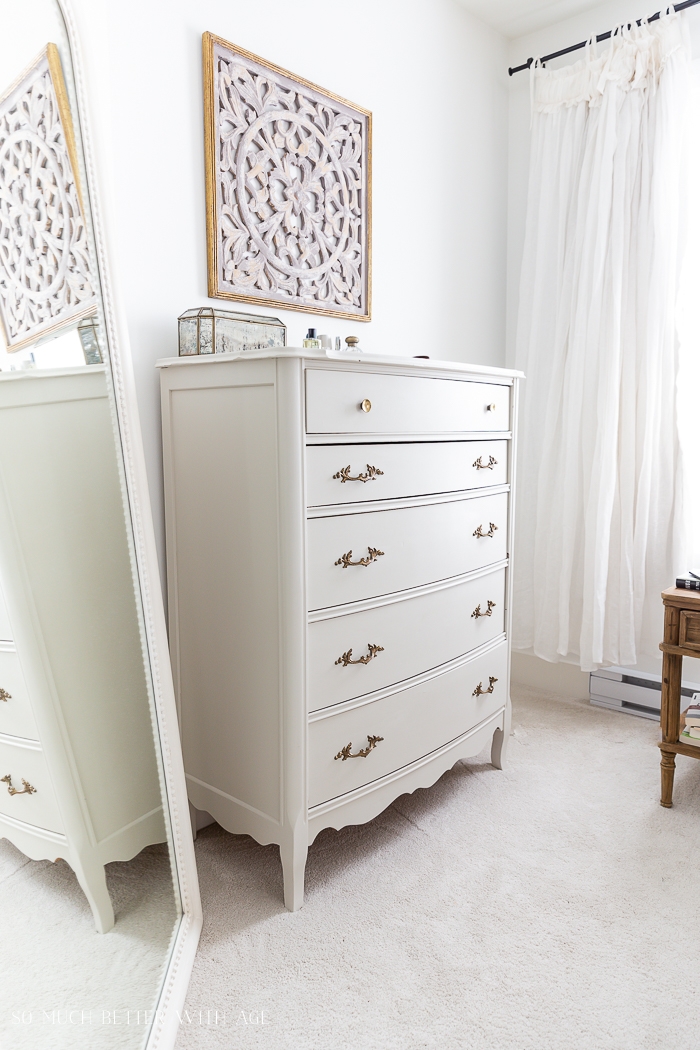
You paint it of course! I started with my favorite primer then chose two paint colors for this dresser. Champlain for the main color and Linen for the interior and exterior of the drawers.
I finished it off with the clear furniture wax and buffed it off to a smooth finish.
Check out my post on how to paint furniture like a pro (along with video) to get all the details along with tips.

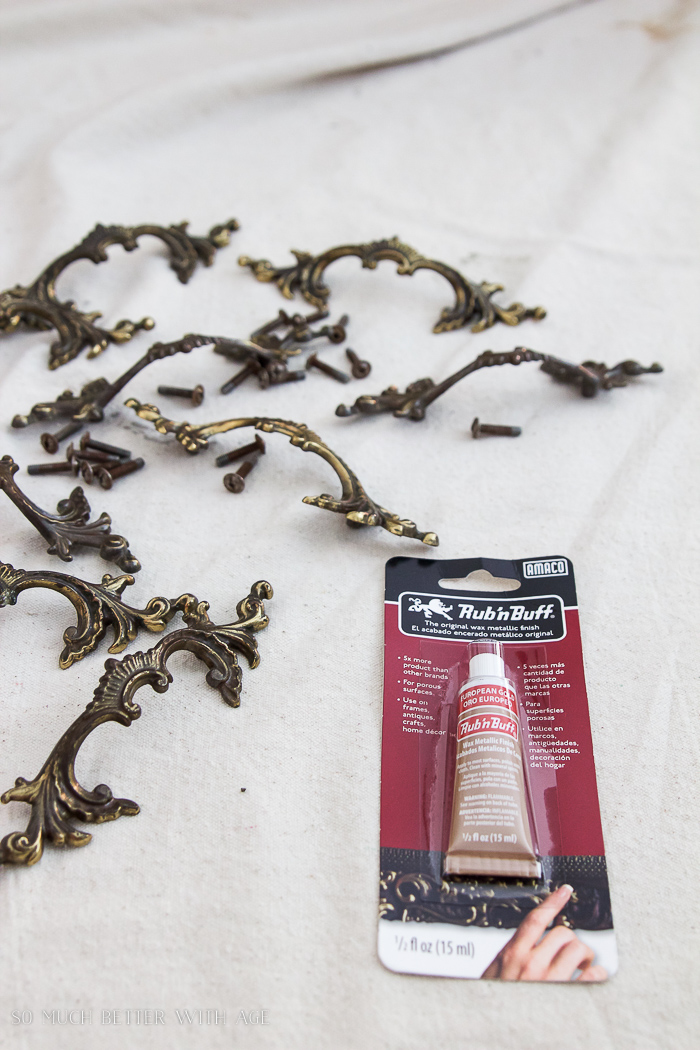
7. What to do with old hardware:
The hardware belonging to an old dresser can be so worn that the original finish has worn off or it can be too brassy looking. I used Rub N Buff in European Gold finish to give it that matte gold finish.
You just dab some on a cloth and rub it in. That’s it. This stuff is pretty amazing. You can also rub it off if it’s too much or if you want a distressed look. It goes on like a wax or furniture polish.


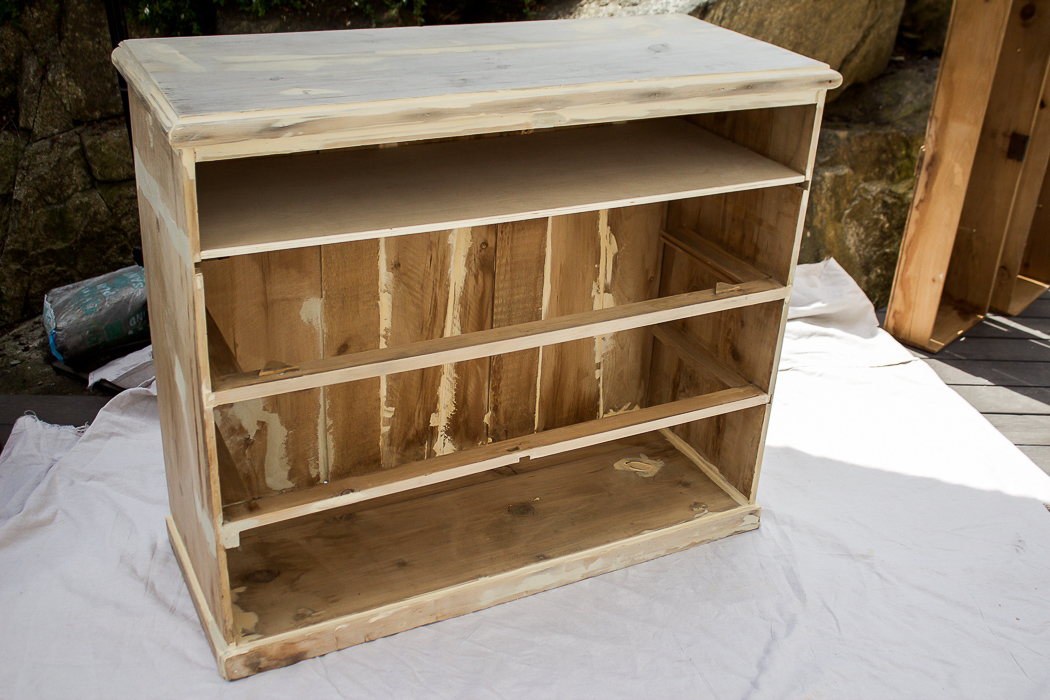
8. What to do if the whole piece has fallen apart:
Do you remember that piece of furniture that had completely fallen apart and was on its way to the dump when I decided to resuscitate it?
I decided that large amounts of wood filler and finishing nails would do the trick and it did!
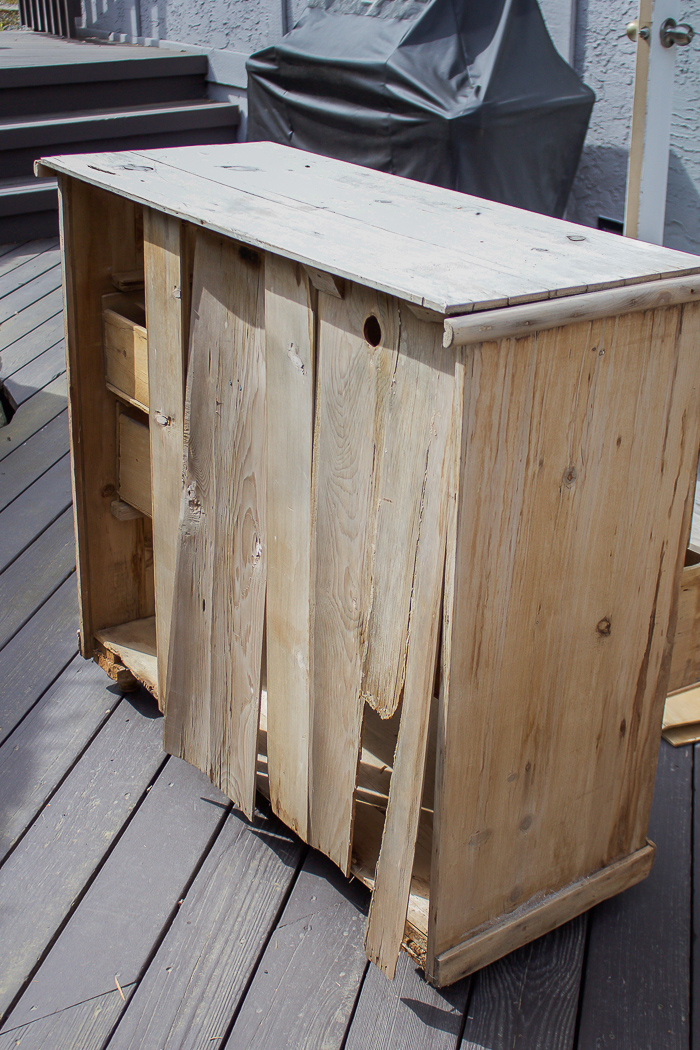

The small top drawers were completely broken so I opted for an open shelf there instead.
You can see all the filler everywhere and I added a new piece of wood to the inner top shelf that was once two little drawers.
There were only three feet so I took the existing feet off and it just sat flush on the ground.
Tons of filling, sanding, nailing, painting and it’s now rescued!
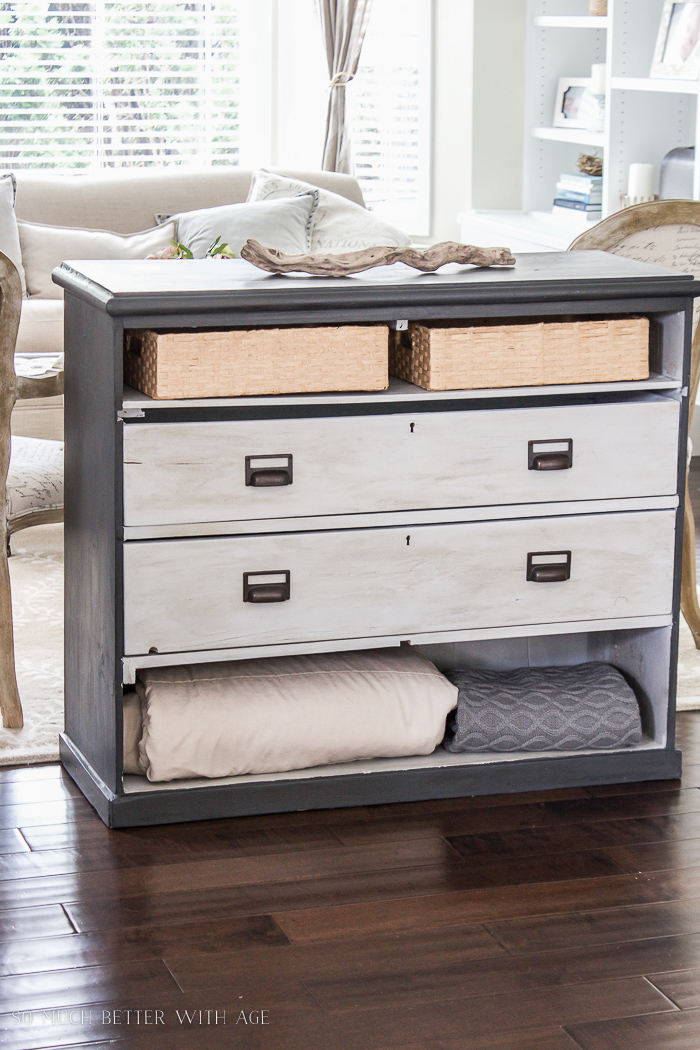
So here is the finished dresser that I started this post with. I love before and afters, don’t you?
It makes all the hard work worthwhile. I’m in love with this dresser now and you’d never know it had so many problems.
video:
Be sure to watch my video on 8 techniques to repair badly damaged furniture!
How about you? Do you think you can fix a piece of furniture? I know you can!
Make sure to pin it for later!


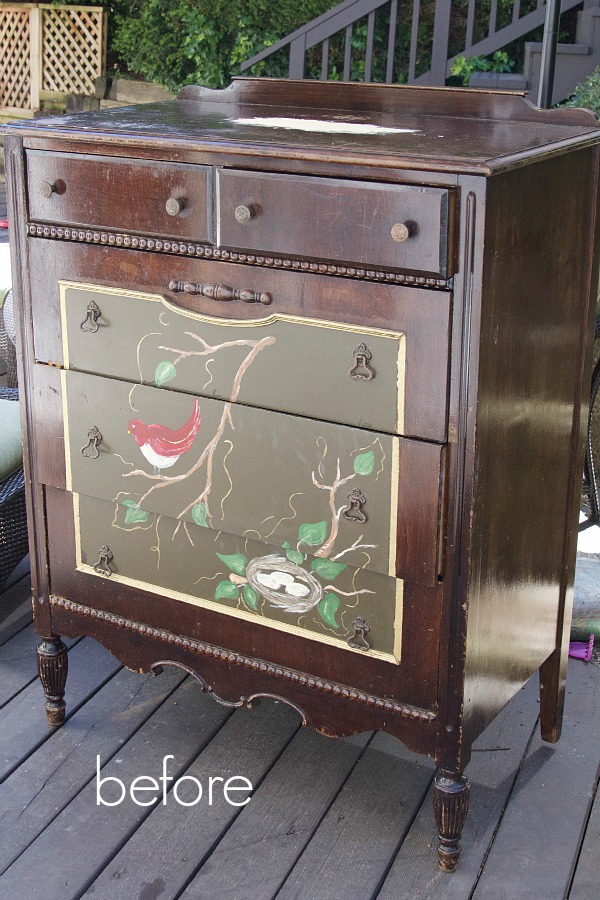
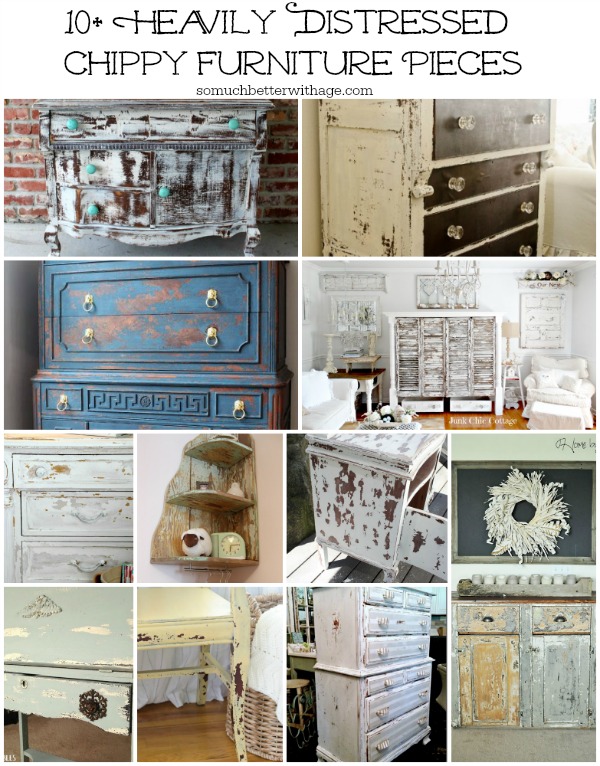
Check out these before & afters:
Ugly Bird Dresser to French Dresser Makeover


hey girl this is so cool! Great job!
Thank you Shawnna!
Hugs, Jamie
Love Love Love!!! Wood putty, here I come!!!
haha it’s so true! Thanks Elizabeth!
Hugs, Jamie
Makeovers look great!
I’m an impatient sort and hate to wait for the wood putty to dry. Instead, I use auto body filler! It is a two-part system and once you mix it together, it hardens chemically, rather than drying (much like epoxy). It is easy to work with, easy to sand, and stands up to abuse. The only down-side is the smell, so I generally only use it in the garage.
Oooohhh, great tip, Shawnda! I have seen it before but haven’t tried it. Thanks for sharing.
Hugs, Jamie
Bravo so elegant! Wood putty is amazing!
Thanks so much, Michelle.
Hugs, Jamie
This is incredible and your tips are great! The one about the drawer guides is a game changer. I know I’ve passed on pieces with broken or missing guides but, I’ll look at them entirely differently from here on out! Thanks for this! Pinning 😉
So glad this post helped you, Angie!
Hugs, Jamie
U mean wood filler not wood putty. Wood putty doesnt harden so u cant sand it.
Yes! You are totally right. I’ve since updated my post. Thanks Anna!
Hugs, Jamie
Your handles are upside down ?
I thought they were but I also thought they looked funny the other way lol. I’ve been meaning to change them. Thank you!
Jamie
confused on what color you used on the badly damaged dresser. it looks great!!!
Hi Dan,
The colour is called Champlain from Fusion Mineral Paint.
Thanks, Jamie
Thankyou for the tips about how to repair damaged furniture, this is so useful. Because i have table in my house that’s little damaged, with slightly broken and the color faded. kuhlhome.com
Thanks so much! Good luck!
Hugs, Jamie
I really liked how you gave the different ways to repair badly damaged furniture pieces, but what I liked the most was the cracks and holes and how I can just use my fingers to fill them with mud. I would love to give them a try, but my job impedes me from doing anything else in the house. Because of this, I think it is better if I just hire a professional to fix the patio furniture. Though I will keep this for future use. Thanks!
Yes and it’s fun to do! Thanks Dino.
Great Job, you have inspired a lot with your work. It is need of everyone how to get rid of bad furniture. and how to prepare that according to our need.
Keep it up.
The white dresser is stunning. What was the brand of the clear wax you applied? Is it yellowing at all? You said you used two different paint colors, I don’t see that from the front of the dresser, but no matter, I love it! Your sanded finish is excellent.
Hi Claudia, I use Annie Sloan Clear Wax or Fusional Mineral Paint Clear Furniture Wax. Both of those do not yellow. The second color is on the inside of the drawers.
Hugs, Jamie
Very professionally done. This is a much appreciated post. Thank you for sharing your knowledge.
I use to love to redo and old furniture. Use to only buy antiques or furniture to redo. So much fun and I love the way you fix these dressers. Is there anything as attractive as a painted one?
I agree, Marti!
Hugs, Jamie
Wow. I love your projects. It is so cool how you give “junk” furniture new life. I never would have thought of puttying a piece when the veneer was coming off. I thought it was done for. So many great ways to upcycle furniture. Thanks for sharing! I am pinning now.
Thanks so much, Scarlet! Yes, the putty works like a charm!
Hugs, Jamie
Love what you have done!! I am interested in the carved wood panel. Did you do it also? I purchased two panels at an estate sale and would love to do the same with them. How did you achieve the white-washed look? My panels have a dark stain on them right now. Thank you for any tips/tricks! Looking forward to any advice!!
Thanks Cindy! I got the carved art at Soft Surroundings online but I’m not sure if they still have it. To get a white washed look, it’s best to have the piece stained (if it’s not already) and then put white wax on it and wipe off. I have a post (and video) on how to wax here: https://somuchbetterwithage.com/how-to-use-dark-wax-on-furniture/
And you can see how I waxed this chair here: https://somuchbetterwithage.com/refinishing-furniture-sanding-versus-stripping/
Hugs, Jamie
Great post with some good tips. Pinned
Thanks Anita!
Hugs, Jamie
You’re obviously a dab hand at rescuing furniture! Thank you for sharing your techniques.
And thanks so much for joining the Grace at Home party at Imparting Grace. I’m featuring you this week!
Thanks so much, Richella!
Hugs, Jamie
I was a little bit confused on using wood putty. I read somewhere that woody putty doesn’t harden and then I heard something about wood filler. I’m trying to find out how to repair my old wooden dresser that has a long small straight crack in it. I’m just a beginner. Any suggestions that could help me would be very appreciated.
Thanks so much,
JoAnne
Hi JoAnne,
I meant wood filler and I’ve since updated my post! And I just realized it’s been a year since I noticed your comment so hopefully you figured it out, sorry about that.
Hugs, Jamie
What about furniture feet that can’t screw in anymore? Meaning, the connection is lost so you the feet with the screw in the middle can just stick into the hole but there is nothing there to keep it connected. Seems like the screw inside the hole is too wide.
Do you have any suggestions to sell a mid century blonde mahogany bedroom set? Unfortunately, it was left outside and has deteriorated. I think someone can salvage it. The wood of this quality is hard to find and worth saving.
I have a small solid oak cabinet top that has lifted from the base, how do I repair this without having to take it apart/or is that the only way? It had a crack all the way across that I filled but now notice it’s lifting off the base of the cabinet!
Thanks!