Comparison of HomeRight PaintSticks
Disclaimer: This post is sponsored by HomeRight but all opinions are 100% {because I love this product!}
When I went to the Haven Conference this summer in Atlanta, Georgia, I got to learn all about HomeRight products. I couldn’t WAIT to get my hands on one of the HomeRight PaintSticks. I was wanting to paint my dining room for awhile but didn’t have the time. When I heard that the PaintStick could cut down the time it took to paint, I was curious. I’m not into gimmicks/fads/trends. I’m a pretty practical person. Just give me what works, tray and roller and a brush!
When they offered to send me a PaintStick, my first question was what was the difference between the regular PaintStick and the EZ Twist PaintStick. Their response was, ‘why don’t you try both and see for yourself?’
So that’s exactly what I did!
First, I’ll show you how to put it all together. It’s easy, I’ll show you.
How To Put The PaintStick Together
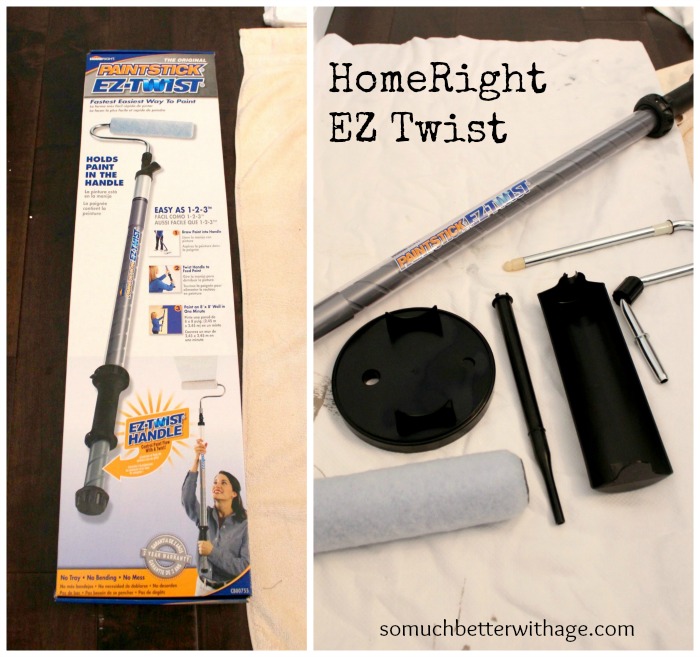
Here are all the parts:
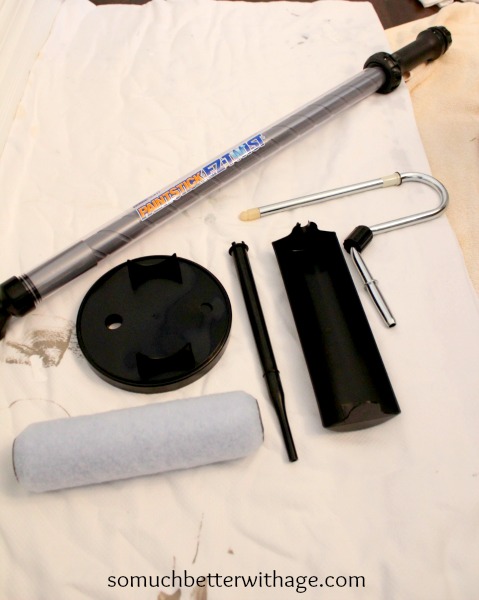
1. Pop the roller cover on the frame.
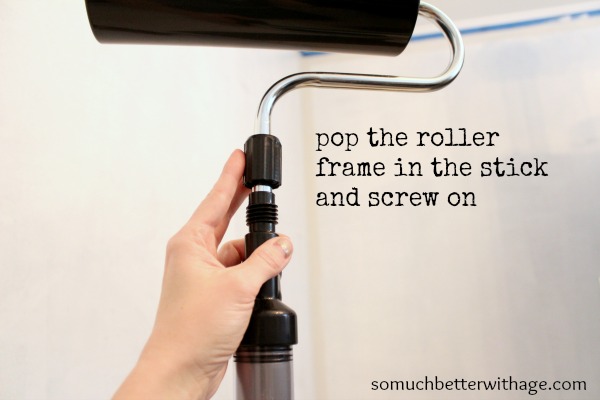
2. Put the roller frame on the paint stick and screw in.
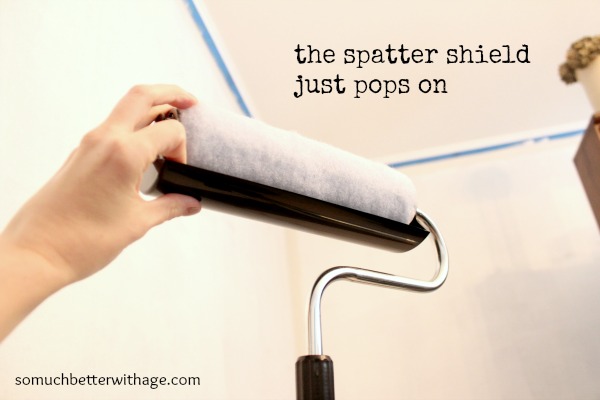
3. The spatter shield just pops on.

How To Use The PaintStick
1. There’s a little stick-like thing called the fill tube. Push the fill tube through the cover then pop the cover over your paint can.
2. Pop the PaintStick on the fill tube via the valve part.
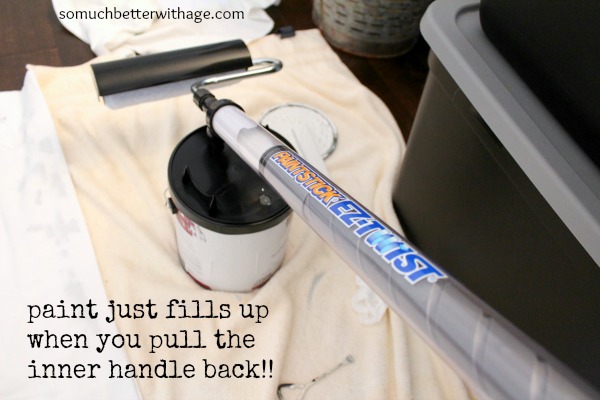
3. Hold at a 45 degree angle and pull the inner handle away from you.
4. You’ll feel a suction as you pull the handle and the paint draws into the stick.
5. If it doesn’t work the first time, just push the handle back in and pull out again.
6. Once you have the paint in the stick, push {or twist} the inner handle to feed paint into the roller and start painting! It’s so easy!



The Difference Between PaintSticks
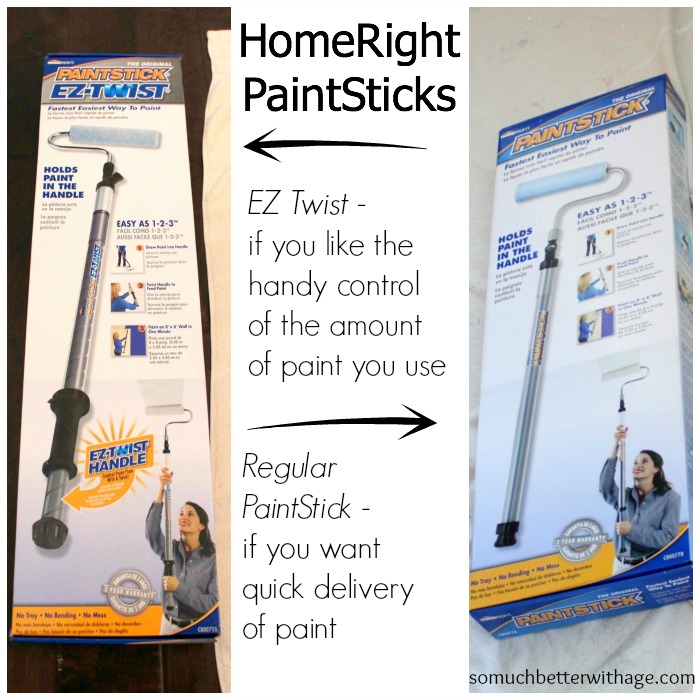
So if you notice between the two photos below, there really isn’t a whole lot of difference between the two PaintSticks. The main difference is the actual handle part of the sticks. Essentially, the EZ Twist PaintStick “twists” and the regular PaintStick “pushes” the paint through the tube.

I used the regular PaintStick first and that’s the one I actually ended up liking more. Maybe it’s because it was my first one.
I actually like the control I get from pushing the paint through the stick. When I did my second coat of paint, I tried the EZ Twist and I ended up pushing the paint through the tube rather than twisting out of habit. Actually, it was awesome that I could either choose between pushing or twisting on the EZ Twist. With twisting, it delivers the same amount of paint with each “twist” so you could essentially count how many twists you need to fill your roller if you were that kind of person. I actually like a lot of paint on my roller so pushing the paint through was a lot easier for me than actually twisting it up. But I could still push the paint through with the EZ Twist. It may not be intended for pushing so if I continued to do that I may end up damaging it in the long run. I’ll have to research more on that.
Both PaintSticks cut down the time it takes to paint and I won’t go back to regular tray and roller again. If you read my previous dining room post, you’ll remember I kept saying to myself, “where have you been all my life?”
And I love how my dining room turned out.

Thanks HomeRight!!! You made my life so much easier.




Awesome!!! I won the regular PaintStick in a giveaway a few months ago, but haven’t been able to use it yet. We rent and can’t paint in our current house, so I’m saving it for the future. I’m sooooo glad to see how easy it is, and how much you like it! Makes me even more excited to get to use it someday 🙂
Yes, you’ll love it, Anna! So happy you won one!
Hugs,
Jamie
Thank you so much for doing a comparison between the two different PaintSticks. This is really helpful.
Thank you so much for the products, Laura! I’ll never go back to regular rollers again!
Jamie
I’m getting very curious about these HomeRight Paint Sticks! They sound like a breeze to use. Your dining room looks beautiful1
So easy to use, Emily! I was surprised myself.
Hugs,
Jamie
Slater shield, that’s what I needed. I just finished painting my son’s room with my husband and I get so upset when he brings out the paint roller. It leaves little specks everywhere, I hate it. I only let him do the primer coats that way, everything else I hand paint, less mess and I do not like the look of egg shell on my walls. I hope that works better for you. ALaina
Yes, it was genius! It was covered in paint at the end and surprisingly washed off very easily. But it made me think of what a mess regular rollers are! I only used a small dropcloth that I moved around as I worked. Love this product.
Hugs,
Jamie
Hi, I looks great. How would you clean it after the job is done? Tks
Hi Caroline, Great question…next time I use it I’ll be sure to show you how to clean it. I have a few projects coming up!
Hugs,
Jamie
Used once, cleaned as directed, used petroleum jelly. Next use: could not get the tube to fill with paint. Removed air, paint stick still will not fill. Very frustrated and disappointed. Now what???? A piece of junk?