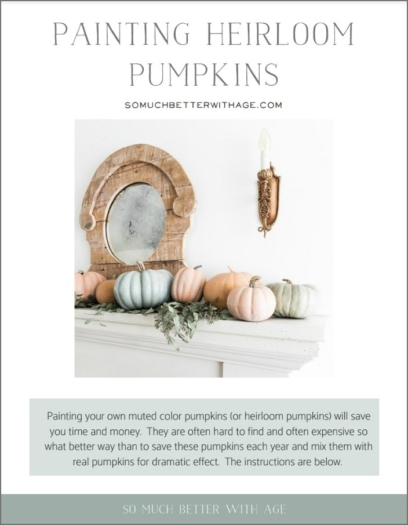
PLEASE NOTE: After painting so many pumpkins, I’ve updated this tutorial and created a new post (along with a free PDF) that shows you a more streamlined way on how to paint heirloom or muted color pumpkins. CLICK HERE TO READ.
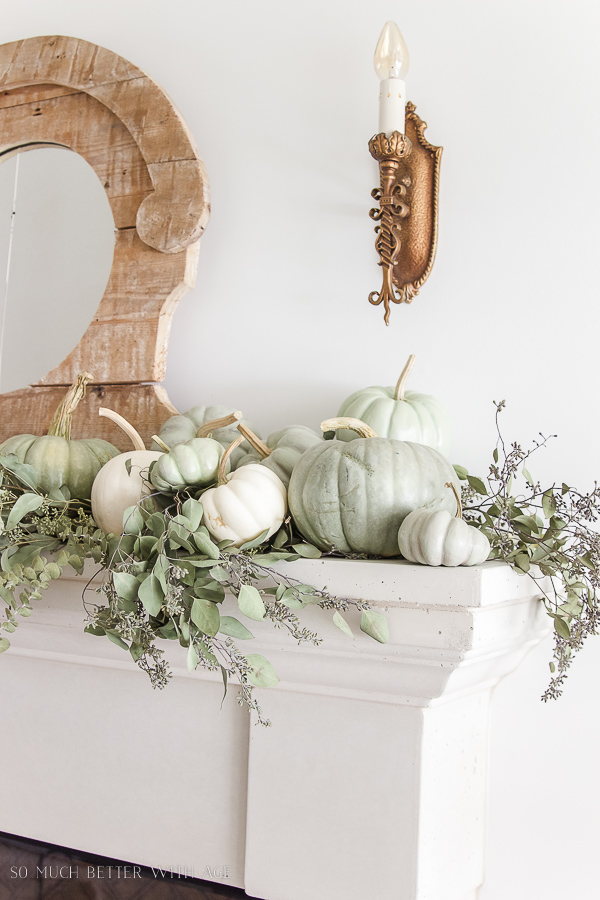
Painting your own pumpkins to resemble those beautiful heirloom/muted color pumpkins will save you time and money when you save them for the fall season each year. These pumpkins are hard to find and often expensive so I thought why not paint my own!
I have never painted so many pumpkins before in my life! I tried numerous color combinations to find the right color match and I finally achieved it.
Get the directions on how to paint your own heirloom pumpkins below.
This post contains affiliate links for your shopping convenience. Click to read my full disclosure policy.
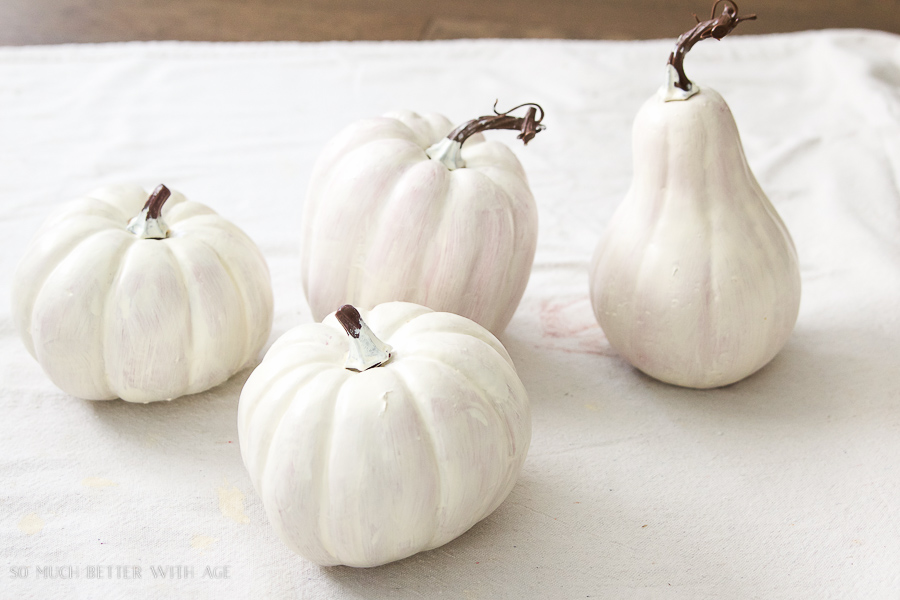
Here is a before shot of the dollar store pumpkin. I practiced a lot on these ones that looked more like gourds but stuck with the more round ones for the final product.
Some Color Combinations I Tried
I used Fusion Mineral Paint as they have the dreamiest colors for this project. I also had a ton of little sample pots from various conferences I’ve been to so it was the perfect time to try them out.
Here are just some of the color combinations I tried:
Heirloom + Ceramic = pretty but way too blue
Inglenook + Heirloom = too blue
Inglenook + Ceramic = too turquoise
Inglenook + Lilypond + Upper Canada dry brushed over top = too green
I practiced on mini pumpkins before testing them out on the big pumpkins but I still painted the big pumpkins many times over because they would dry so much differently.
But I finally came up with the best color combinations.
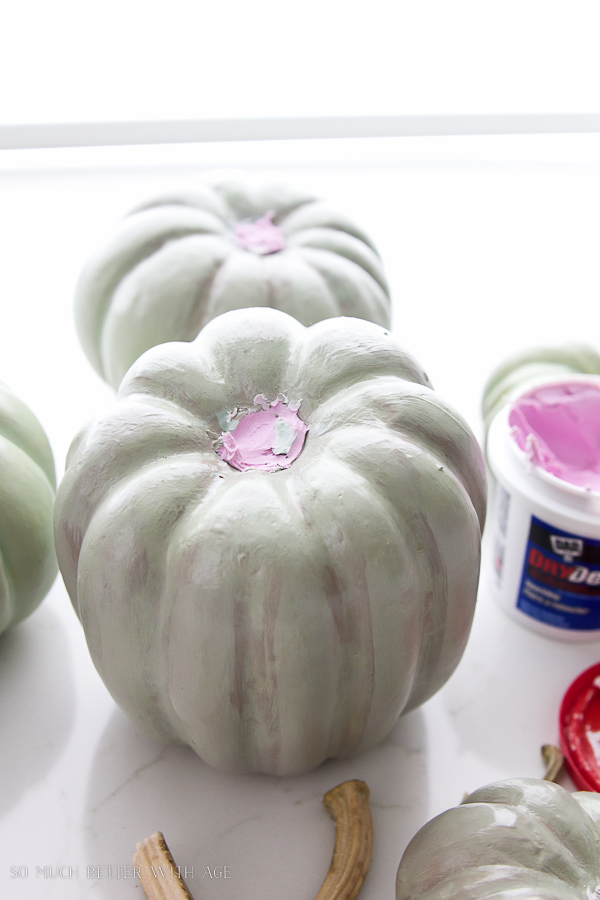
Take the tops off the plastic pumpkins with pliers. Using a finger, fill holes with drywall filler before painting (I took the stems off after but I wish I took them off before!).
2. Paint a coat of primer or paint you have lying around for first coat. I used sample pots leftover from my house renovation.
Mix Inglenook + Upper Canada together with just a bit of Algonquin and paint over the high parts of the pumpkin while still wet
Splatter texture:
Many heirloom pumpkins have dots of lighter color on their surface.
To achieve this effect, splatter Bedford over top and with a wet paper towel or wipe, dab the paint spots all over while wet.
3. Once dry, spray entire pumpkin with a semi-gloss varathane. This step is optional as some pumpkins can give off a shine so if you’d like that effect, then you can spray them. If you’d like them to have a matte look, ignore this step.
4. Hot glue real pumpkin stems to plastic pumpkin.
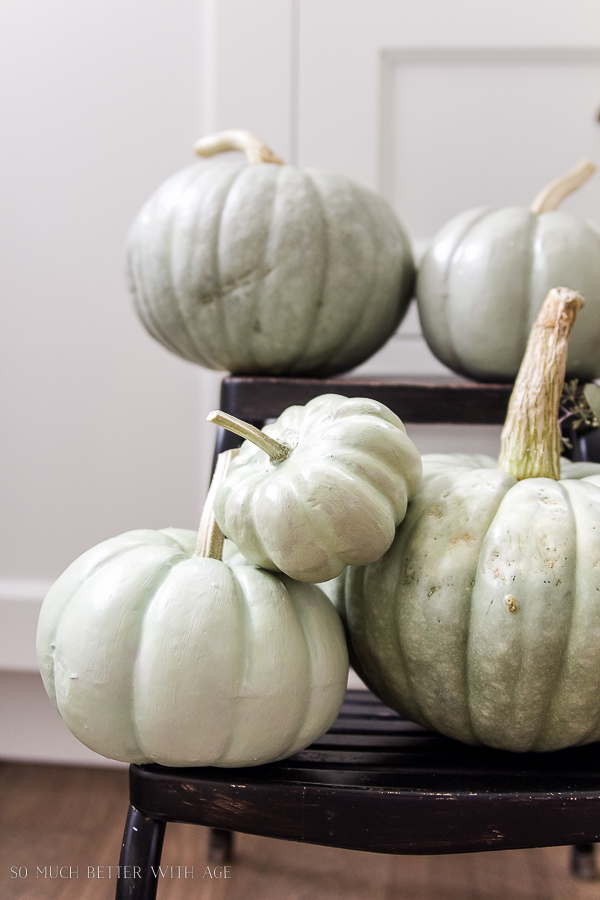
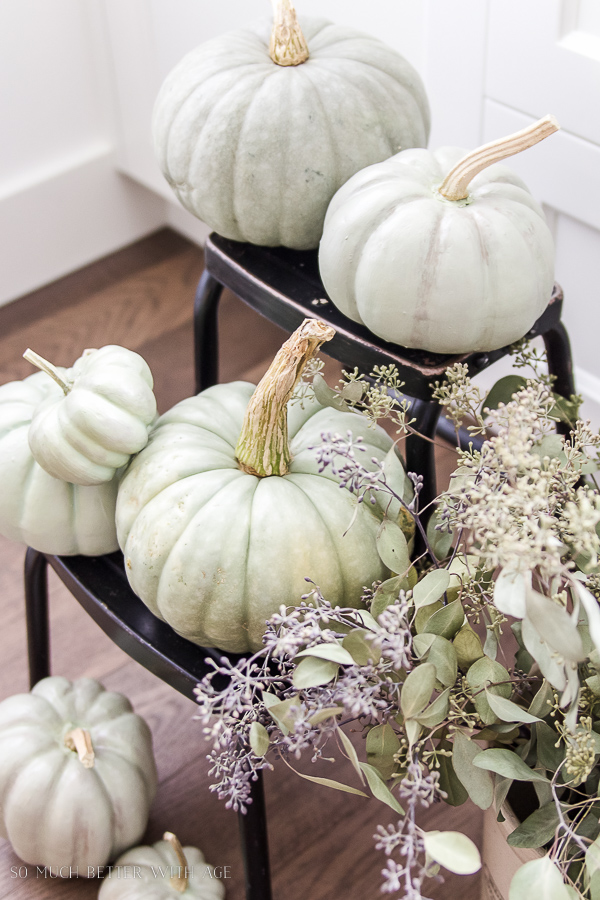
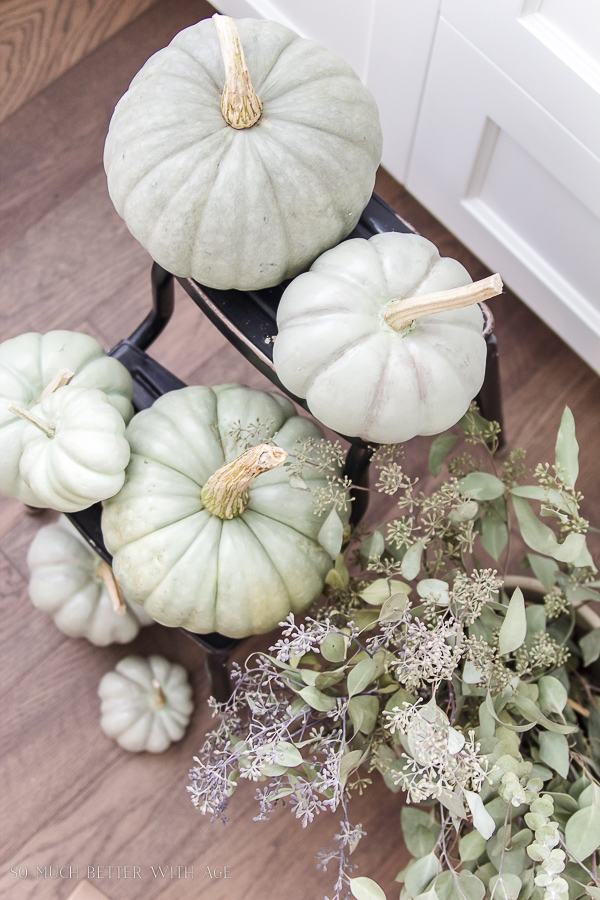
Guess Which Pumpkins Are Real
Pumpkin #2 are on the top step and on the floor and pumpkin #1 are on middle step. The two largest pumpkins are real heirloom pumpkins.
Adding real stems is the perfect touch to making them look real.
Here are just the painted ones together. My favourite green!
I hope you enjoyed this tutorial on how to paint your own heirloom pumpkins.
You can download a free PDF of my other pumpkin tutorial, Painting Pumpkins in Muted Colors, by subscribing to my newsletter below.
video:
Be sure to watch my YouTube video on how to paint heirloom or muted color pumpkins below!
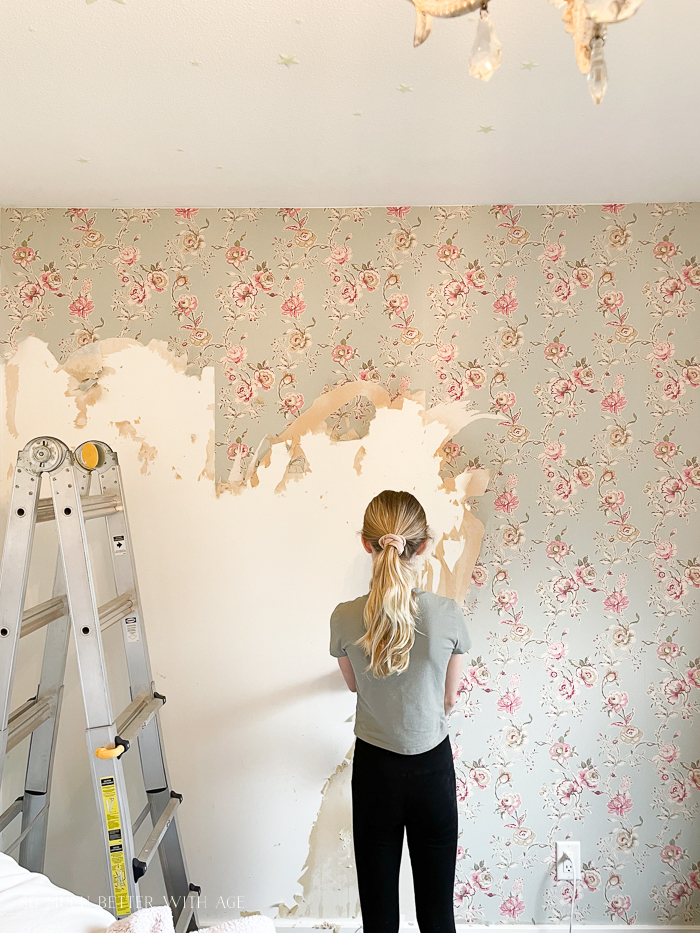
If you are needing to remove wallpaper but are daunted by the task, be sure to follow these easy directions! More than four years ago I did a blog post on how to apply wallpaper or a mural and now I’m telling you how to remove it. Sometimes you need to remove it, what can…
Come see all my outdoor entertaining ideas for fall. You will find beautiful cozy inspiration for the coming season! Updated Sept 2025 Now that our backyard renovation is complete, we can finally host! Although, you might be thinking why would I do that in fall here in rainy North Vancouver. Well, it’s nice to have…
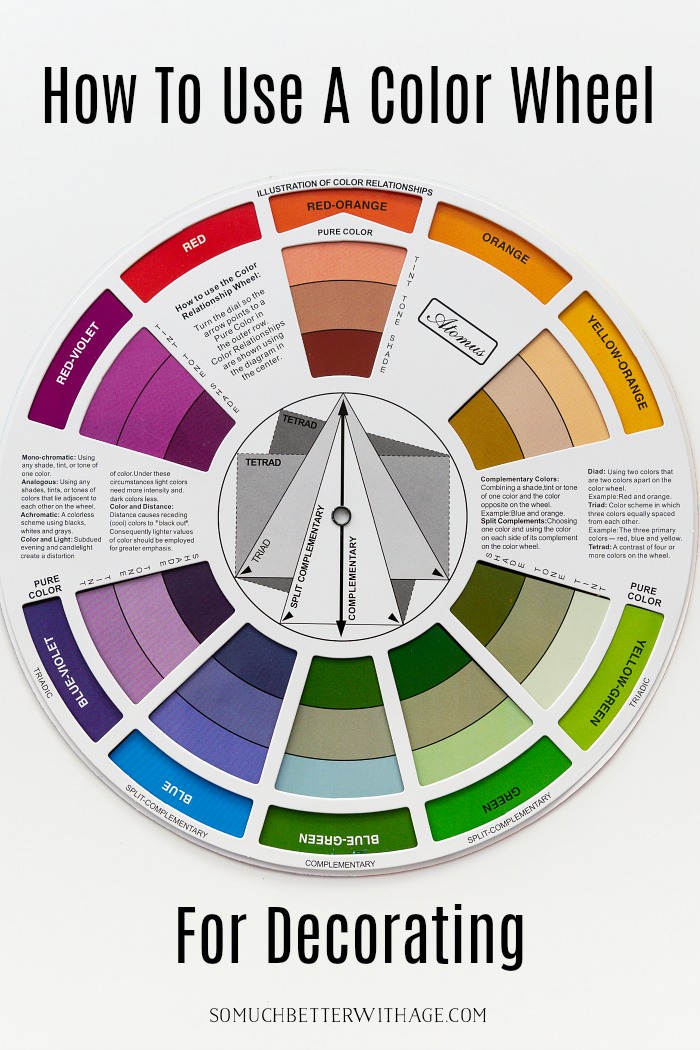
Do you know how color combinations are formed? Have you ever used an artist’s color wheel? This article explains the details on color theory. For someone who LOVES neutrals, it may seem odd for me to write a post series on color theory, right? Well as any interior designer or creative like me knows, color…
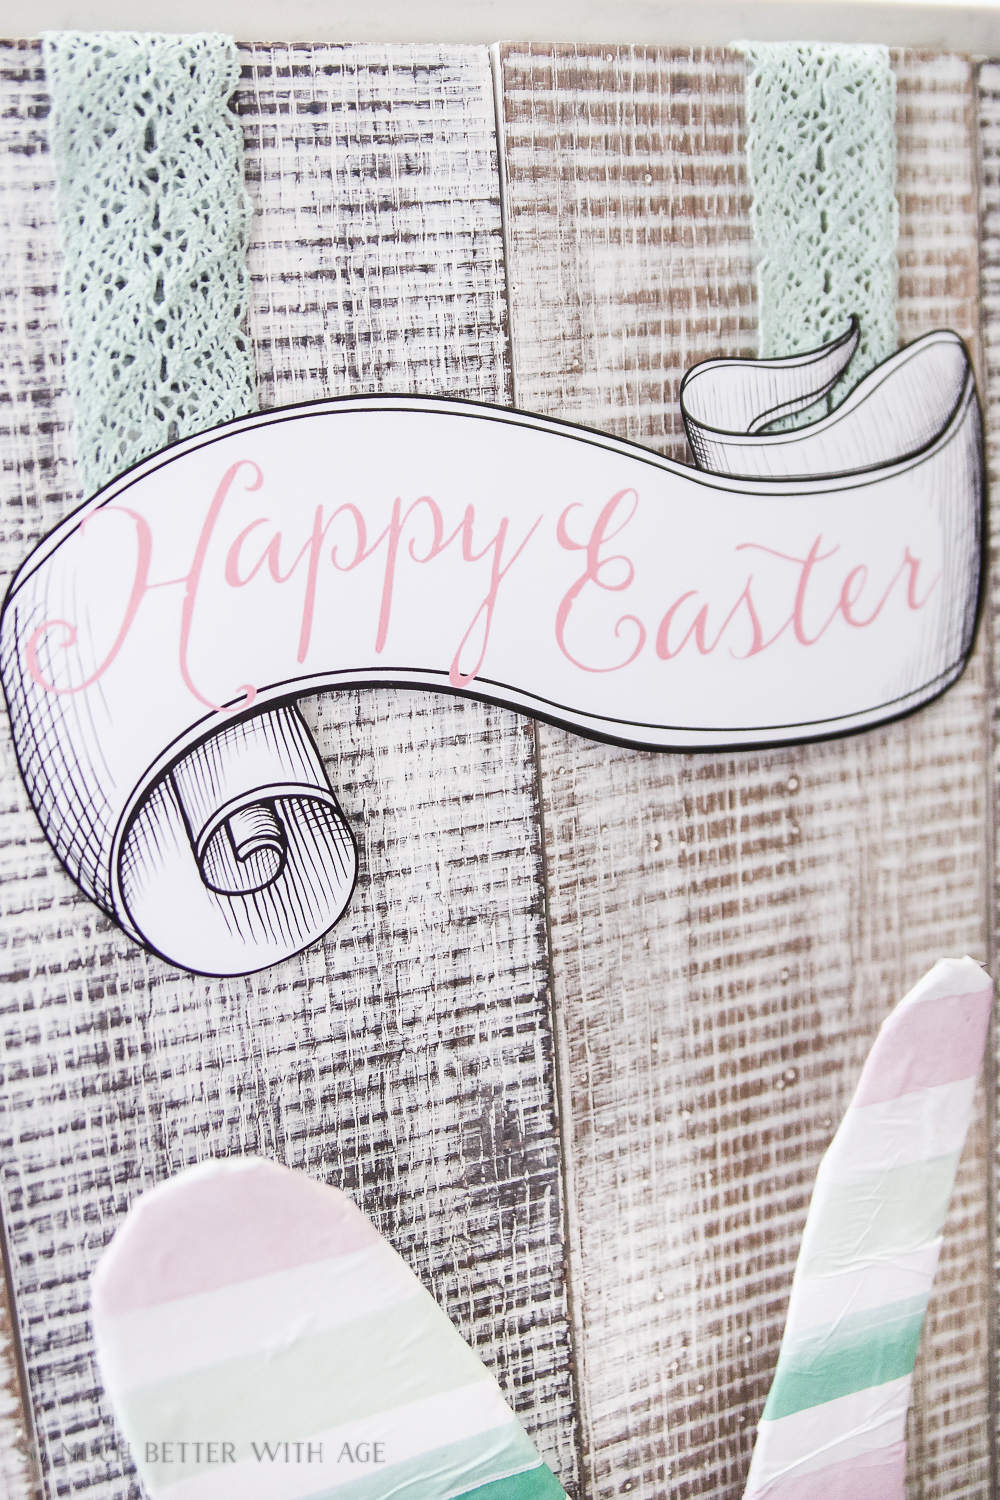
This ‘Happy Easter’ sign is a free printable for you to download. So many places it could be used in your home to decorate for Easter this year. Recently I made this pallet sign and Easter Bunny sign and wanted to share with you I did it. I love the springs colors of this bunny,…
Are you wanting to paint furniture pieces but don’t know where to start? Be sure to check out this guide on how to prep furniture for painting! I love updating old furniture by painting it. I love solid wood furniture but the finish can be worn and the look can be dated. To get a…
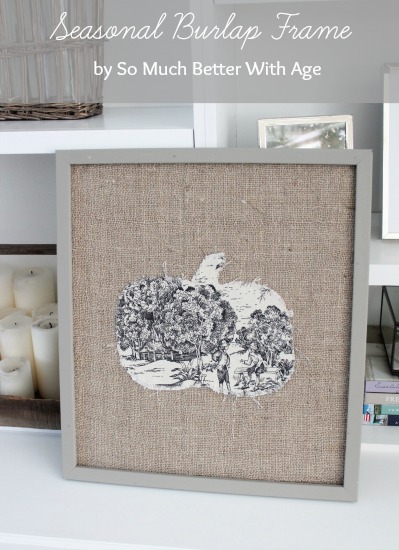
I will show you how to make this seasonal burlap frame and toile pumpkin art. I made this burlap frame with a toile pumpkin for my neutral fall mantel. I’ll be showing you the whole decorated mantel next Tuesday! I wanted something that I could use for every season or holiday that would go with…
64 Comments
The green color results are lovely! The mantel arrangement is so elegant. Being able to pile and arrange lots is a great benefit for us who watch our seasonal decorating dollars. Have a good day. Linda
You did such a beautiful job with these!
I’ve been playing around with painting some of my pumpkins this year, but you made yours something special! Pinning!
They look fantastic ! I think when you mix a couple of the real ones in it’s hard to tell if they are faux or not. Thanks for the tutorial. I have been exprimenting with different paints to come up with a pleasing neutral tone and this is just perfect.
This is actually a great tutorial for those not familiar with color theory. Sometimes, subtle is the hardest to achieve. Amazing what $1 pumpkins can become. Sandi
Great job on these pumpkins! I would like to share on photo with a link back for a favorites post I am writing. If you do not want me to share, let me know and I will be happy to remove the image. xoxo
These came out so pretty! you can’t tell the real from the faux! Pinned & sharing! Thank you for sharing on Merry Monday! Hope to see ya next week!
Kim
Oh boy do I love that specific green you created, so soft and pretty, very believable, you went to lot of trouble to get just the right color. Pretty sure I won’t go to that much trouble to get correct color but will look at acrylic paints or spray paint to find something close. Will be painting a few $ store pumpkins for my interior decorations. Some in very light green and white. Love how you combined the seeded eucalyptus with your pumpkins, perfect touch. Where do you get seeded eucalyptus?
I won’t be buying any real pumpkins so will have to make do with sticks covered with jute string. Is just two of us so exact isn’t needed.
Will be creating decorations for front porch but not til next week, hopefully our wind will go away. When we get wind it’s really strong, blows anything away. Always enjoy your wonderful posts. Happy rest of week
Thanks so much! You definitely don’t have to go through all the trouble I went through. The key is using a couple of similar colors to get great dimension. I always find seeded eucalyptus in either Whole Foods or a local florist shop near my home. Once you find a place that carries them, they’ll probably always carry it. Mine was $6 CDN a bunch. Good luck!
Hugs, Jamie
Love the final green color so much! You put a lot of work in just trying to create the perfect green and the results are awesome. Thanks for sharing with us at #HomeMattersParty
Great painting. I love the green pumpkins and how you were able to mimic the heirlooms. I am following you on Pinterest and Instagram. I am always delighted to find Canadian bloggers.
These are really cute, Jamie! Thanks for the tutorial and for sharing the exact colors you used. It’d be fun to try and recreate them!! Saving and sharing to my Crafts and Sewing ~ Fall board for you. <3
Happy almost fall,
Barb
p.s. Stopping over from Waste Not Wednesday with Leanna at Faeries and Fauna. 🙂
Those pumpkins are so pretty, and what a long process you had to achieve that perfect color(colors), thanks for sharing this tutorial. I am pinning and planning to try it, hope my results are as gorgeous as yours!
Pat
These are the most real-looking painted pumpkins I’ve ever seen! You hit it out of the park with these. Thank you for sharing them at the Grace at Home party at Imparting Grace–I’m featuring you this week!
Hi Diane,
I get them from pumpkin patches or at the bottom of the pumpkin bin when they sell pumpkins at the store. I haven’t seen anywhere to buy them online yet.
Hugs, Jamie


The green color results are lovely! The mantel arrangement is so elegant. Being able to pile and arrange lots is a great benefit for us who watch our seasonal decorating dollars. Have a good day. Linda
So beautiful!
Thanks Maureen!
Say, what?? You had me fooled! Such a good idea. I look at those faux pumpkins and cannot bring myself to do it. Now you have me thinking. Brilliant!
Thanks so much, Shauna. It’s great to pair them with the real thing to extend the budget.
Hugs, Jamie
You did such a beautiful job with these!
I’ve been playing around with painting some of my pumpkins this year, but you made yours something special! Pinning!
Thanks so much, Linda! Def a labour of love, lol.
Hugs, Jamie
These turned out great! Such a clever idea too. Well done!
Thanks 😉
Oh my gosh, they look incredible! I can’t believe you mastered that so well!!!
Thanks so much, Jen!
Hugs, Jamie
They look fantastic ! I think when you mix a couple of the real ones in it’s hard to tell if they are faux or not. Thanks for the tutorial. I have been exprimenting with different paints to come up with a pleasing neutral tone and this is just perfect.
Thanks so much, Marijean! That’s the idea, mix the painted ones with real ones.
Hugs, Jamie
This is great! I love this tutorial, and the painted pumpkins look very nice. Pinned!
Thanks Kristen!
Hugs, Jamie
These are ahhhhh – mazing, Jamie! I’m sharing them tomorrow for my weekly roundup of “a few of my favorite things”!
You’re so sweet, thank you so much, Doreen!
Hugs, Jamie
Jaime- Thanks for this!! I LOVE it!!
Thanks Gina!
Hugs, Jamie
This is actually a great tutorial for those not familiar with color theory. Sometimes, subtle is the hardest to achieve. Amazing what $1 pumpkins can become. Sandi
Yes, it was a bit difficult lol. Thanks for appreciating that 😉
Hugs, Sandi
Great job on these pumpkins! I would like to share on photo with a link back for a favorites post I am writing. If you do not want me to share, let me know and I will be happy to remove the image. xoxo
Thanks for asking! Not a problem.
Hugs, Jamie
These came out so pretty! you can’t tell the real from the faux! Pinned & sharing! Thank you for sharing on Merry Monday! Hope to see ya next week!
Kim
Thanks so much, Kim!
Hugs, Jamie
Oh boy do I love that specific green you created, so soft and pretty, very believable, you went to lot of trouble to get just the right color. Pretty sure I won’t go to that much trouble to get correct color but will look at acrylic paints or spray paint to find something close. Will be painting a few $ store pumpkins for my interior decorations. Some in very light green and white. Love how you combined the seeded eucalyptus with your pumpkins, perfect touch. Where do you get seeded eucalyptus?
I won’t be buying any real pumpkins so will have to make do with sticks covered with jute string. Is just two of us so exact isn’t needed.
Will be creating decorations for front porch but not til next week, hopefully our wind will go away. When we get wind it’s really strong, blows anything away. Always enjoy your wonderful posts. Happy rest of week
Thanks so much! You definitely don’t have to go through all the trouble I went through. The key is using a couple of similar colors to get great dimension. I always find seeded eucalyptus in either Whole Foods or a local florist shop near my home. Once you find a place that carries them, they’ll probably always carry it. Mine was $6 CDN a bunch. Good luck!
Hugs, Jamie
These pumpkins turned out gorgeous!!
Thanks Marci!
Hugs, Jamie
These are beautiful! I pinned them. Thanks for linking up to our party!
xoxoxo
Thanks so much, Jennifer!
Hugs, Jamie
So real looking! These are some of the best faux pumpkins I’ve seen! I’m pinning this for sure, and thank you!
Thanks so much, Carol!
Hugs, Jamie
They look way better painted! I will definitely be pinning this for next year (I’m done this year!).
Thanks Cherryl!
Hugs, Jamie
Love the final green color so much! You put a lot of work in just trying to create the perfect green and the results are awesome. Thanks for sharing with us at #HomeMattersParty
Thanks Donna! It was a lot of work but fun to do 😉
Hugs, Jamie
Beyond gorgeous! Where is that mirror above your mantel from? I need it 🙂
Hi Amy,
Unfortunately I bought it locally on clearance 🙁
Hugs, Jamie
Great painting. I love the green pumpkins and how you were able to mimic the heirlooms. I am following you on Pinterest and Instagram. I am always delighted to find Canadian bloggers.
Thank you so much, Barbara! I’m so glad you’re here.
Hugs, Jamie
These are really cute, Jamie! Thanks for the tutorial and for sharing the exact colors you used. It’d be fun to try and recreate them!! Saving and sharing to my Crafts and Sewing ~ Fall board for you. <3
Happy almost fall,
Barb
p.s. Stopping over from Waste Not Wednesday with Leanna at Faeries and Fauna. 🙂
Thanks so much, Barbara! It was fun to create.
Hugs, Jamie
Decorating with pumpkins is one of my fall favorites. Today I’ll be sharing your pumpkin decor at Merry Monday. Hope to see you at the party.
Thank so much for featuring my pumpkins, Jenny!
Hugs, Jamie
Wow, these pumpkins look amazing! Thank you for sharing your tutorial on MM. I’ll be featuring these on tonight’s party.
Thank you so much, Erlene. I truly appreciate it!
Hugs, Jamie
I’m impressed! Hard to tell the difference. Great job. Thanks for sharing.
Thanks so much, Mary!
Hugs, Jamie
Those pumpkins are so pretty, and what a long process you had to achieve that perfect color(colors), thanks for sharing this tutorial. I am pinning and planning to try it, hope my results are as gorgeous as yours!
Pat
Thanks so much, Pat. I’ve just done another pumpkin tutorial that’s a bit different from the first one if you’d like to check it out:https://somuchbetterwithage.com/vintage-thanksgiving-table/
Hugs, Jamie
Green with envy over this beautiful display!
Thanks Kippi.
Hugs, Jamie
You did an amazing job of matching up the colors and how you painted your pumpkins! Thanks for sharing with Share Your Style!
Thanks so much, Carol!
Hugs, Jamie
These are the most real-looking painted pumpkins I’ve ever seen! You hit it out of the park with these. Thank you for sharing them at the Grace at Home party at Imparting Grace–I’m featuring you this week!
Thanks so much, Richella. I truly appreciate the feature.
Hugs, Jamie
Hi! Where did you get your big wooden mirror on your mantle? It’s beautiful! I love this tutorial too and can’t wait to do it myself.
I love them! And with the seeded eculyptus it’s just stunning!
Thank you, Kim!
Hugs, Jamie
Looking forward to try your painting technique.
I remember that post so well…..and I did the exact same thing soon as you inspired us. Thanks again, Jamie. That was genius.
Hope you have a fabulous autumn.
I love these!! Where do you get the pumpkin stems if you aren’t buying pumpkins?
Hi Diane,
I get them from pumpkin patches or at the bottom of the pumpkin bin when they sell pumpkins at the store. I haven’t seen anywhere to buy them online yet.
Hugs, Jamie