
DIY Wooden Shelves & How to Install Them
These DIY wooden shelves are so easy to make and put up in any room.

We made these wooden shelves for my son’s room with rustic industrial shelving brackets and wood cut to size that fits perfectly for this angled wall.
This post contains affiliate links for your shopping convenience. Click here to read my full disclosure policy.
Supplies:
- Wooden boards cut to size (we used 2 x 12″)
- Shelving brackets (should come with screws but double check) the ones I bought are below:
I liked these ones too, similar size and cheaper (set of 4 instead of set of 2):
- Level
- Pencil
- Drill or screwdriver
- Wall anchors that fit the screws
- Sander with fine sandpaper (180-220 grit)
- Wood stain (I used Minwax Weathered Oak)
Directions:
1. Find the studs in the wall first and make a pencil mark about where you want the brackets to go and where the studs are. Divide the space equally between each shelf.
2. Next install one bracket by placing the bracket on the wall in the general area you’ve marked for it then mark the screw holes with a pencil. Remove the bracket and screw in a screw at the pencil marks then put in a wall anchor. You may need to hammer in the anchor to the wall. Screw the bracket into place.
3. Hold up the bracket on the other side and place one of the boards over both brackets. With a level on top of the board, make sure the board is completely level before marking the second bracket’s screw holes with a pencil. Mark the screw holes with a pencil before removing and install the bracket like above.
4. Repeat for the other brackets and shelves.
5. Sand the boards down til smooth and stain if you’d like.


Aaron installed these shelves and did an awesome job. I can’t tell you how awesome it is to have some handy help now! I used to do this all on my own.
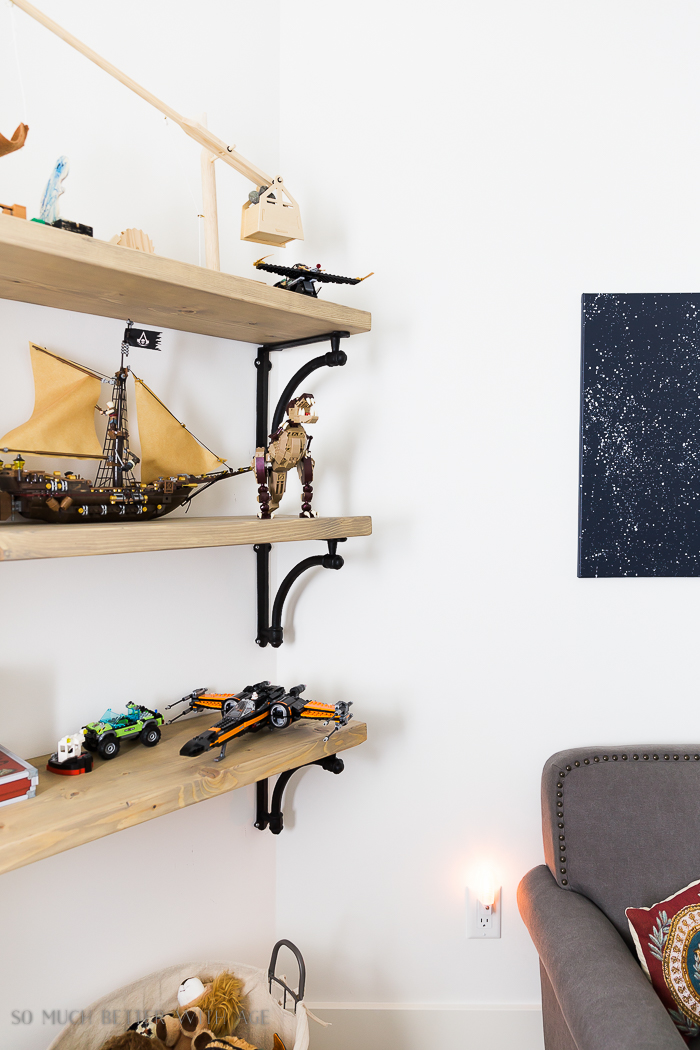
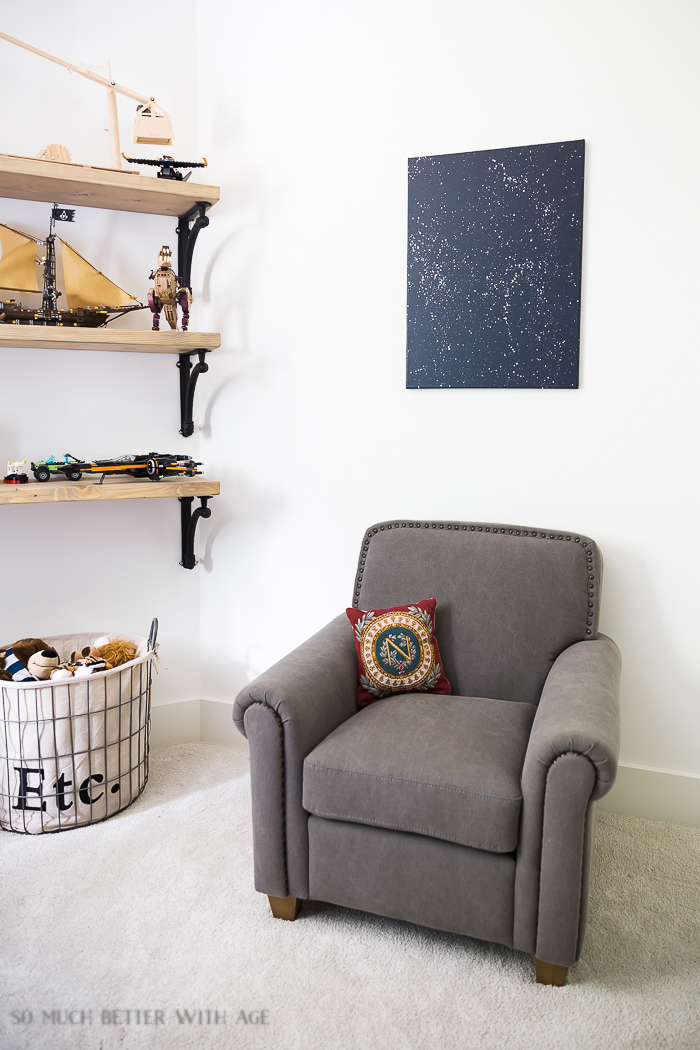

These shelves turned out great and I love the custom feel. My son loves them for displaying all his Lego creations.
I hope you feel inspired to DIY your own wooden shelves.
Make sure to pin it for later!


Click in Case You Missed:
Industrial Space Boy’s Bedroom


Love them and the shelf brackets are super
Thanks so much, Marty!
Hugs, Jamie
They look great! What color stain did you use?
It looks like a great place to place treasures. I have two sons, their men now but, they needed places for their special stuff. Your sons room is very nice. I am glad you have help, its nice to have someone who cares.Have a great week.
Thanks so much, Marlene. I love how he can display his special projects.
Hugs, Jamie
Did you screw the shelves to the brackets?
Hi Ann,
Good eye! I add a sentence that says ‘screw in the bracket into place’. Might be a good idea 😉
Hugs, Jamie
Those turned out great, Jamie. It is so much fun for kids to have a place to display their “treasures”.
I hope you have a wonderful Thursday- xo Diana
Thanks so much, Diana!
Hugs, Jamie
Those shelves are gorgeous! I love how big they are, my son wouldn’t totally use them to display lego too! I might have to make him some. 🙂
Thanks Laura. They are working out great!
Hugs,
Jamie
This whole room is so perfect! I’m planning out my son’s room right now, and I think I may need those shelves!
Aloha,
Charlee
Thanks Charlee!
Hugs, Jamie
These came out so beautifully! Pinned! I’d luv to invite you to share it with us at WAll to Wall DIY Wednesdays too! Best, Ann
Thanks Ann! I’ll have to check it out.
Hugs, Jamie