• Home
  • About
    • France
  • Published
  • Contact
    • Disclosure Policy
    • Privacy Policy
  • Nav Social Menu

    • Bloglovin
    • Facebook
    • Instagram
    • Pinterest
    • Twitter
    • YouTube

So Much Better With Age

  • Decorating 101
    • Color
    • Decorating
  • Organization
    • Organization
    • Printables
  • DIY
    • Crafts/DIY
    • Home Repair
    • Paint/Wax/Stain
    • Sewing
  • Seasonal
    • Valentine’s Day
    • Easter
    • Spring
    • Mother’s Day
    • Outdoor
    • Summer
    • Fall
    • Halloween
    • Christmas
    • Winter
    • Parties
  • Baking Recipes
  • My House Source List
  • House Tours
    • My Current House
    • My Previous House
    • The Old, Old House
  • Shop
    • Instagram Friends
    • My House Source List

May 9, 2017 · 25 Comments

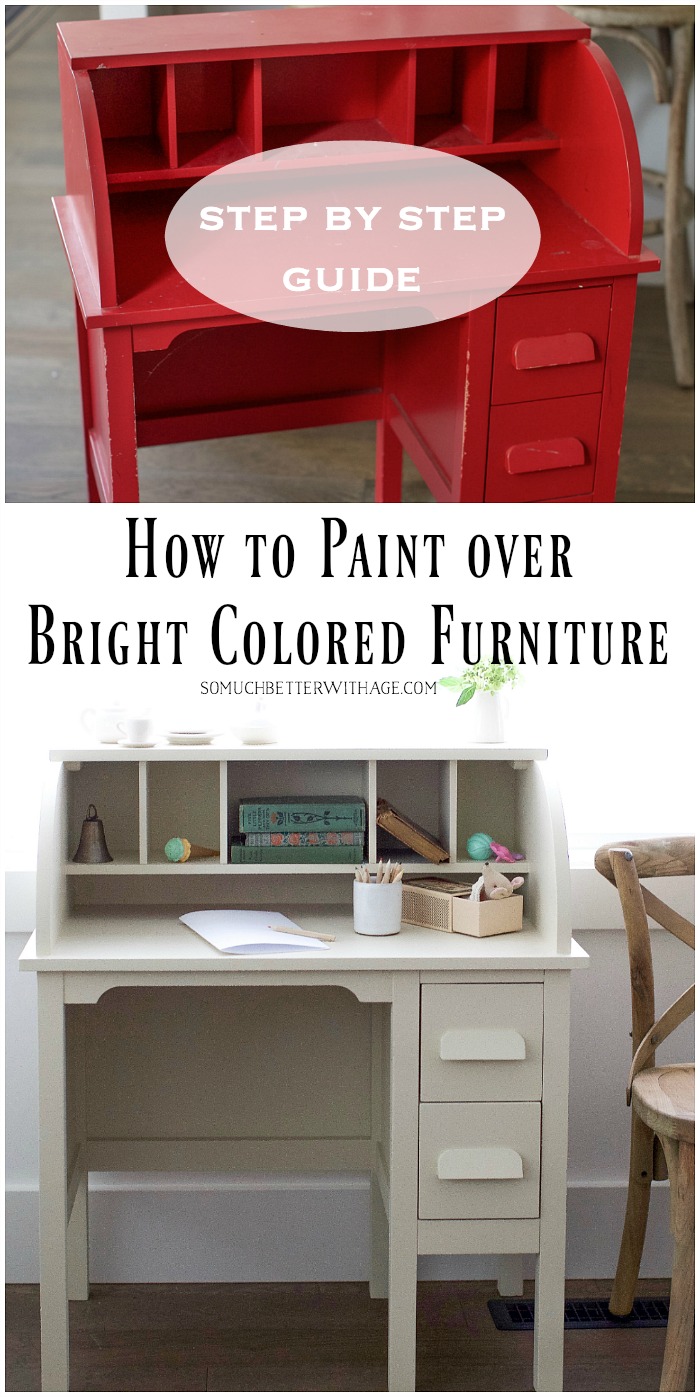
How to Paint Over Bright or Dark Coloured Furniture-Vintage Kid’s Desk Makeover

Paint/Wax/Stain

177 shares
  • Share
  • Tweet

A step by step guide in how to paint over bright or dark coloured vintage kid’s furniture.

How to Paint over Bright or Dark Coloured Furniture, kids' vintage desk makeover- So Much Better With Age

I love finding new pieces to make over. Most of the time, I’m not even trying to.

For instance, the day I found this desk I was dropping boxes of stuff off at a thrift shop after a big house purse. Here I am so happy to be getting rid of stuff from my house and I leave with a desk!

But I couldn’t help myself. I have a soft spot for mini or kid furniture. And it was only $10!

It’s solid wood but bright red and had seen better days.

If you’ve spent more than five minutes on my blog, you’ll know how much I love my neutrals so the red was never going to stay. Painting something from bright red to a neutral color takes a few steps but if you follow my step-by-step guide, you’ll be able to paint over bright coloured furniture easily too.

How to Paint over Bright or Dark Coloured Furniture, kids' vintage desk makeover- So Much Better With Age

Affiliate links added

Before we get to the steps and tips to painting bright coloured furniture, you’ll need these…

Supplies:

  • drop cloth
  • fine sandpaper
  • painting stands
  • foam roller similar to this kit
  • sash brush, my favourite brand (for painting all the corners)
  • foam brush (for painting in the cubbies or small spaces)
  • primer, my favourite brand
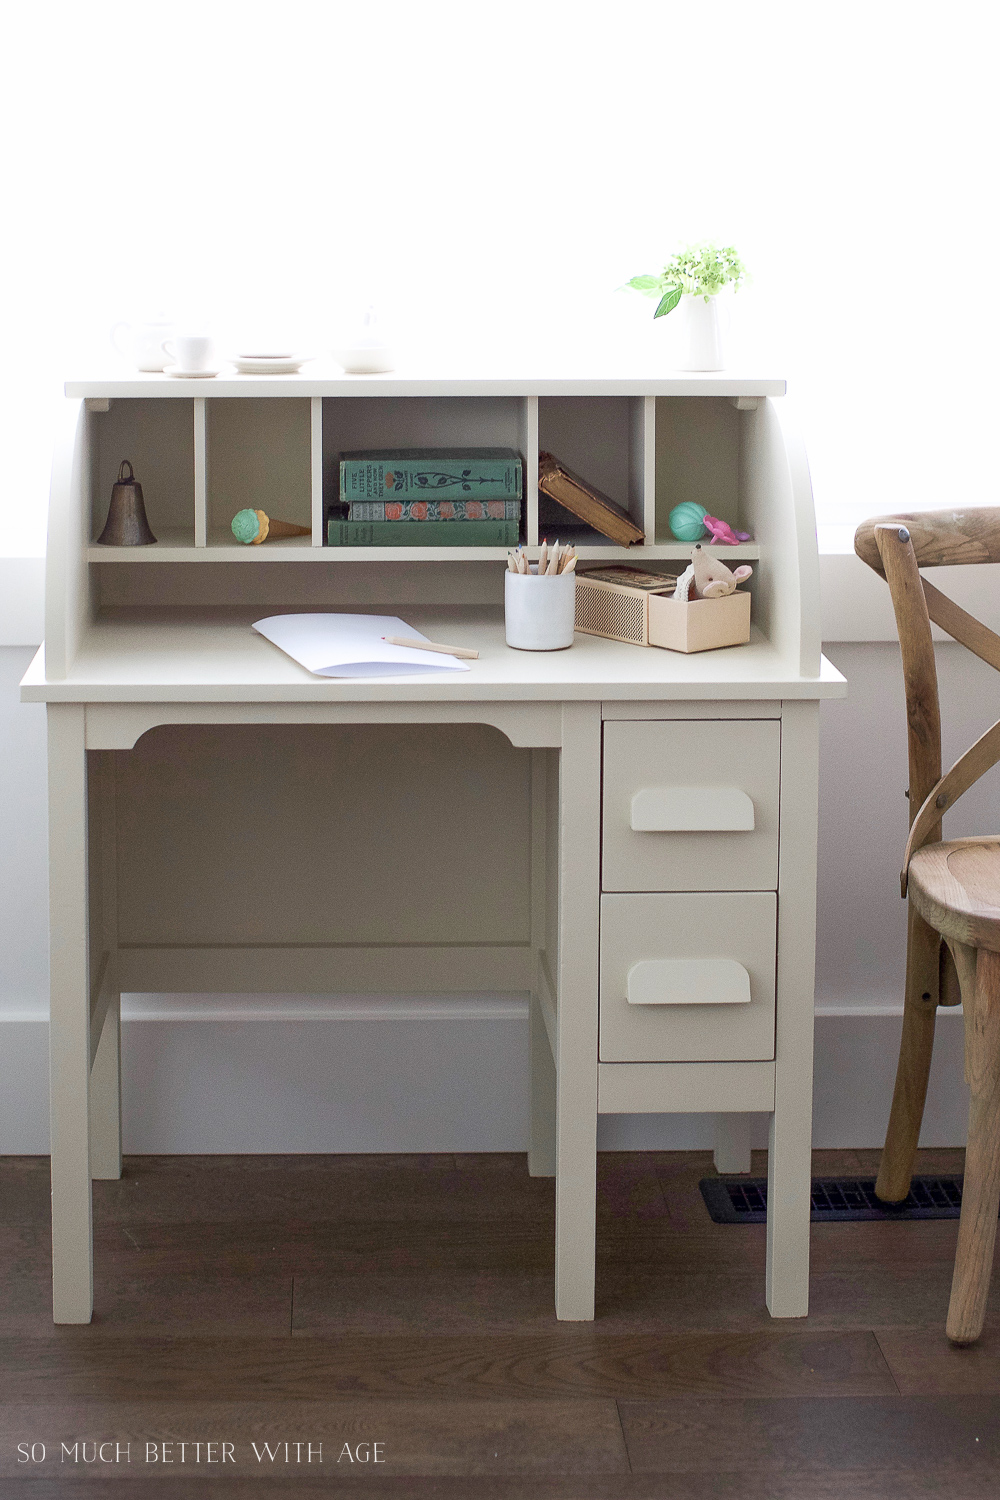
  • paint, I used Fusion Mineral Paint in Plaster
  • furniture wax

Directions:

1. Prep – I hate sanding furniture before painting. That’s why I switched to chalk paint years ago and now I always use Fusion Mineral Paint (Fusion Mineral Paint is an acrylic paint with zero VOCs but adheres like chalk paint and needs little or no prep). This piece was very shiny so I felt some light sanding was in order. I took fine sandpaper and gave it a light rubbing everywhere. You can see by the photo below that the goal isn’t to take the finish off, just to take off some of the shine. Lightly sanding this whole piece took about 5-7 minutes.

How to Paint over Bright or Dark Coloured Furniture, kids' vintage desk makeover- So Much Better With Age

2. Wipe off the dust – you want to make sure your piece of furniture is free of dust and cobwebs and debris. Wipe it all down with a slightly damp cloth. Make sure the underneath is dust free. Remove drawers and vacuum them out.

How to Paint over Bright or Dark Coloured Furniture, kids' vintage desk makeover- So Much Better With Age

3. Remove all hardware – if the furniture piece has doors or handles, remove it all. There is nothing worse than painted over hinges, in my opinion. It takes more time but it looks so much better. If they are in bad shape, you can replace the hinges with new ones as well.

4. Put on stands – prop your furniture onto stands or you can do what I do – once I’ve painted the legs, I move the whole piece to a different spot on the drop cloth that way it doesn’t adhere to the drop cloth when dry. I sometimes have to move my furniture piece in between coats as I paint near my kitchen and if it were on stands, it would topple over when moved of course.

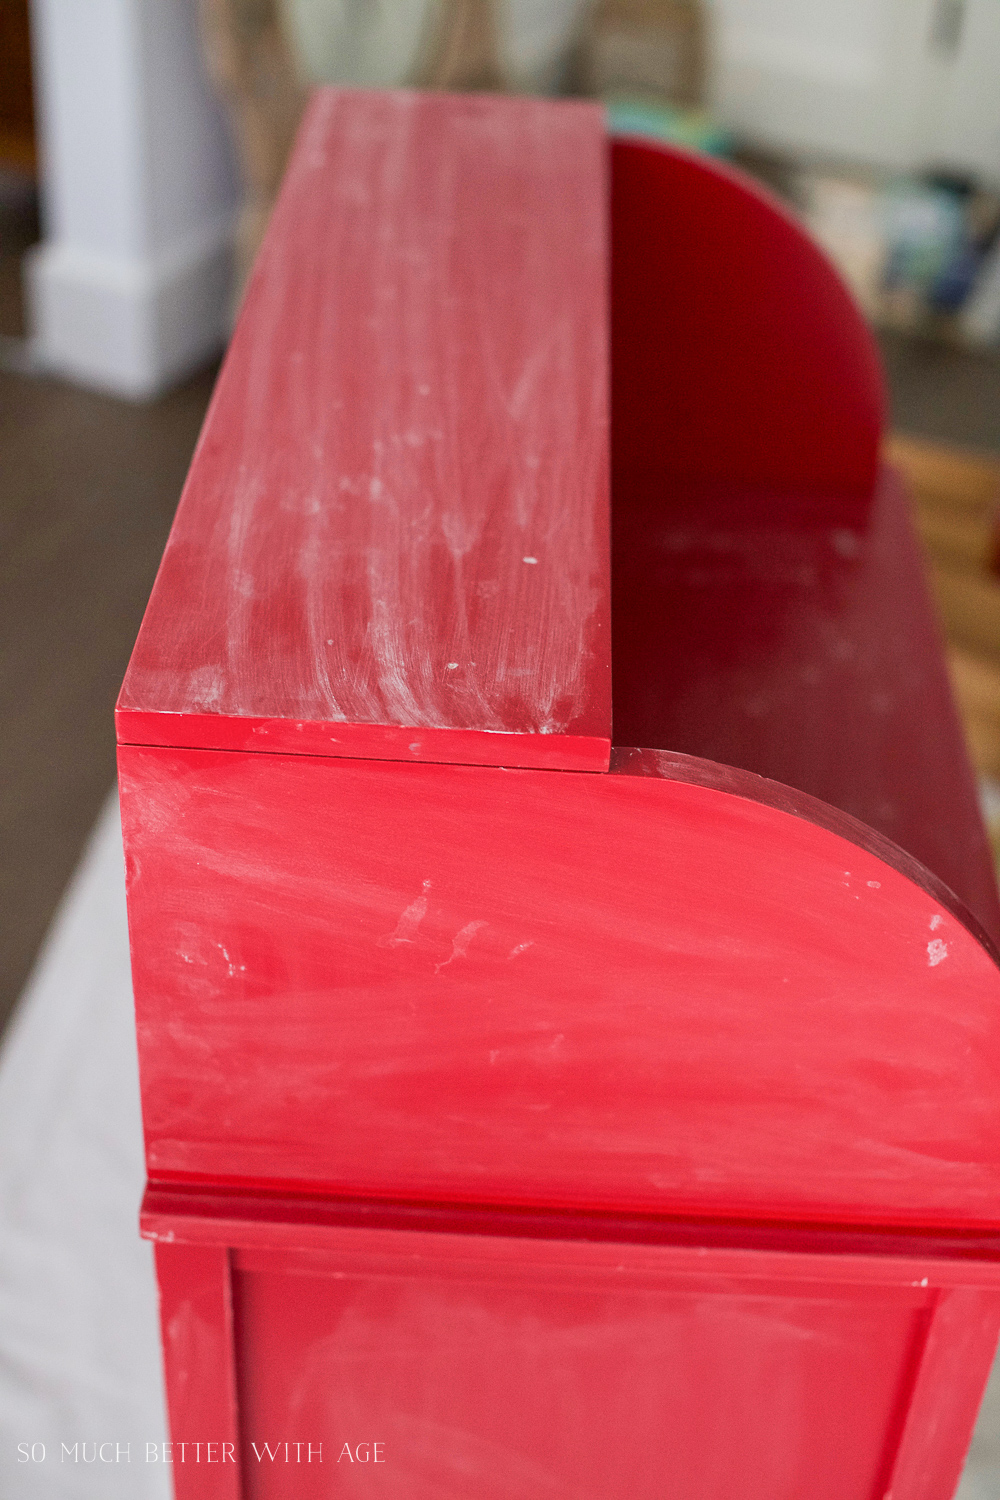
5. Primer –  As you can see by the photo below, it doesn’t fully take the color away but it’s just a primer, that’s what it’s supposed to do. So don’t try to lay on a thick coat. One thin coat of primer is all you need. Make sure to get in every nook and cranny.

How to Paint over Bright or Dark Coloured Furniture, kids' vintage desk makeover- So Much Better With Age

6. Multiple thin coats are better than one thick coat – I know that’s not what you want to hear. You would rather paint one thick coat of paint and be done with it. But trust me, I’ve tried this and it just doesn’t look good. You’ll end up having to go back to spot paint areas that you can still see which will leave you with a patchy mess. If you do it right the first time, you won’t need to go back. Also, thicker coats tend to chip later on so thin coats are always better. For this furniture piece, I ended up painting three coats of paint on it. Two would have been fine but I’m a bit anal and though one more coat would be perfect.

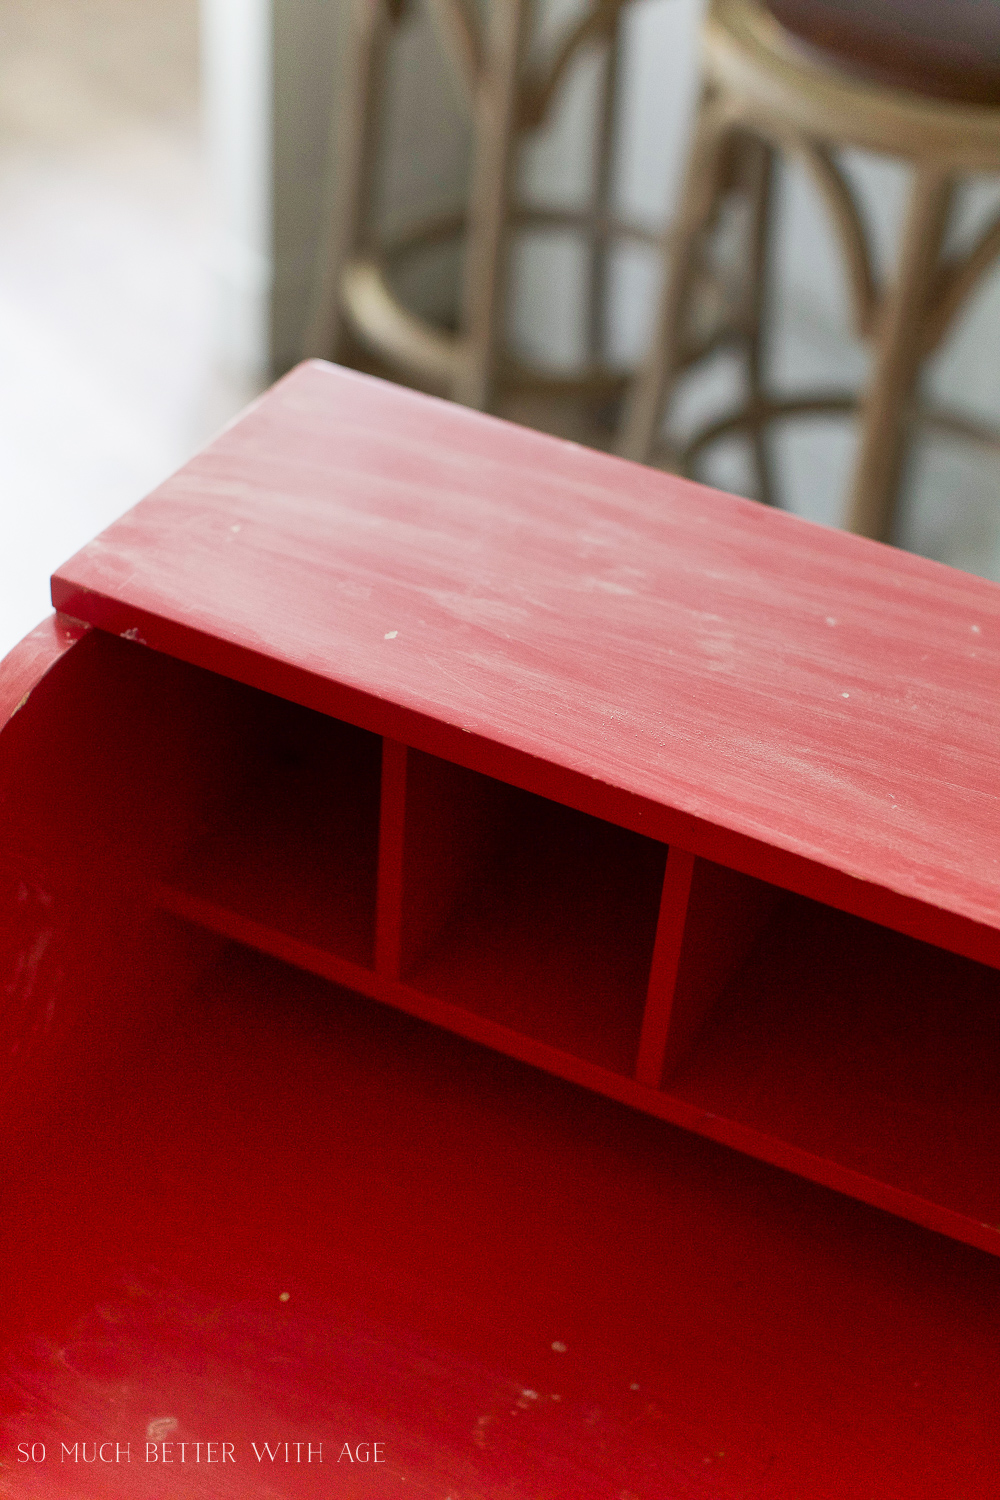
7. Paint small sections first – when you are painting a piece you just want to get to the large areas but you’ll mess up your newly painted work by trying to reach into those small spaces later. For this desk, I painted the cubbies first. The roller wouldn’t fit in there obviously so I used the sash brush for the corners and edges and the foam brush for everything else. I had to paint using the whole side of the foam brush as it was so tight in there. Alternatively you could spray paint the primer in that section or use spray paint primer for the whole piece but you will go through multiple cans. And you still have to watch for drips, that’s why I like painting by hand. (If you are using spray paint, make sure to spray outside or well ventilated area and on drop cloths).

8. Watch for drips – this is soooo important. After every coat, before you let it to dry, go around your piece and look for any drips. Once those dry, you’ll have to pick them off if you don’t catch them and then you’ll end up with marks on your freshly painted piece.

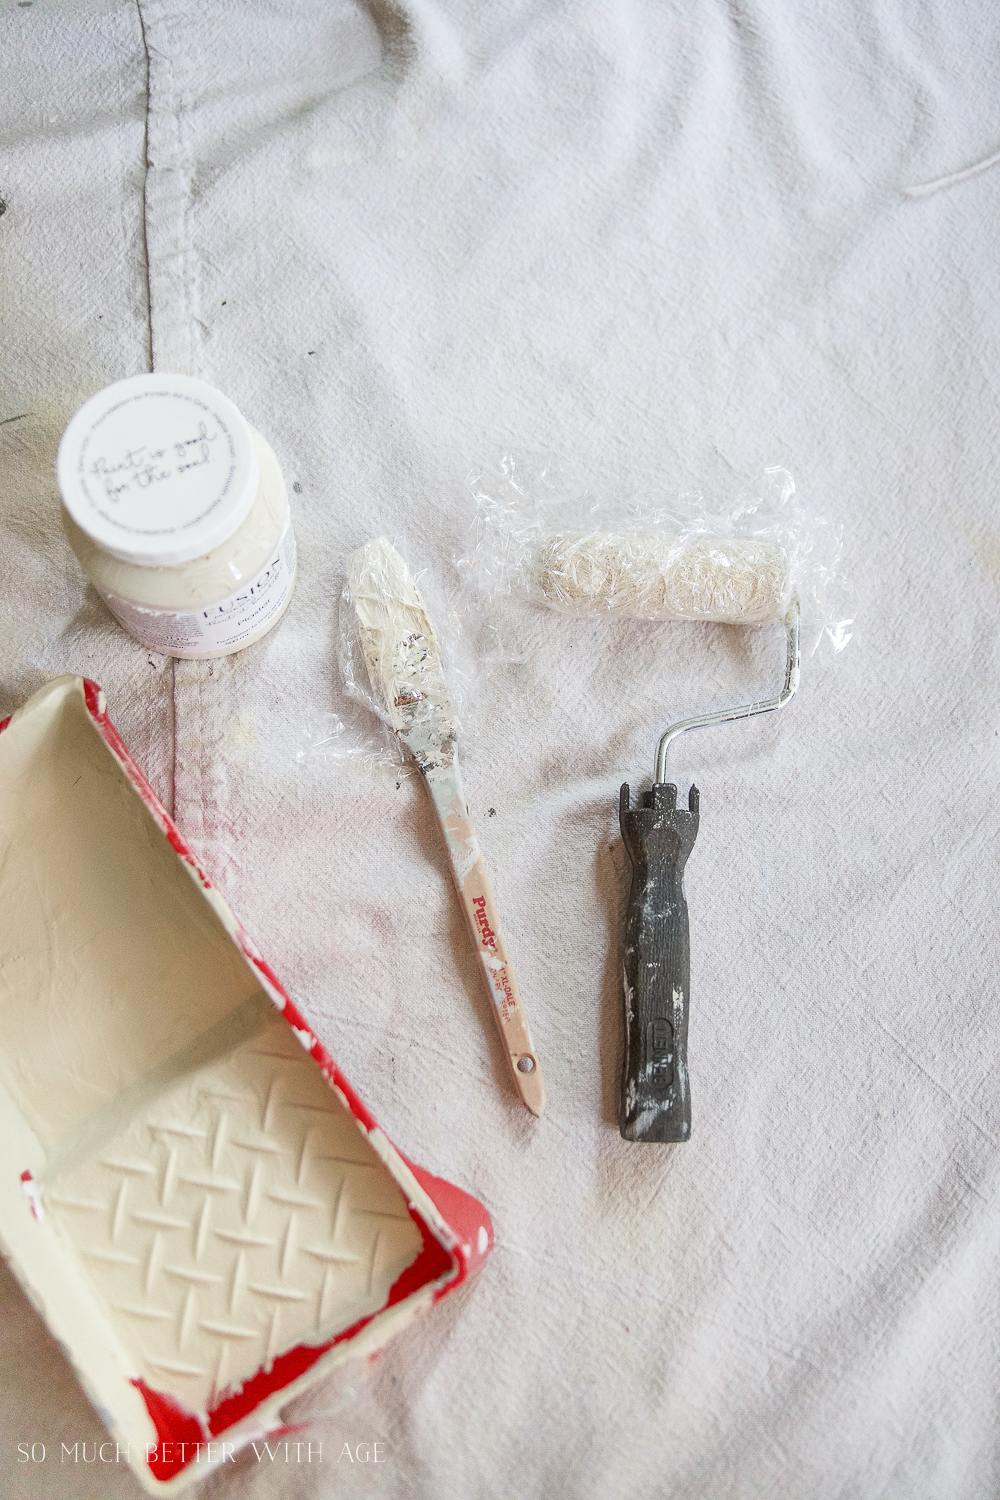
9. No need to wash brushes in between coats – washing paint brushes and rollers is the worst part of painting! Do what I do and wrap your paint brushes and roller with plastic wrap in between. If I know I’ll be painting again in a couple of hours, I’ll put the tray into a plastic bag or if I’m not painting again until the next day, I pour the extra paint leftover in the tray back into the bottle and the tray will dry. After awhile, you can just peel out the entire dried paint layer from off the tray.

How to Paint over Bright or Dark Coloured Furniture, kids' vintage desk makeover- So Much Better With Age

10. Furniture wax (if using chalk paint or Fusion Mineral Paint) – once your furniture piece has completely dried (I usually wait 24-48 hours), I wax it. Grab a soft cloth and put a dab of the wax on a corner and start rubbing it onto the furniture piece. For instance, I put wax all over the top part of the desk then started to put wax on half of the desk top. Then I went back to the very top part and buffed the wax off with a clean part of the cloth. Then I would go to the other half of the desk top and wax that, going back to the previous section to buff that off. I like to work in sections and allow a bit of time for the wax to sit before buffing off.

You’ll know you’re done when you feel the sections with your hand and it doesn’t feel sticky. It should feel nice and smooth to the touch. This protects your furniture and also gets rid of the chalky feel to it. If the piece gets marked up later on, you can put more wax on it and buff it out. You can also paint over the wax again if you need to. It’s very versatile.

How to Paint over Bright or Dark Coloured Furniture, kids' vintage desk makeover- So Much Better With Age

So here is the before and after: 

How to Paint over Bright or Dark Coloured Furniture, kids' vintage desk makeover- So Much Better With Age

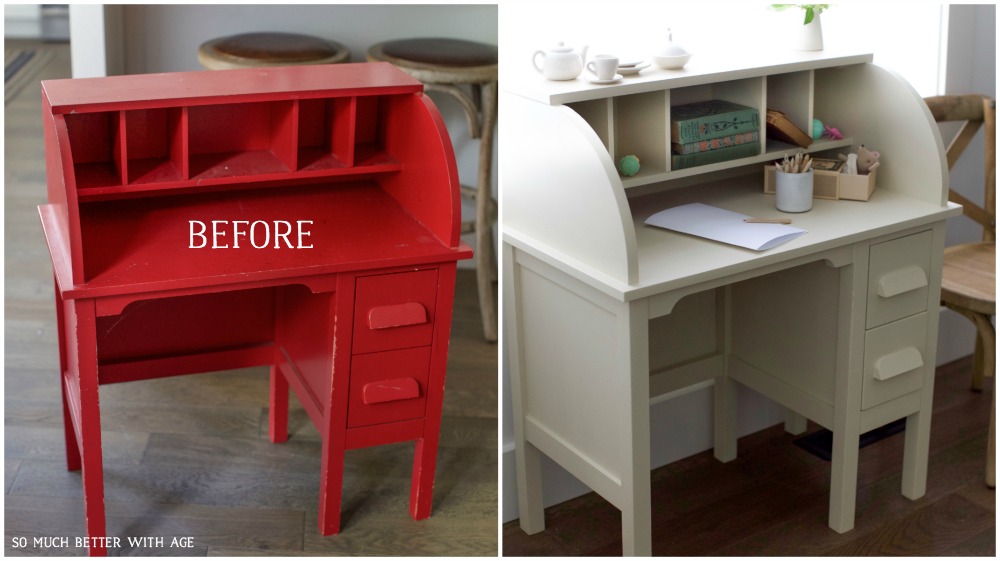
Furniture pieces are just so satisfying to paint as they produce such great results!

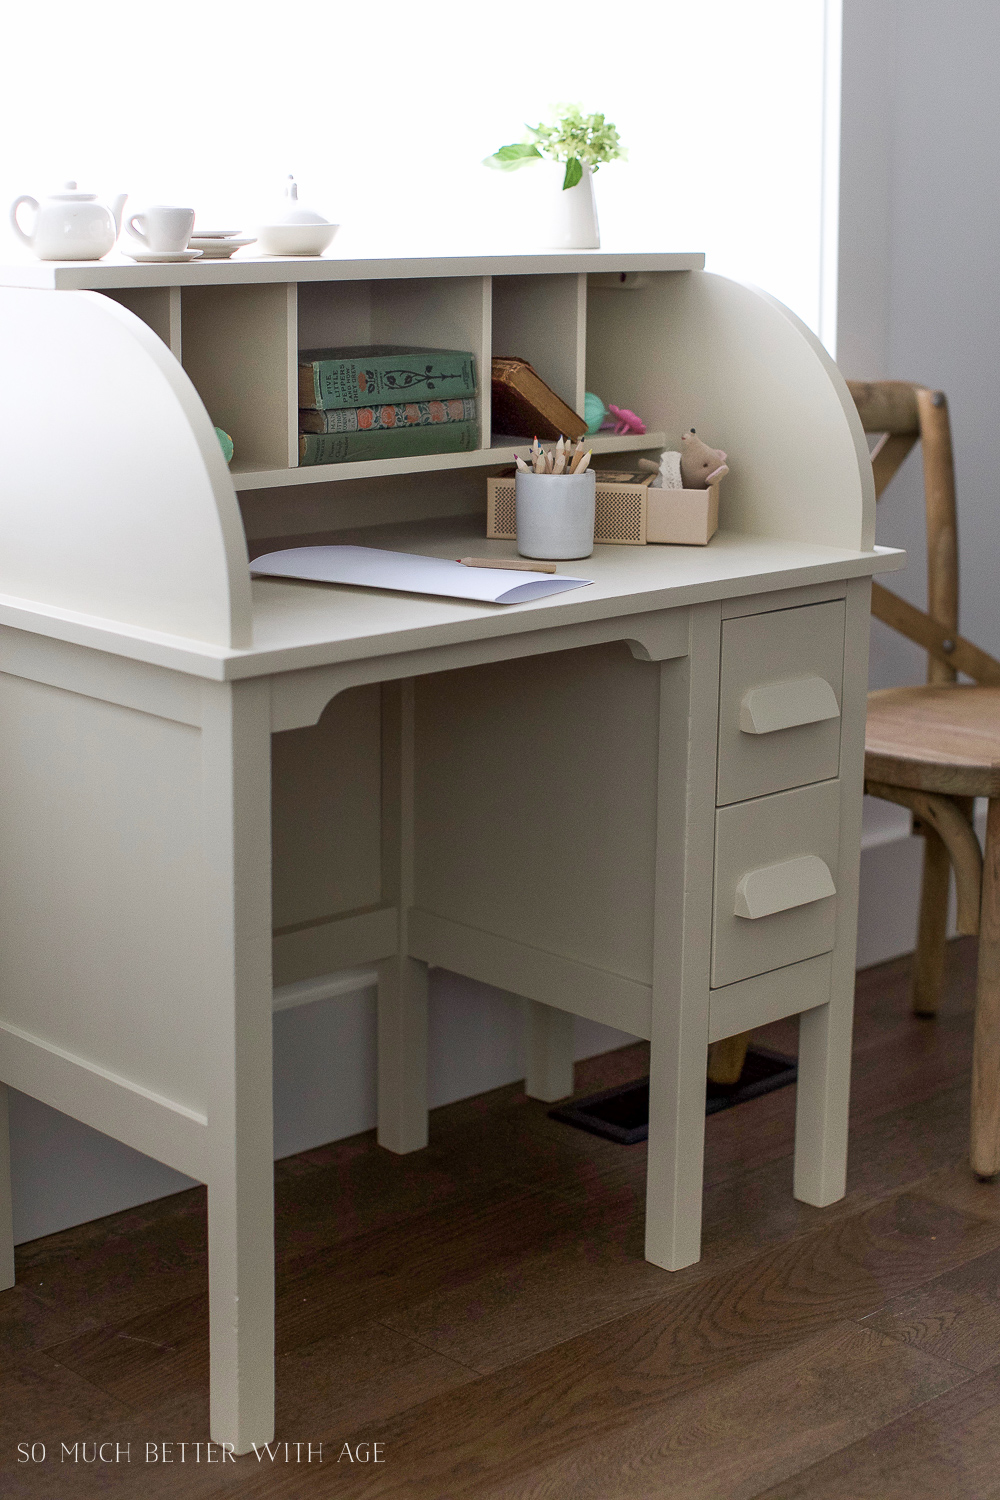
What was once a ragged old desk now has new life and it looks gorgeous. How to Paint over Bright or Dark Coloured Furniture, kids' vintage desk makeover- So Much Better With Age

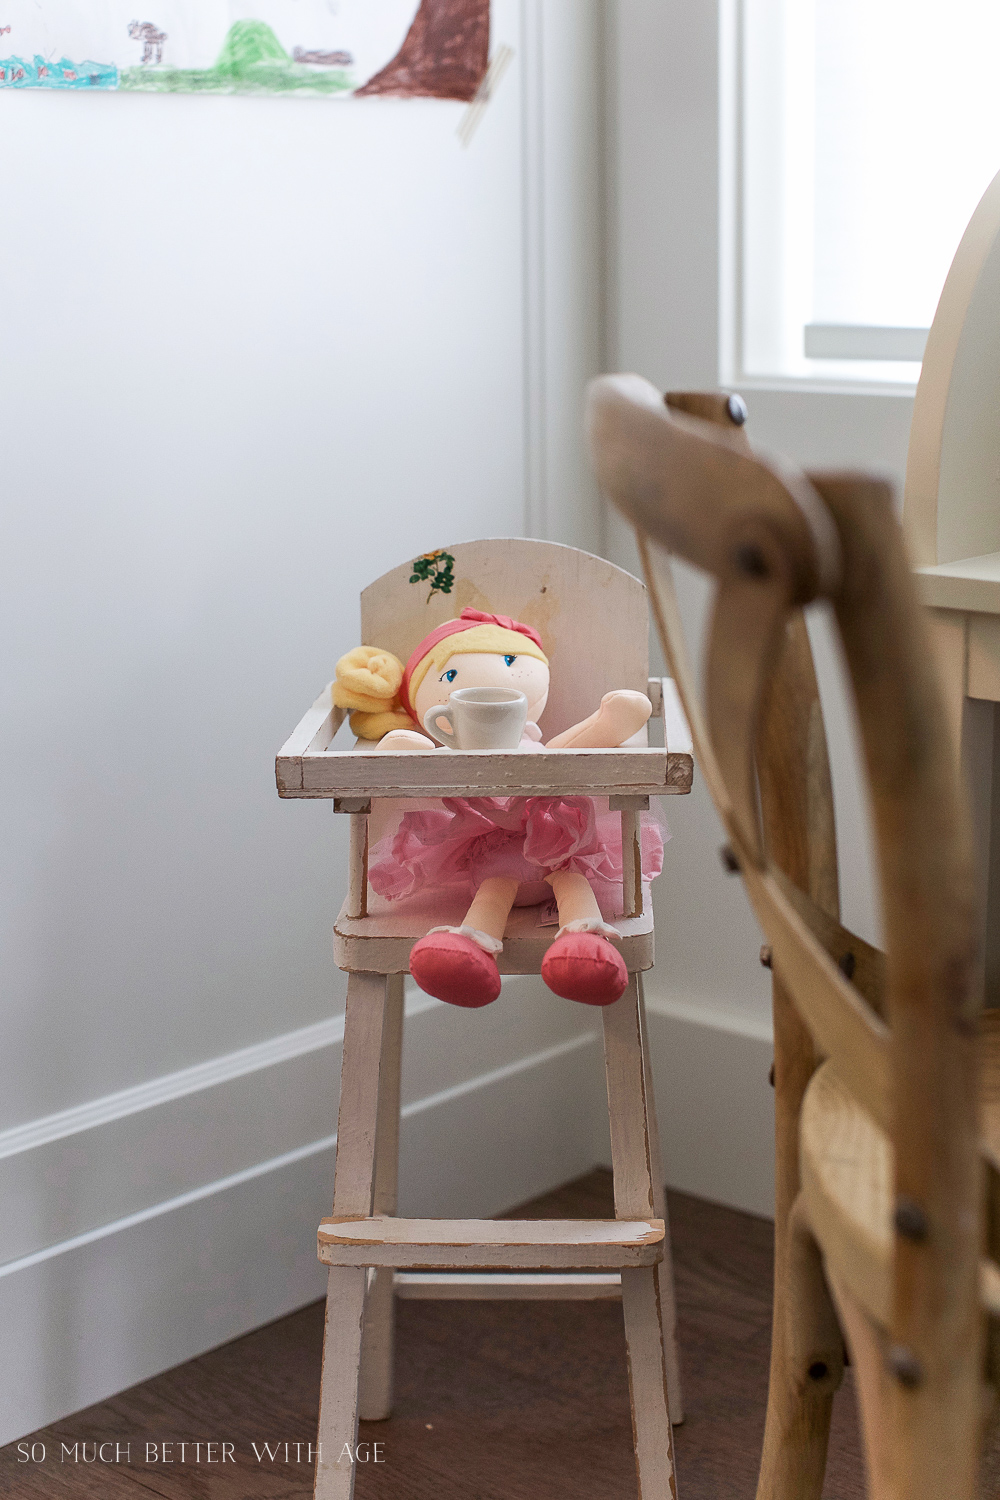
I replaced my kids’ table and chairs for this desk for now. I’m not sure ultimately where it’s going to go. I’m a furniture hoarder.

How to Paint over Bright or Dark Coloured Furniture, kids' vintage desk makeover- So Much Better With Age

How to Paint over Bright or Dark Coloured Furniture, kids' vintage desk makeover- So Much Better With Age


How to Paint over Bright or Dark Coloured Furniture, kids' vintage desk makeover- So Much Better With Age

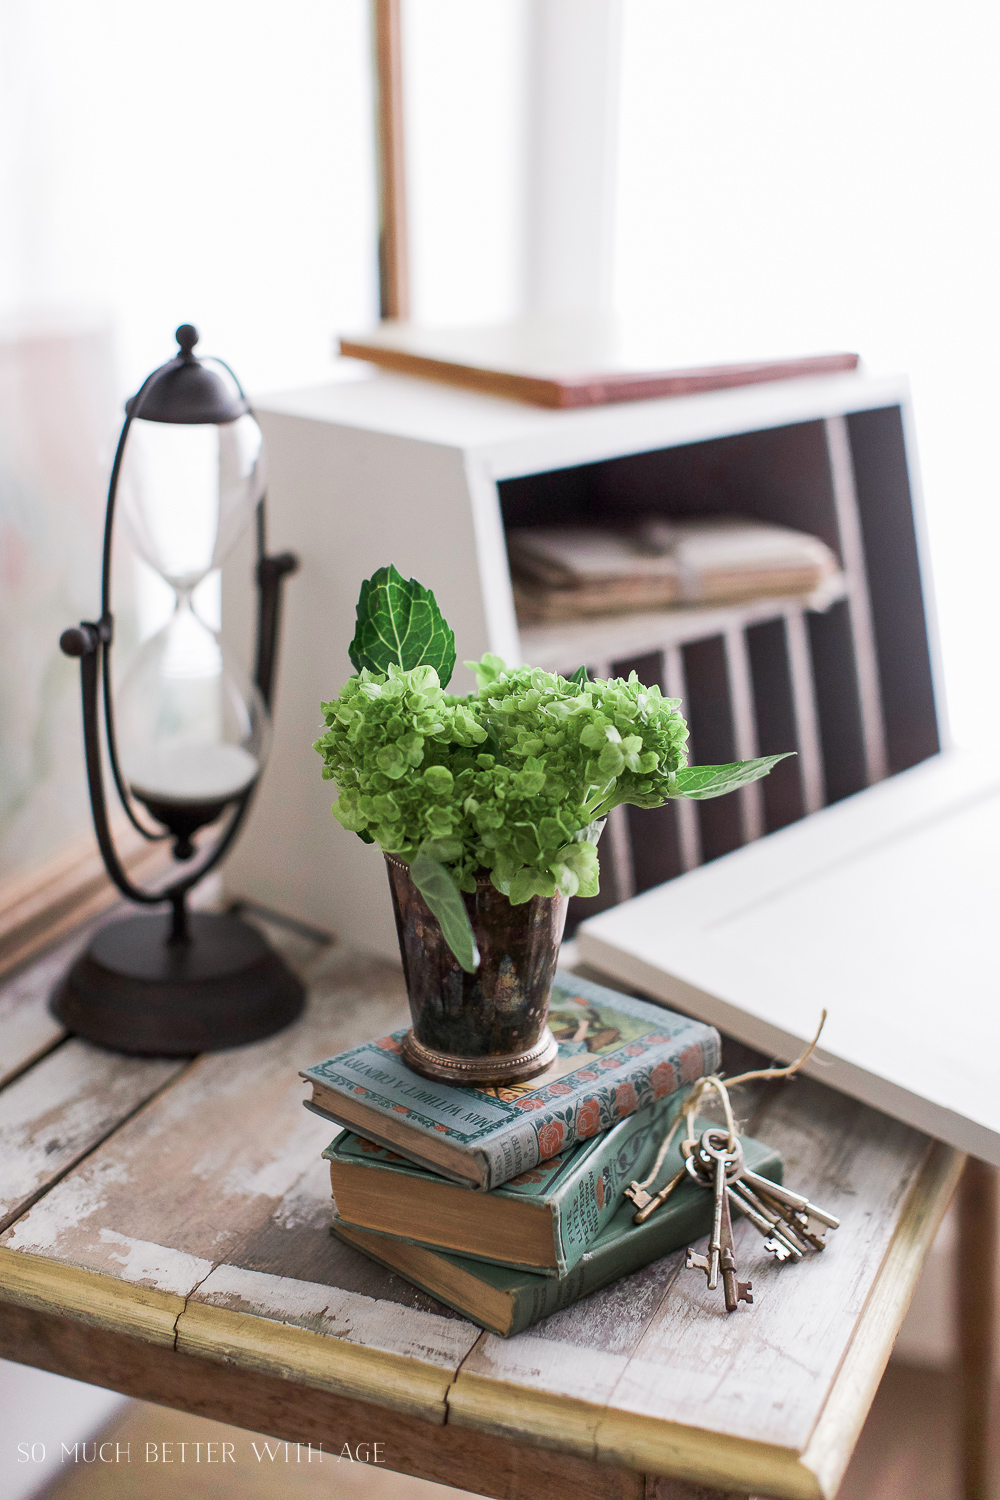
At first I wasn’t crazy about the handles but now that it’s a neutral color those handles remind me of an antique school desk.

How to Paint over Bright or Dark Coloured Furniture, kids' vintage desk makeover- So Much Better With Age

How to Paint over Bright or Dark Coloured Furniture, kids' vintage desk makeover- So Much Better With Age

How to Paint over Bright or Dark Coloured Furniture, kids' vintage desk makeover- So Much Better With Age

Here is one last tip, when I paint a piece of furniture, I basically accept that this will take me one week so I plan accordingly. Technically it shouldn’t take anyone that long but in between kids and running my blog and all the every day usual stuff, by the time I get a chance to putting another coat on it, it’s the next day or evening. So every day might get one coat.

Chalk paint and Fusion Mineral Paint do not take that long to dry in between coats. I usually paint a second coat within a couple of hours if I have the time.

How to Paint over Bright or Dark Coloured Furniture, kids' vintage desk makeover- So Much Better With Age

I hope I’ve inspired you to paint over a bright coloured piece of furniture.

I know you can do it! If you have any questions, leave them below.

I’m going to do a beginner painting post next week to fill in any gaps I’ve missed here today.

Some Sources For You:


Click in Case You Missed:

Paint Ikea Products to Match Your Decor

Paint Ikea Products to Match Your Decor - So Much Better With Age

How to Paint Stripes Like an Outdoor Rug on Patio Concrete Slab

How to Paint Stripes like an Outdoor Rug on Concrete Patio Slab - So Much Better With Age

How to Paint over Bright or Dark Coloured Furniture, kids' vintage desk makeover- So Much Better With Age

SaveSave

Subscribe to get the latest

free goodies straight to your inbox

Previous Post: « Home Style Saturdays
Next Post: The Best Tip for Filling Large Outdoor Planters »

Reader Interactions

Comments

  1. Candice says

    May 9, 2017 at 11:02 am

    Jamie, where did you find this gem? Super cute….love the new look.

    Reply
    • Jamie says

      May 9, 2017 at 4:27 pm

      Salvation Army, Candice!
      J. xo

      Reply
  2. Marlene Stephenson says

    May 9, 2017 at 11:04 am

    The desk looks so different. The new color is much better and thanks for the tips.

    Reply
    • Jamie says

      May 9, 2017 at 4:27 pm

      Thanks Marlene!
      Hugs, Jamie

      Reply
  3. Little dog says

    May 9, 2017 at 11:46 am

    Beautiful!

    Reply
    • Jamie says

      May 9, 2017 at 4:27 pm

      Thank you!
      Hugs, Jamie

      Reply
  4. Sandy Huntley says

    May 9, 2017 at 1:21 pm

    I loved the little desk, it looked so much better with the neutral color than the fire engine red. I’ve never used wax on anything before, is it very hard to do or very time consuming ? Also, is that the same kind of wax they talk about when they are refinishing furniture? What brand of wax do you use?

    Reply
    • Jamie says

      May 9, 2017 at 4:26 pm

      Hi Sandy,
      Thanks so much! I think it’s much better than that red too! My favourite waxes are Fusion Mineral Paint Furniture Wax and Annie Sloan Chalk Paint Clear Wax. It goes on like butter so it’s not hard but a bit time consuming. For that desk I would say it took me about 20 minutes to wax it. There are many different type of waxes out there. The wax you buy at the hardware store could be used for the same thing but it’s most likely a beeswax or synthetic type wax and it’s much harder to apply.
      Hugs, Jamie

      Reply
  5. Michelle Meyer says

    May 9, 2017 at 5:00 pm

    Brilliant find and I love the refined look!

    Reply
    • Jamie says

      May 9, 2017 at 9:58 pm

      Thanks so much, Michelle.
      Hugs, Jamie

      Reply
  6. Nancy Nelson says

    May 9, 2017 at 6:44 pm

    Could you reveal your primer choice please

    Reply
    • Jamie says

      May 9, 2017 at 10:18 pm

      Hi Nancy,
      My favourite primer is Zinsser 1-2-3. It’s very similar to Kilz.
      Hugs, Jamie

      Reply
  7. Virginia Baker says

    May 9, 2017 at 7:29 pm

    I’m always a day late and a dollar short, finding things…I guess I’ll have to look everyday…you did an excellent job!

    Reply
    • Jamie says

      May 9, 2017 at 10:19 pm

      Virigina, it’s always when I’m not looking and I don’t have room in my house for it!
      Hugs, Jamie

      Reply
  8. Virginia says

    May 9, 2017 at 7:31 pm

    You did a great job on the desk.

    Reply
    • Jamie says

      May 9, 2017 at 10:20 pm

      Thank you!

      Reply
  9. Jamie says

    May 11, 2017 at 10:19 pm

    I have used Fusion but have always been afraid to use wax because I thought it would have to be stripped before touching up or painting again. Thanks for sharing that it can be painted over!

    Reply
    • Jamie says

      May 13, 2017 at 7:19 pm

      Yes! It can be painted over again, no need to strip! I’ve done it many times. The wax hardens so it doesn’t prevent painting over it again.
      Hugs, Jamie

      Reply
  10. Heather Oberg says

    May 12, 2017 at 8:32 pm

    That looks so good Jamie, I love that you left the handles. Can you tell me what brand of primer you use? When I click on the “favorite primer” it takes me to amazon but not to the primer.

    Reply
    • Jamie says

      May 13, 2017 at 7:19 pm

      Hi Heather,
      Thanks so much, I love the handles too. Oh sorry, it’s Zinsser 1-2-3!
      Hugs, Jamie

      Reply
  11. Kathleen Rupp says

    July 18, 2017 at 4:46 pm

    This is such a great makeover!! I will have to try that mineral paint! I have been seeing that more and more online and it looks great on your desk. I also love the color you used. I am glad I found your site through the linky party:)

    Reply
  12. KitNighteen says

    June 10, 2019 at 12:25 pm

    What color fusion paint is this? I love it!

    Reply
    • Jamie says

      July 11, 2019 at 2:11 pm

      I used Plaster in Fusion Mineral Paint!
      Hugs, Jamie

      Reply
  13. Mary says

    July 15, 2020 at 3:46 am

    Where did you get the adorable wooden chair?

    Reply
    • Jamie says

      August 31, 2020 at 3:26 pm

      Hi Mary,
      It’s from RH Baby & Child. It’s it sweet?
      Hugs, Jamie

      Reply

Leave a Reply Cancel reply

Your email address will not be published. Required fields are marked *

Recipe Rating


Primary Sidebar

  • Bloglovin
  • Facebook
  • Instagram
  • Pinterest
  • Twitter
  • YouTube

Search

Categories

My YouTube Videos

“somuchbetterwithage”

My Book

“somuchbetterwithage”

Footer

Copyright

All images and text on this site are property of So Much Better With Age. Please contact [email protected] to ask for all photo requests. Please do not take my images without first obtaining written permission from me. All free printables offered are for personal use only. Pinning is always welcome and appreciated.

Copyright 2010-2021

Categories

Archives

Let’s Connect

  • Bloglovin
  • Facebook
  • Instagram
  • Pinterest
  • Twitter
  • YouTube

Looking for something?

This kitchen from @stevecordony with the mini ligh This kitchen from @stevecordony with the mini lighting sconce has my heart. I’m not sure if small lighting is here to stay, but I say if you love something, it can stay forever. 💚➡️ Check out my affordable mini light fixtures, direct link in stories.💚 notifications 

.
.
.
.

#minilightfixtures #lightfixtures #elledecor #ruedaily #idcoathome #homegoals #homedesign #interiordesign #stevecordony
Yesterday I wrote a blog post on how to plan & ins Yesterday I wrote a blog post on how to plan & install an eclectic gallery wall. I used my client’s dining room wall as an example. I started with a digital mock-up then put it up with kraft paper and painter’s tape. 💚➡️I have lots of examples & lots of details of how I do it in my blog post. Check out the direct link in stories. notifications 

.
.
.
.

#somuchbetterwithage #jamielundstrominteriors #homedesign #gallerywall #artwork #homeinspo #artwork #artgallery
This space by @marieflaniganinteriors is the dream This space by @marieflaniganinteriors is the dreamiest. I put together a post on how to achieve European decorating style and this image was top of my list. There are so many great characteristics that make up a gorgeous European decorating style, from the flooring, windows, lighting and architectural details. 🖤➡️ Be sure to check out my blog post, direct link in stories & in highlights. notifications 
.
.
.
.

#homedesign #europeandecor #europeandecoratingstyle #vogueliving #elledecor #vintagestyle #homegoals #dreamhome
It’s feeling pretty Monday like today but I did It’s feeling pretty Monday like today but I did manage to get a load of work done. That’s feels good for a start of the week. 💚 Design dilemma: did you know that changing the doors and trim work jn your house can bring it up to date? If you skip it during a renovation, your house will still look dated. Swipe to see a before photo in my house. Such a difference it makes, right? 💚➡️ Check stories for more details in my blog post. 
.
.
.
#baseboards #trimwork #houserenovation #housegoals #bhghome #houseinspo
Recently I wrote a blog post all about Chantilly L Recently I wrote a blog post all about Chantilly Lace by @benjaminmoore. First, I love Simply White. I’ve painted it everywhere in my house, walls, cabinets, doors, trim. The color is perfect in my house. In some houses it shows a yellow undertone. If it does, White Dove is usually a great choice. But this is what I learned about 6 months ago in a color course I took, Chantilly Lace has nearly zero undertone! 💚➡️ Be sure to check out my blog post on Chantilly Lace and all the real house examples. I also have posts on the best way to pick white & grey paint colors in your home. I’ll leave direct links in stories & in a highlight in my profile. 💚
📷: @brittdesignstudio 
.
.
.
.

#somuchbetterwithage #jamielundstrominteriors #chantillylace #benjaminmoore #benjaminmoorepaint #benjaminmoorechantillylace #paintcolor #paintcolorideas #howtopickwhitepaint
Happy Monday friends! I have 2 very popular posts Happy Monday friends! I have 2 very popular posts with my bathroom ensuite 1) 13 renovation tips to make a small bathroom feel luxurious and 2) How to organize a small bathroom. 💚➡️I’ll leave links to both blog posts in stories! And also in a highlight in my profile.
.
.
.

#somuchbetterwithage #bathroomensuite #smallbathroom #smallbathroomrenovation #smallbathroomreno #bathroominspo #bathroomdesign #smallbathroomgoals
Kitchen pantries and bedroom closets. Two of my le Kitchen pantries and bedroom closets. Two of my least favorite areas to purge and organize! They can easily accumulate and get out of control maybe because we use them every day. 👍🏻👊🏻➡️ Check out the simple steps in how I purge my closet, even keeping some items that I may want to keep for later and how I organize everything. ➡️ The direct links are in stories and I have a highlight in my profile called Organization. 
.
.
.
.

#somuchbetterwithage #decluttering #konmarimethod #mariekondo #declutteringmethods #organization #organizingtips #organizingideas #organizinginspiration
Thank you so much for all the support on my last I Thank you so much for all the support on my last IG reel! The amount of shares & love is overwhelming. Thank you! 😘 Today I’m sharing some of my most popular organization posts. I’ll share all the direct links in stories as well as a highlight in my profile! 💚👊🏻➡️ 1)How to become a minimalist but keeping some collections
2) How to declutter in stages
3)How to declutter when you're sentimental
4) How to declutter your basement
5)How to create seasonal decor capsules
6)How to sell everything in a storage unit
7)Why I use paper daytimers and why I keep them all
8)Free Printables: School Memories for every year in school notifications 

.
.
.
.

#somuchbetterwithage #organization #decluttering #howtodeclutter #minimalism #declutteringwhenyoureahoarder #declutteringchallenge #seasonalcapsules #declutterinstages #getorganized
Today I shared my Top 10 blog posts of 2021! Here Today I shared my Top 10 blog posts of 2021! Here are a few of my top posts with How to Find Your Own Decorating Style in my top 5! 💚💚 I’m joining along in a blog hop which I haven’t done for a year I believe. 💚Be sure to check out all the top posts from these lovely ladies: @thehappyhousie @danslelakehouse @cleanandscentsible @tatertotsandjello @satoridesignforliving @casawatkinsblog @aprettylife @sincerelymariedesigns @shegaveitago @maisondecinq @thetatteredpew @deeplysouthernhome 💚➡️ Check stories for the direct blog post link and you can also click the link in my profile. notifications 
📷: 1st photo : @hayleyalicephoto 
.
.
.
.

#somuchbetterwithage #toppost #topblogposts #bhghome #bhgstylemaker #idcoathome #ruedaily
I just started baking today. Today was sugar cooki I just started baking today. Today was sugar cookies and tomorrow it will be butter tarts. Then shortbread and cinnamon buns for Christmas morning. I love to bake and my family has so many favorites! 🎄💚🎄➡️ Check stories for all the recipe links. Merry Christmas 🎄🎁 notifications 

.
.
.
.

#somuchbetterwithage #bakingfromscratch #christmasbaking #bhgfood #bhgholiday #christmascookies #shortbread #cinnamonbuns #buttertarts

Copyright © 2022 · captivating theme by Restored 316
· Privacy Policy