• Home
  • About
    • France
  • Published
  • Contact
    • Disclosure Policy
    • Privacy Policy
  • Nav Social Menu

    • Bloglovin
    • Facebook
    • Instagram
    • Pinterest
    • Twitter
    • YouTube

So Much Better With Age

  • Seasonal
    • Valentine’s Day
    • Easter
    • Spring
    • Mother’s Day
    • Outdoor
    • Summer
    • Fall
    • Halloween
    • Christmas
    • Winter
    • Parties
  • Organization
    • Organization
    • Printables
  • DIY
    • Crafts/DIY
    • Home Repair
    • Paint/Wax/Stain
    • Sewing
  • Decorating 101
    • Color
    • Decorating
  • Baking Recipes
  • House Tours
    • My House Source List
    • My Current House
    • My Previous House
    • The Old, Old House
  • Shop
    • Instagram Friends
    • My House Source List

May 29, 2017 · 26 Comments

How to Paint Stripes Like an Outdoor Rug on Patio Concrete Slab

Outdoor· Paint/Wax/Stain

3171shares
  • Share
  • Tweet

Learn how to paint stripes like an outdoor rug on a patio concrete slab from this detailed tutorial!

How to Paint Stripes Like an Outdoor Rug on a Concrete Slab graphic.

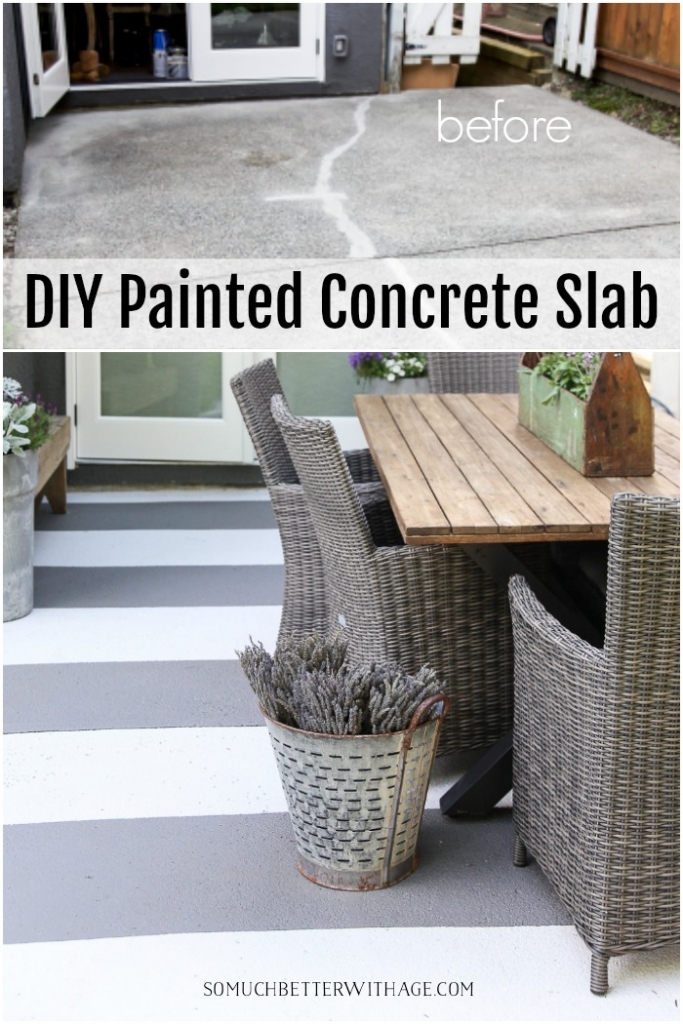
I really wanted to replace the patio and front driveway when I moved into this house but with the extensive renovation done inside, there was no room in the budget. To live with this concrete slab in the meantime I thought it would be a good idea to paint it.

The concrete slab is probably original to the house (late 80s) and has settled and cracked in many places so let me show you how we fixed the couch cracks and painted it to update this old, ugly concrete slab into a beautiful striped outdoor rug.

This post contains affiliate links for your shopping convenience. Click to read my full disclosure policy.

Supplies:

  • powerwasher (we rented ours for half a day)
  • premixed concrete patch
  • flat trowel
  • Zinsser 1-2-3 Primer with a grey tint
  • driveway paint roller x 3
  • roller frame
  • roller tray  (line the tray first with a plastic bag or roller tray liners to use it multiple times)
  • extension pole
  • tape measure
  • chalk reel kit
  • painter’s tape – my favourite
  • Armour Coat Porch & Floor paint in Storm Sky (dark stripe) and Mushroom (light stripe)
  • Slate grey and silver grey would be a great alternative in this porch and patio paint here

Directions:

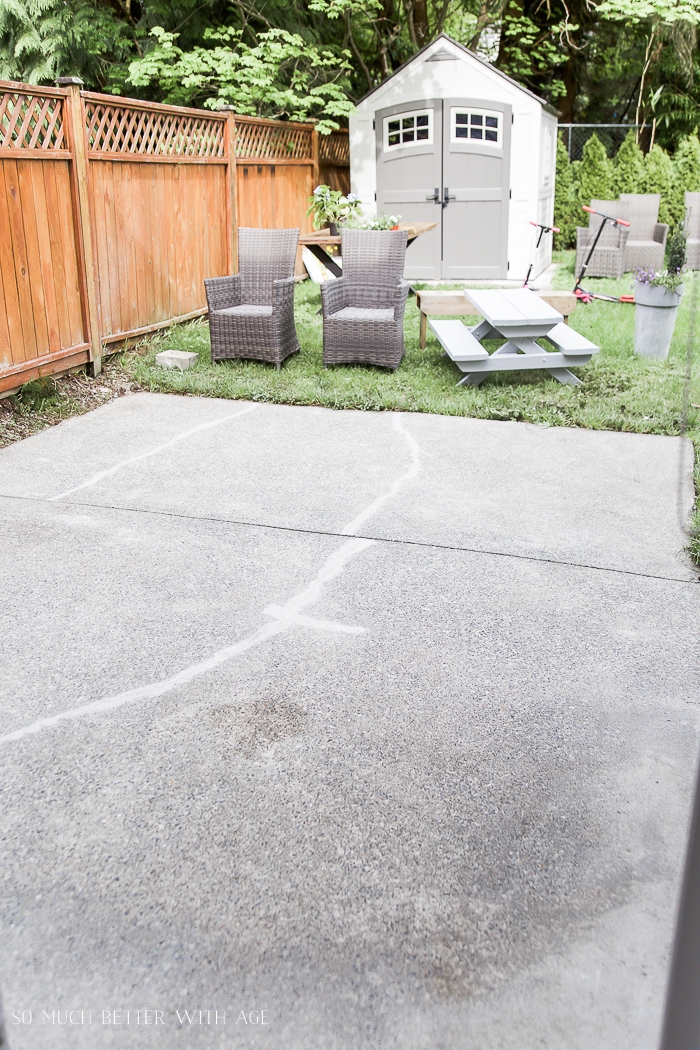
1. Use a power washer to wash off all the winter grime.

Power washing concrete patio in backyard.

Wow, what a difference just the power wash made!

And after the power wash, I got to work pulling all those overgrown weeds along the fence.

Concrete patio slab being power washed.

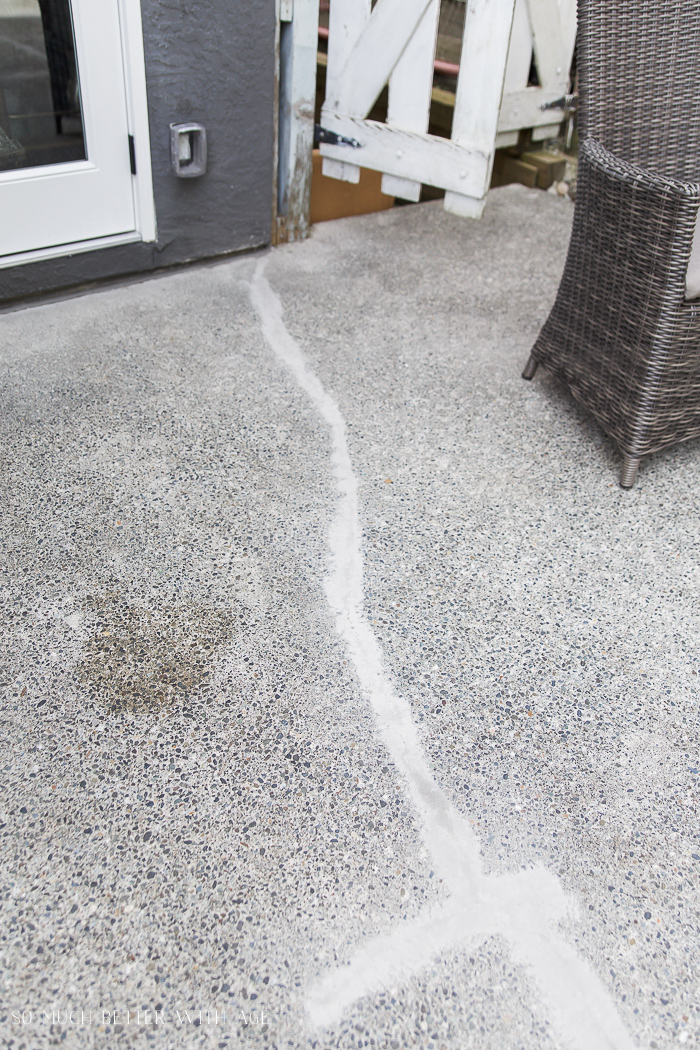
2. Once the patio is dry, seal the cracks with a concrete patching kit.

We used one like this premixed product.

Fill the large cracks with a putty knife or trowel and if you have gaps in between the slab and the house like I did, you’ll want to fill that too to make a nice, neat finish.

The concrete being patched with a wicker chair on it.
Clean concrete patio with furniture in grass in backyard.

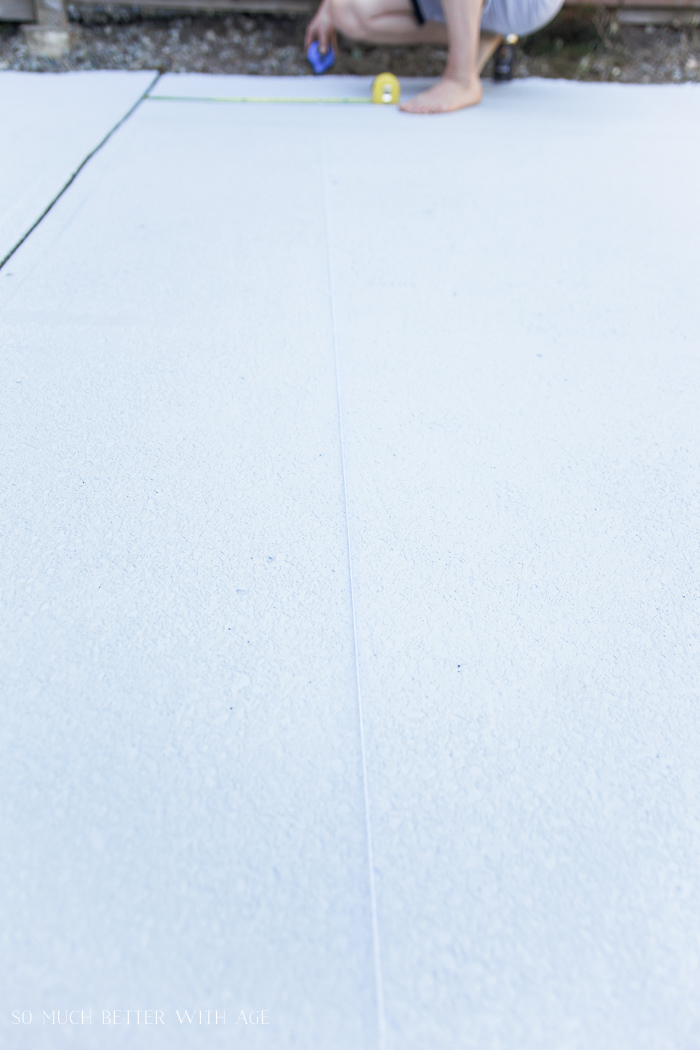
3. Once the concrete patching is completely dry, it’s time to prime the concrete slab.

Check the directions on the tub to see how long it takes to dry (usually 12-24 hours). After it’s completely dry, paint two coats of primer, drying well in between coats.

I used my favorite Zinsser 1-2-3 Primer with a grey tint.

A clean concrete slab ready to be painted.

4. Measure out the stripes.

I thought stripes in a horizontal pattern would be best since there was one large crack in the middle f the concrete slab.

That crack is an actual separation of the two poured slabs so we didn’t fill that one with the concrete patch mix. Instead I measured each section and divided the stripes equally from that middle crack.

The slab nearest the yard was 84 inches long so 21 inch wide stripes worked out perfectly.

I made sure to continue the 21 inch wide stripes on the slab closest to the front of the house starting from the middle crack again. There was one skinny stripe closest to the house which was better than a weirdo skinny stripe in the middle of the slab.

Using two tape measures, measure out 21 inches (or whatever your stripe width is) at the top and bottom and leave the tape measures there. Using a chalk line, snap the twine into place. It should leave a nice chalky line where you can lay your painter’s tape next to.

Using the measuring tape to paint the stripes.

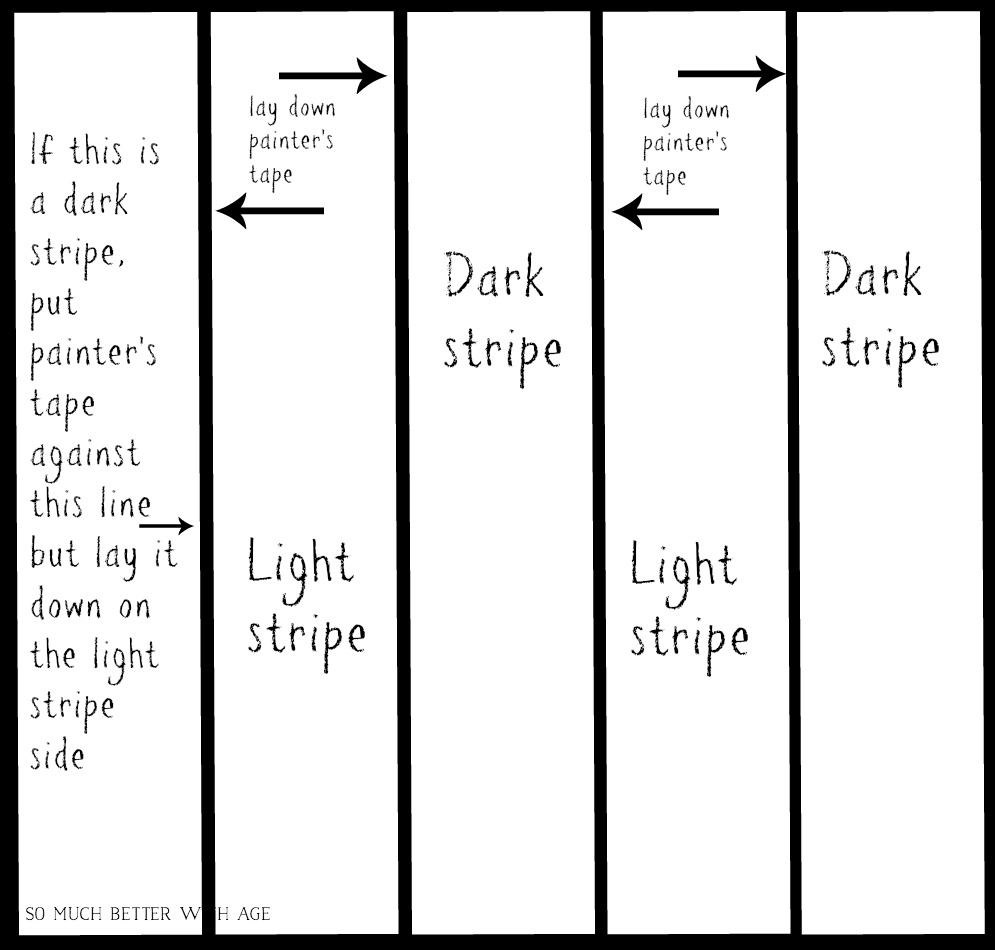
5. Decide which stripe color to paint first and lay down painter’s tape.

After we decided which stripes we were going to paint first (the darker ones), we put painter’s tape on along the OUTSIDE of the chalk lines to where we were painting.

Putting painter's tape on patio.

Here’s a graphic that might help you (or confuse you more).

It’s really not that confusing once you figure it out in your mind but I needed to make sure you didn’t mess this part up.

Laying down the tape in the correct way is essential to making perfect stripes!

A written layout of how the stripes sholud be painted.

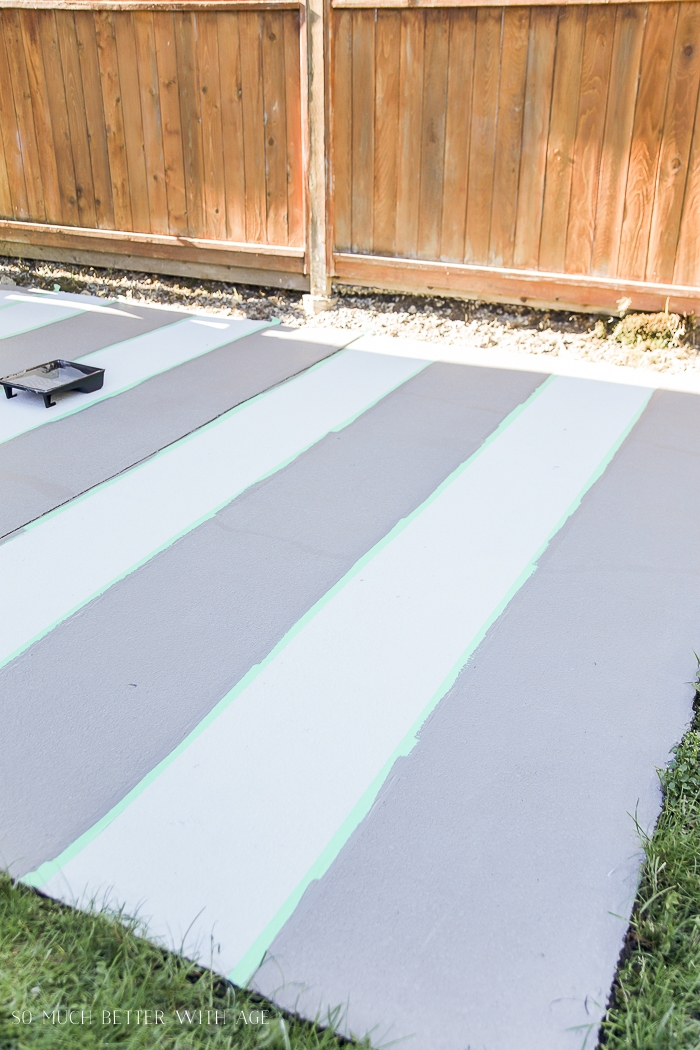
6. Paint first color stripe with two coats, drying in between coats.

Then we painted all the dark stripes and used a smaller foam brush to cut in close to the edges.

Painting along the grass was fun (not!).

We used Armour Coat Porch & Floor paint in Storm Sky (dark stripe) and Mushroom (light stripe) from Canadian Tire’s Premier Paints line. If you are not near a Canadian Tire, the slate grey and silver grey would be great alternating colors in this porch and patio paint here.

Grey stripes on concrete.

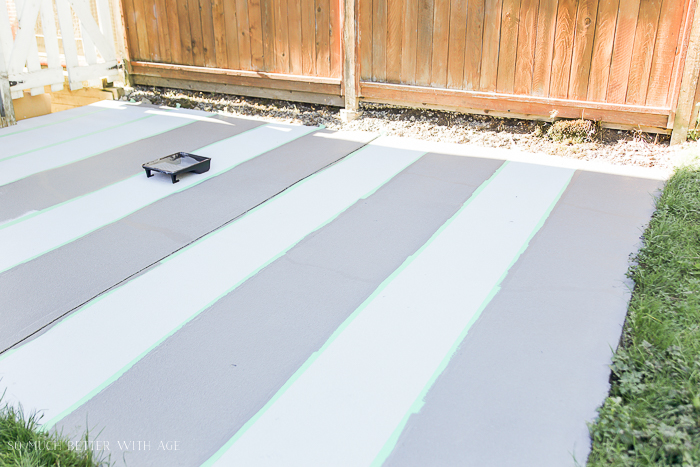
This light stripe you see is still the primer, we haven’t painted the lighter color yet.

Painting stripes on concrete with a wooden fence beside it.

7. Once dry, peel off painter’s tape and lay down new strips of painter’s tape right over the paint you just painted but lined up to the edge.

Again, it sounds confusing but you’ll get it once you start painting. You want to make sure there’s no gap in between the light and dark coloured paint.
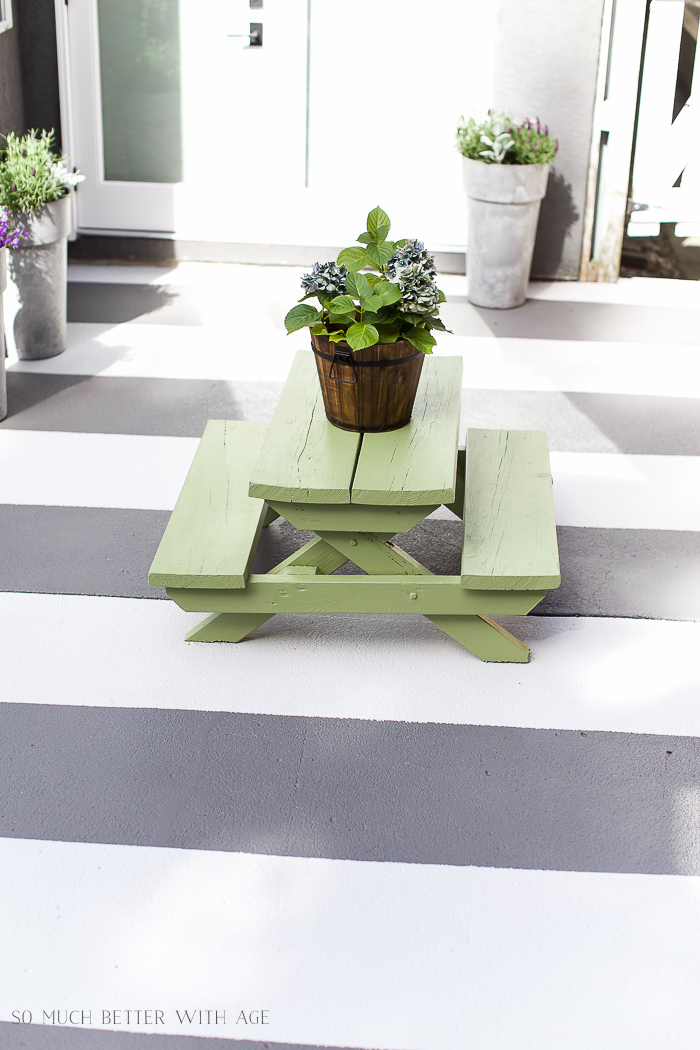
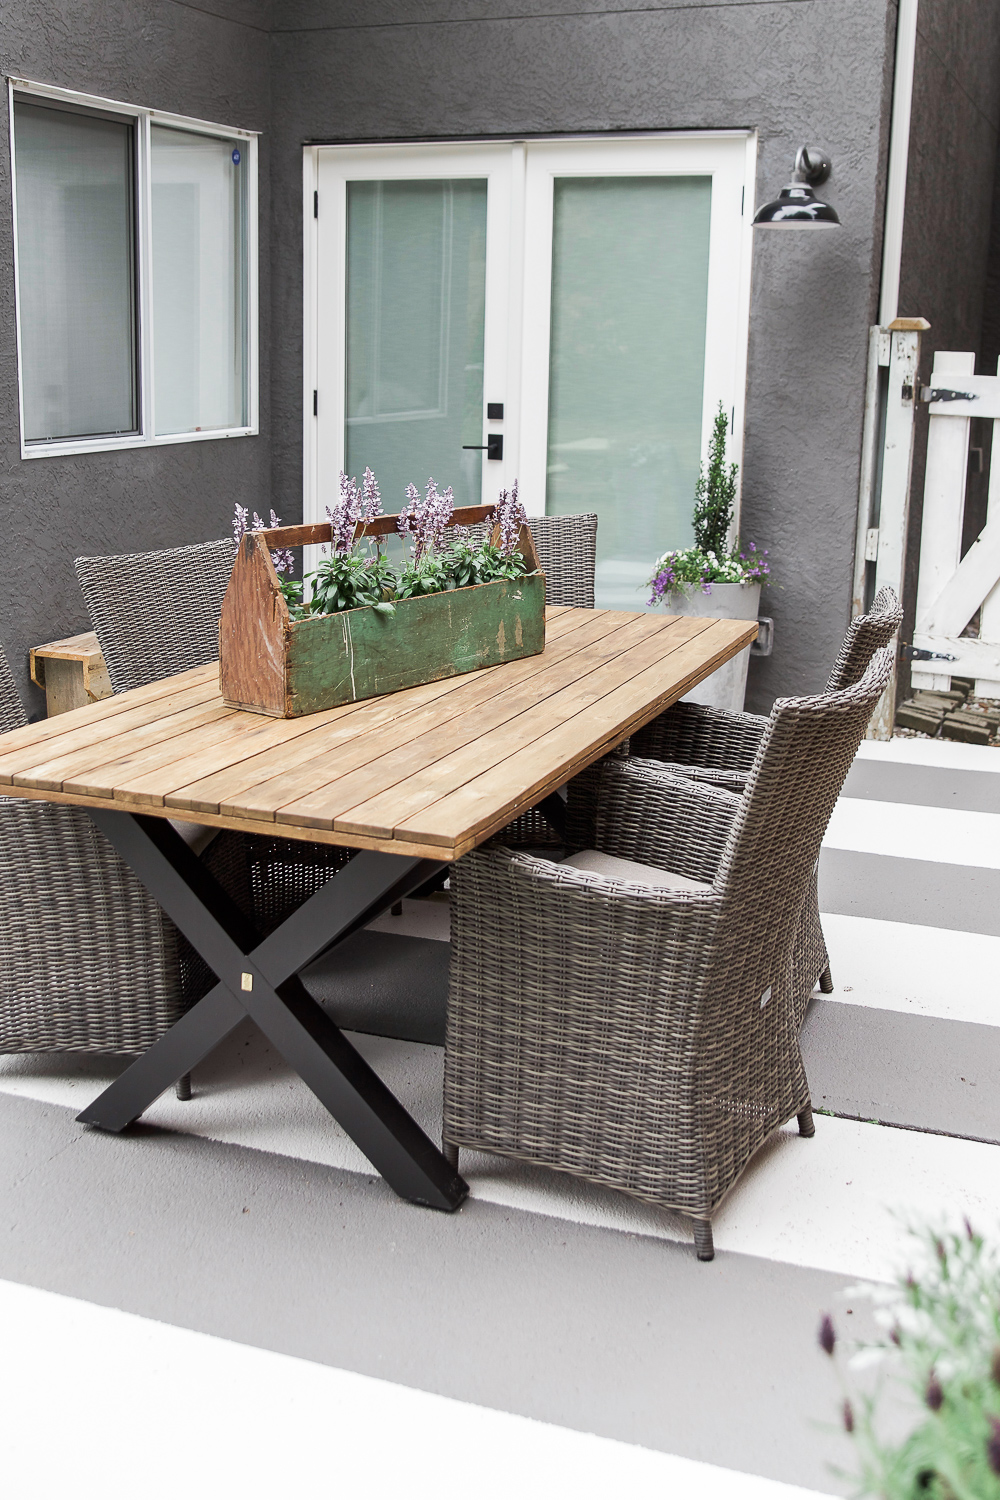
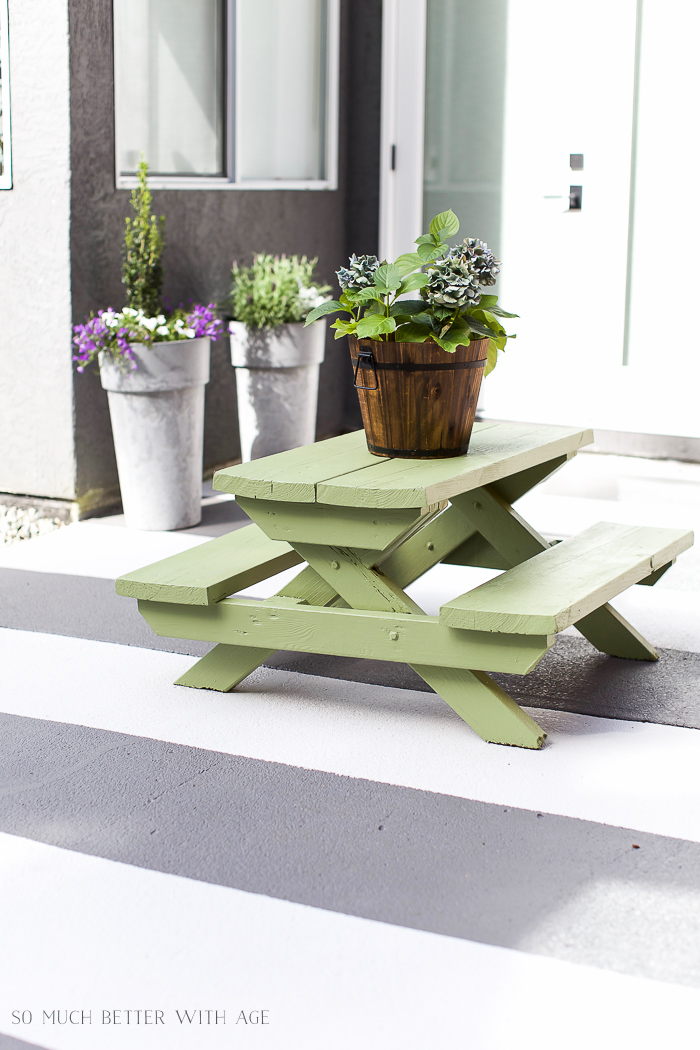
And you’re done!

Because we essentially put four coats of paint on the concrete slab, we think it’s good. The lighter color looks almost white even thought it’s a light grey and there’s already been scuffs and dark on it and it just washes away with a hose. No marks left so far!

A picnic table on the painted concrete with flowers in a wooden box.

I have two active kids that were running through the sprinkler and then ran all over the patio (and into the house!) with mud and grass on their feet. Thankfully the paint is very resistant and durable so there were no stains left behind after a quick hose down.

If anything, I find I’m just sweeping more than washing this slab.

There’s so many different colours you can choose to make your striped outdoor rug. You can definitely have some fun with it.

A kids picnic table with a bucket of flowers on it.

I hope this has inspired you to update your concrete patio slab and make it into an outdoor patio rug this summer.

Happy painting friends! You can see how well the patio has held up one year later (2019 update: still amazing!)

Check out my short video on how to paint stripes on concrete:

Make sure to pin it for later!

DIY Painted Concrete Slab graphic.

Click in Case You Missed:

Painted Concrete Patio One Year Later

Painted concrete patio one year later poster.

How to Paint Paver Bricks

How to paint paver bricks graphic.

More from my site

  • Clay Heart Dish for Valentine’s DayClay Heart Dish for Valentine’s Day
  • Home Style Saturdays No. 68 & Reader Survey Results!Home Style Saturdays No. 68 & Reader Survey Results!
  • DIY Evergreen Wreaths and Fabric Banners (Free Printables)DIY Evergreen Wreaths and Fabric Banners (Free Printables)
  • Happy Easter Sign – Free Printable + Video
  • How to Print Out Printables on Kraft Paper

Subscribe to get the latest

free goodies straight to your inbox

Previous Post: « Home Style Saturdays
Next Post: So Much Better With Age Business Set Collection from Bliss and Tell Branding Company »

Reader Interactions

Comments

  1. Shawnna Griffin says

    May 30, 2017 at 8:05 am

    hey girl- love the new look! so cool!

    Reply
    • Jamie says

      May 31, 2017 at 9:27 pm

      Thanks so much, Shawnna!
      Hugs, Jamie

      Reply
  2. Aaron says

    May 30, 2017 at 9:10 am

    This turned out awesome babe! And I really do love working on these projects with you.

    Reply
    • Jamie says

      May 31, 2017 at 9:28 pm

      So much fun!! I’m going to start making a list of future projects lol
      Love u xo

      Reply
  3. Janette Deans says

    May 30, 2017 at 9:43 am

    It’s looks brilliant and what a fab way to cover up an old ugly slab, going to sent this to my daughter so she can try…thanks for sharing Jamie…x

    Reply
    • Jamie says

      May 31, 2017 at 9:28 pm

      Thanks Janette! I’m so happy with the results. It’s amazing what paint can do.
      Hugs, Jamie

      Reply
  4. Shelly says

    May 30, 2017 at 10:22 am

    Wow, that looks great! It is so sweet that your boyfriend likes doing projects with you! It is a good idea to date someone that likes and is willing to help with your projects. There are some things that having a man to help is wonderful.
    Blessings

    Reply
    • Jamie says

      May 31, 2017 at 9:29 pm

      Thank you, Shelly. Yes, it’s so, so nice to have a partner that enjoys the same things and is helpful and supportive at the same time. I’m truly blessed.
      Hugs, Jamie

      Reply
  5. Jaime Costiglio says

    May 30, 2017 at 1:39 pm

    Jamie it’s stunning. A perfect example of how DIY can completely transform a space with a little elbow grease and thought. I’m getting ready to paint and stencil my kids bath wood floors so your post hits close to home.

    Reply
    • Jamie says

      May 31, 2017 at 9:30 pm

      Hi Jaime! So nice to hear from you. I know! Paint is amazing. I cannot wait to see your wood floor transformation. I’m sure it will be amazing as always 😉
      Hugs, Jamie

      Reply
  6. Sandra @ Maison De Jardin says

    May 31, 2017 at 9:34 am

    Great idea and it looks great !

    Reply
    • Jamie says

      May 31, 2017 at 9:30 pm

      Thanks so much, Sandra. I’m really enjoying it!
      Hugs, Jamie

      Reply
  7. Pamela says

    May 31, 2017 at 8:33 pm

    Wow , the patio rug painted on looks great!!! I totally agree with you it’s nice to have a partner who works along side of you and supports you in your business.

    Reply
    • Jamie says

      May 31, 2017 at 9:31 pm

      Thank you Pamela! Yes, it’s so very nice to have a partner that likes doing the same things as me and is so helpful and supportive.
      Hugs, Jamie

      Reply
  8. Ivory says

    June 3, 2017 at 3:48 pm

    Fabulous results. I love this and will do this to my back scoop. Thank you for sharing.

    Reply
    • Jamie says

      June 6, 2017 at 11:06 am

      Thanks so much, Ivory!
      Hugs, Jamie

      Reply
  9. Gentle Joy Homemaker says

    June 6, 2017 at 7:23 pm

    This looks wonderful… what a great idea! 🙂

    Reply
    • Jamie says

      June 6, 2017 at 9:57 pm

      Thanks so much!
      Hugs, Jamie

      Reply
  10. Emily says

    June 8, 2017 at 11:38 am

    Your patio looks fantastic! I really like the look of the stripes. Our patio (and deck) could use some love – I hadn’t thought about painting the patio until now!

    Reply
    • Jamie says

      July 8, 2017 at 9:34 pm

      Thanks Emily! The paint made such a huge difference.
      Hugs, Jamie

      Reply
  11. Jessi @ Practically Functional says

    June 16, 2017 at 12:30 pm

    This is so gorgeous Jamie! You guys did a fantastic job! I really love how it turned out; I wish we could do it to our patio, but it’s all bricks.

    I just wanted to let you know that you were featured as a Rockstar at last week’s Creativity Unleashed party! Voting is now open for MEGA Rockstar, so stop by and vote, and good luck! http://www.practicallyfunctional.com/creativity-unleashed-no-177-stencil-stop-giveaway/

    Reply
    • Jamie says

      July 8, 2017 at 9:35 pm

      Wow! What an honor. Thanks so much, Jessi.
      Hugs, Jamie

      Reply
  12. Danielle says

    April 12, 2018 at 7:43 pm

    How did the paint hold up after a year? This is beautiful! I would love to do this but I’m worried the paint would chip, etc..

    Reply
    • Jamie says

      April 25, 2018 at 8:39 pm

      Hi Danielle,
      It’s done amazing! I’m actually a bit surprised. I thought the white would be brown but it looks the same. There is some mossy spots all around it so we’re going to get a power washer soon and wash it off and I’m going to do a 1 year review post on it in May sometime. I’m so, so happy with my painted stripes.
      Hugs, Jamie

      Reply
  13. karins kottage says

    May 22, 2019 at 9:56 pm

    This looks amazing!! I am hoping to convince my hubby that we should do this to our front porch!
    Karin

    Reply
    • Jamie says

      July 10, 2019 at 10:22 pm

      Fingers crossed for you, Karin!
      Hugs, Jamie

      Reply

Leave a Reply Cancel reply

Your email address will not be published. Required fields are marked *

Recipe Rating


Primary Sidebar

  • Bloglovin
  • Facebook
  • Instagram
  • Pinterest
  • Twitter
  • YouTube

Search

Categories

My YouTube Videos

“somuchbetterwithage”

My Book, French Vintage Decor

“somuchbetterwithage”

Footer

Copyright

All images and text on this site are property of So Much Better With Age. Please contact [email protected] to ask for all photo requests. Please do not take my images without first obtaining written permission from me. All free printables offered are for personal use only. Pinning is always welcome and appreciated.

Copyright 2010-2018

Categories

Archives

Let’s Connect

  • Bloglovin
  • Facebook
  • Instagram
  • Pinterest
  • Twitter
  • YouTube

Looking for something?

House is clean, sun is shining, life is good. Hope House is clean, sun is shining, life is good. Hope you’re having a good Saturday💚 
.
.
.
.
#somuchbetterwithage #idcoathome #greigestyle #interiordesign #neutralhome #neutraldecor #lonnyliving #sodomino #whitekitchen #kitcheninspo #kitchengoals #mydecorlove #vancouverinfluencer #yvrinfluencer #canadiandesigner
Do you know what all these beautiful rooms have in Do you know what all these beautiful rooms have in common! They are all painted in the same paint color - White Dove OC-17 by @benjaminmoore. 💚 White is one of the hardest colors to pick for your home. It can pick up different surrounding colors which is why you can’t just Google a paint color and paint it on your walls. 💚 For my home, Simply White has worked the best. And White Dove is very similar. Swipe to see  some of these gorgeous rooms. 💚➡️ Check my blog post for tips on the best way to pick any paint colors for your home. Link is in stories and in highlights. 
.
.
.
.
#somuchbetterwithage #whitepaint #whitewallcolor #howidwell #howwedwell #idcoathome #greigestyle #homewithrue #howtopickpaintcolors #whitedovepaint #benjaminmoore #designblogger #diyblogger
Last year I totally organized my kitchen pantry an Last year I totally organized my kitchen pantry and tea/coffee/vitamin station and I’m happy to say it still looks the same! Having a spot for each item that you use regularly is so important. Start by checking out my blog post and reading all the tips I have on how to easily measure your cupboards and buy only the organization items that you need. Happy organizing! 💚➡️ Check stories or my highlights for the direct blog post link. .
.
.
.
#somuchbetterwithage #imsomartha #homeorganizer #homeorganization #homeorganizationtips #konmari #konmarimethod #kitchendesign #kitchenorganization #pantryorganization  #organizedhome #organizationhacks #organizingideas #designblogger #diyblogger #yvrinfluencer #vancouverblogger
I love green! The color and greenery. Although I k I love green! The color and greenery. Although I kill most plants so they don’t last long here. I know spring is far far away but this year is really dragging on so far 😂💚🌿🌱
.
.
.
.
#somuchbetterwithage #jungalowstyle #mydomaine #apartmenttherapy #ruedaily #myplantaesthetic #greigestyle #idcoathome #howidwell #howeedwell #simplystyleyourspace #neutraldecor #instahomedecor #homewithrue #designblogger #diyblogger #vancouverinfluencer #yvrinfluencer
Making your own pillow covers is easier than you t Making your own pillow covers is easier than you think! I love changing out my throw cushions on my couch and just being able to store pillow covers is far easier than the whole pillow. 💚 I can only sew straight lines so if I can sew these, you can! It’s an envelope pillow pattern so no zippers or buttons involved. Swipe to see the back of the pillow (chair photo) ➡️ Check stories for the direct blog link and I’ll save it in highlights in my profile. 
.
.
.
.
#somuchbetterwithage #pillowtutorial #sewingpattern #diyhomeproject #diyhomeprojects #diyhome #showemyourdiy #diysewing #diysewingpattern #diysewingproject #diysewing #envelopepillow #livingroominspo #yvrinfluencer #vancouverinfluencer #diyblogger #designblogger
Did you know how much of a difference trim, basebo Did you know how much of a difference trim, baseboards, doors, doorknobs and stair railings make? Like a huge difference! I’m talking all about it on my blog today. Lots of before and photos and details! 💚➡️ Check stories for the direct blog link and in a highlight in my profile. .
.
.
.
#somuchbetterwithage #baseboards #doortrim #doors #stairrailing #stairrailings #homerenovations #neutraldecor #neutralstyle #neutraldecorating #idcoathome #greigestyle #howidwell #howwedwell #ruedaily #interiordesign #interiordecorating #vancouverdesigner #yvrinfluencer #designblogger
Our basement is the perfect place to store seasona Our basement is the perfect place to store seasonal / holiday / decor items. I’ve had plenty of it over the years (too much!) as I’ve been blogging for 10 years! I went through all my Christmas decor this year before I packed it all away and got rid of so much! It felt so good. 💚 Next, I’ll do the same for the other holidays coming up (like Easter, I have 2 bins just for Easter!). Decluttering is easier when it’s done in stages. I’m also really into minimal seasonal decor lately so I think it will be much easier to say goodbye to the extra ‘stuff’. 💚➡️ What about you? Do you have lots of seasonal / holiday / decor items in your home? ➡️ Check out my blog posts on how to organize these items in IG stories. .
.
.
.
#somuchbetterwithage #organization #homeorganization #homedecluttering #imsomartha #idcoathome #homeorganizer #organizingtips #organizingideas #konmari #knomarimethod #yvrinfluencer #vancouverinfluencer
Sometimes it helps to look at your home in terms o Sometimes it helps to look at your home in terms of square footage not how the builder or the previous owner used it. My dining room was once a family room but with our small main floor already having a living room and a very small dining room, we thought this room would be better suited for a bigger dining room (swipe to see the before with the cabinet, the before before when we first bought it and the reno) 💚 It pays to look at your home differently especially during this pandemic. I think we’re all going to look at how we use our homes differently going forward. 💚➡️ What about you? Do you use a room for a different purpose than what it was intended for? .
.
.
.
#somuchbetterwithage #diningroomdecor #diningroomdesign #diningroomgoals #gooduseofspace #idcoathome #currentdesignsituation #simplystyleyourspace #neutraldecorstyles #neutraldecorating #mydecorlove #fromhousetohaven #vancouverinfluencer #yvrunfluencer #designblogger #diyblogger
Oh man, I am so sentimental. It really makes it ha Oh man, I am so sentimental. It really makes it hard to also be a person that is organized and hates clutter! I’m a sentimental purger! 😂 I feel most happy when everything has its place and I’ve kept a few meaningful things, but not too many. Just the right amount. It’s a very fine balance, isn’t it? Do you have a hard time with letting go of sentimental items? I have lots of tips of in my blog post ➡️ Check stories for the link and I’ll keep it in my organization highlight in my profile. Also, I share how to organize and store kids school memories and artwork with free printables!
.
.
.
.
#somuchbetterwithage #sentimental #declutteryourlife #decluttering #declutteringtips #konmari #konmarimethod #mariekondo #imsomartha #homeorganization #homeorganizationtips #organizationhacks #howtodeclutter
The mini transformation in our dining room is now The mini transformation in our dining room is now complete! I took some black frames from IKEA and using Rub n Buff made them look vintage gold. 💪🏻 I’ve used Rub n Buff many times before but never over black! (Thanks for the tip @jennasuedesign 💚) ➡️ Check stories or my profile for a link to my blog post. 
.
.
.
.
#somuchbetterwithage #diycrafts #howwehaven #howihaven #homewithrue #howwedwell #idcoathome #ssmakelifebeautiful #vintagedecor #showmeyourdiy #showemyourdiy #frenchvintage #cornerofmyhome #cottagehomedecor #frenchvintagestyle #yvrinfluencer #vancouverblogger #diyblogger #canadiandesigner

Copyright © 2021 · captivating theme by Restored 316
· Privacy Policy

We use cookies to ensure that we give you the best experience on our website. If you continue to use this site we will assume that you are happy with it.OkRead more