
Multi-Use Garage Makeover
I’ve changed my tiny one car garage to a storage/workspace that I love! Let me show you all the details.
Disclosure: This post is in partnership with Bed Bath & Beyond. All opinions here are my own.
This tiny one car garage has been a thorn in my side ever since I moved in nearly four years ago now. It’s juuuuust the right size for one vehicle and nothing else. The walls have become banged up every time someone got in and out of the car and you had to step over the recycling bin to get in the car. So annoying. But I LOVE parking in the garage!
I finally gave it up for more square footage and I’m so glad I finally made the switch.
I can’t wait to show you all the details!
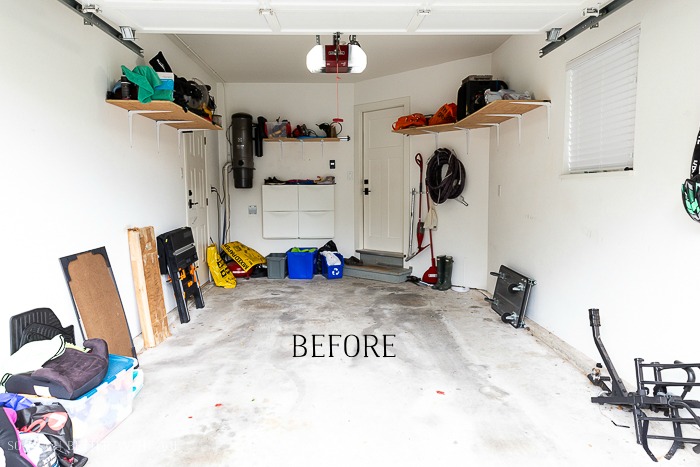
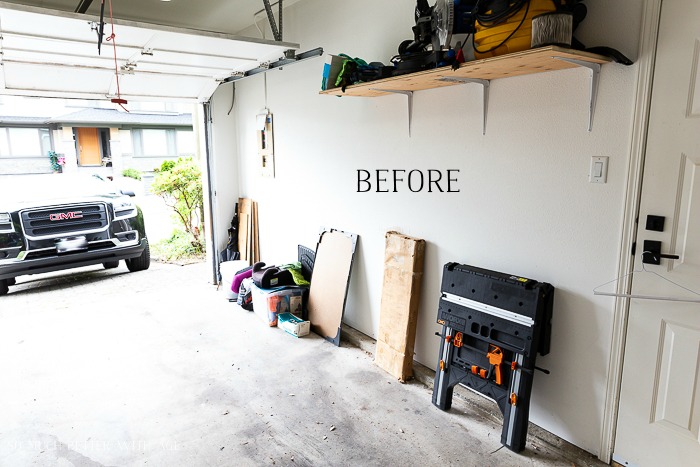
Here is what we started with. You can tell by the dirty tire marks where my SUV sat and how little space there were on either side.
Aaron made some open shelves for holding stuff high up but it really wasn’t much.
And here you can see how tight it is when my car is just about to pull in.
This door is where you enter to the foyer and the laundry room.

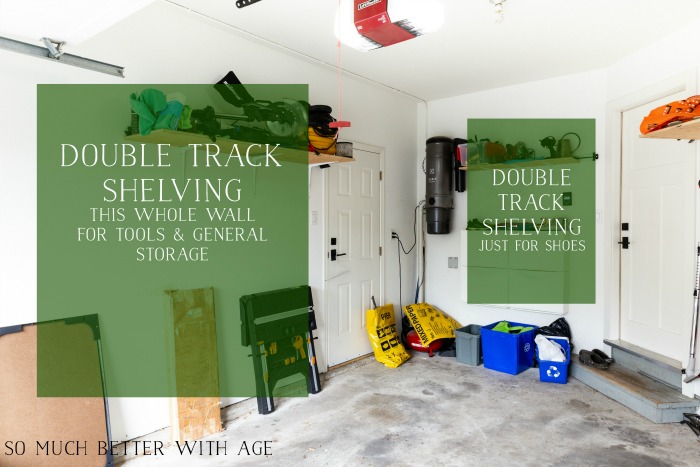
the plan
Our home has been lacking on some square footage so transforming the garage was the perfect solution but we needed it to function in a bunch of different ways.
1.
We needed a spot for storing the light boxes and boom mic for shooting videos. They currently get shuffled around inside the house and are big and bulky.
2.
We need a dedicated space to do DIY projects that wasn’t in between the dining room and kitchen. A workbench that fit under the sweet little window would be the best spot and one that had wheels that could be rolled out in the middle would be amazing for doing big projects or for filming projects.
3.
And we needed storage space for all the paints that were currently in the basement.

4.
On the other side of the garage, we wanted a whole row of storage for tools and accessories and just general storage.
5.
We wanted lots of storage for shoes.
We were asking for a lot, weren’t we?!
Disclosure: This post may contain affiliate links. Please read my disclosure policy.
installing the open shelving
Did you know that you can find everything you need to organize your garage at Bed Bath & Beyond? I had no idea until just awhile ago!
The best part about this garage makeover has got to be these Rubbermaid FastTrack Garage system shelving units and I was thrilled to find out that Bed Bath & Beyond carried them. They can hold weight up to 1750 lbs!!
I love that you do not need to install the vertical shelving racks into the studs. You first install the Rubbermaid FastTrack Rail (the horizontal black piece) into studs on the wall and there is room so you can slide them over and centre your shelving where you like.

The Upright Track Extension (the vertical metal piece) just slides over the black bar. By hanging them like this, it distributes the weight and because it’s securely fastened into the studs but also exactly where you want them on the wall, they can hold SO MUCH weight!
After that, the metal brackets glide into the Upright Track easily and then you lay the shelf over top.

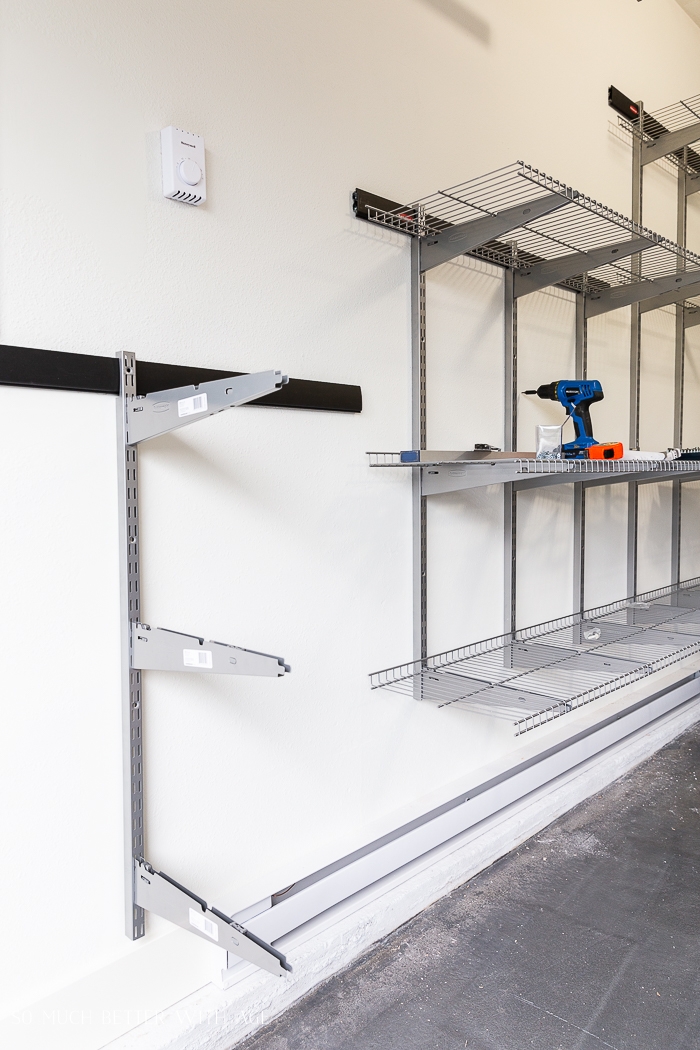
The other thing we loved about this system is that you can lay a piece of wooden board over the shelves and there’s a spot where you can drill into the brackets. They have seriously thought of everything.
There are also accessories galore where you can hang just about anything from gardening tools to bikes from them, so brilliant right?!

Now it’s time to fill them!

Garage reveal
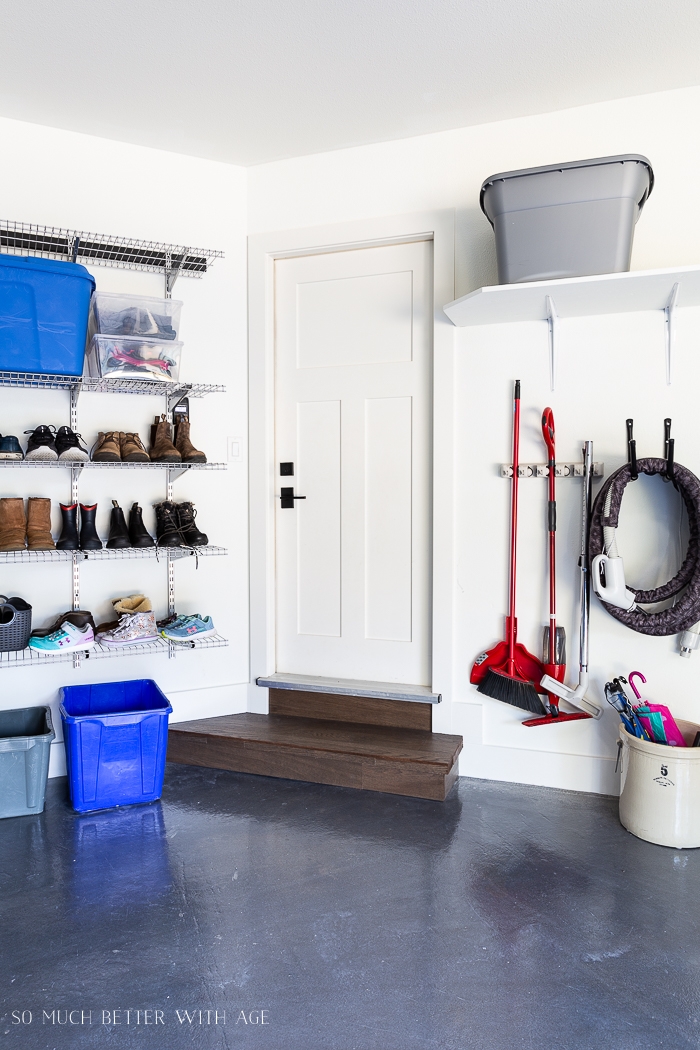
Here is our after!
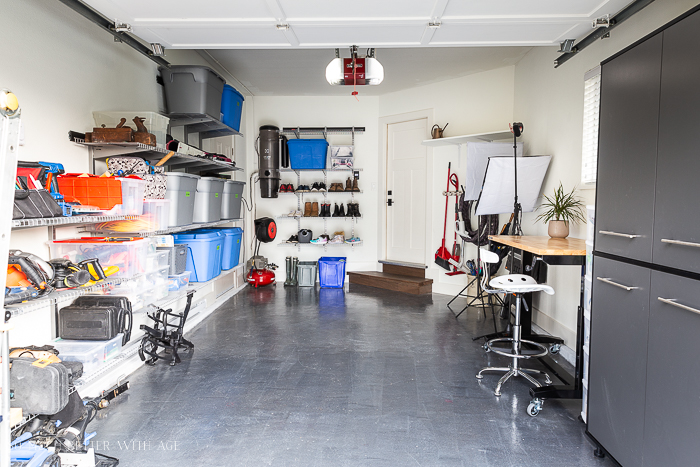
All of our tools are now in one place and easily accessible!

We adjusted the heights of the shelving until we found the perfect combination. We weren’t even planning on bringing up our ski stuff but we actually had room for our skis and two bins of ski accessories!

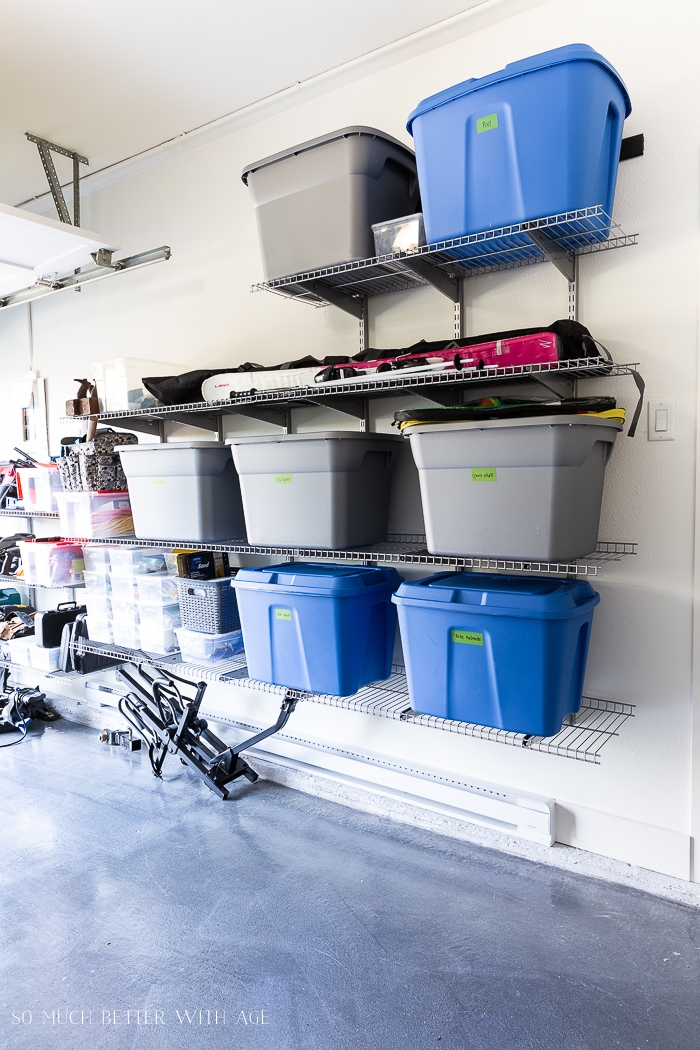
I labelled each big bin with some painter’s tape for easy access (the labels from my label maker usually fall off these bins).

We also organized all of our tools in plastic shoe bins and labelled each one. I have to buy one more to make it even 😉

I kept telling Aaron that there’s no way our shoes are all going to fit here! To be fair, Aaron and I keep our good shoes in our master bedroom but these are the majority of our everyday shoes and all of the kids’ shoes fit no problem.
At the top are two clear bins with scarves and mitts.
One for the parents and one for the kids.
Did you notice that I still have space at the very top? I couldn’t even fill all of the shelves!

I love my new broom rack. It’s so easy to use without any pulling or pushing. There’s a ball inside that simply releases when you take it off.

There’s now plenty of room for my light boxes and boom mic and our folding work bench.
This new drafting stool is the perfect compliment for doing DIY projects!

I was MOST excited about bringing up all my paints from the basement and they fit perfectly in this garage storage cabinet.
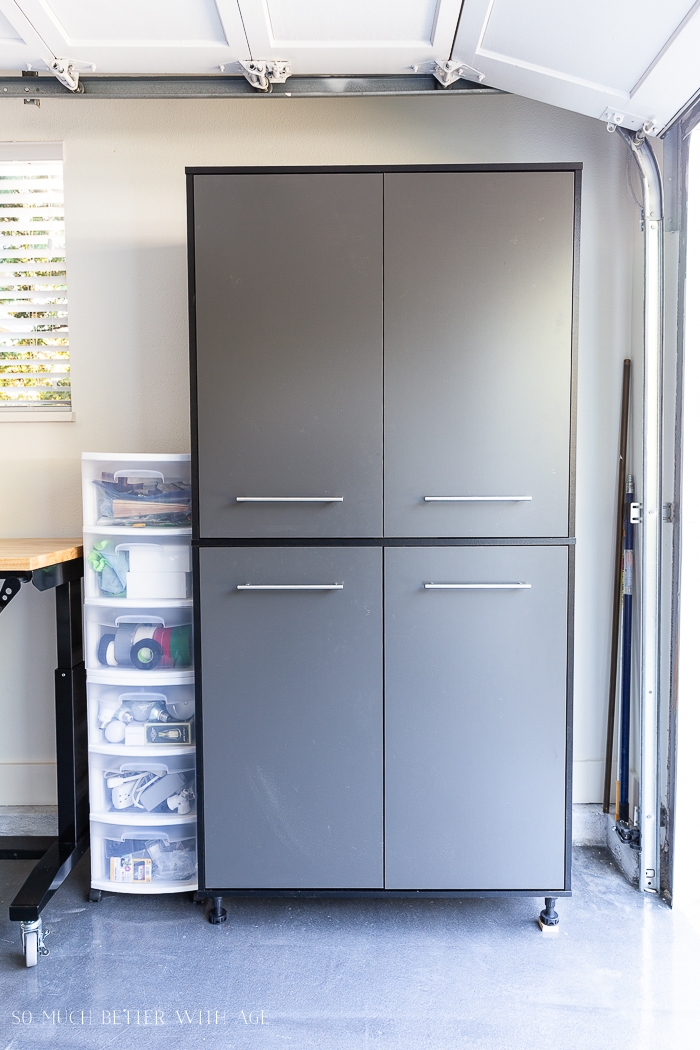
I’ve never been so excited to organize paints before!

I organized more clear bins at the top for paint accessories, waxes, powders and painter’s tape.

Paint brushes, stir sticks and gloves are all ready to grab!

The bottom holds big cans of paint along with spray paint, wallpaper accessories, stain and small paint trays and rollers.

I can’t believe how much we fit in here (and how much we were able to bring up from our cramped basement!) and there is still a ton of room!

I’ll be sharing with you soon the details of the many steps we took to make the space warm, the flooring product we used and anything else that I may have missed!
sources:
I’ll list all the Rubbermaid FastTrack products we used along with the other items we received from Bed Bath & Beyond.
Rubbermaid FastTrack Garage Upright Track Extension 47.5 inch x 12
Rubbermaid FastTrack Garage Upright Track Extension 25 inch x 6
Rubbermaid FastTrack Garage 16 inch bracket with clips x 45
Rubbermaid FastTrack Garage 48×16 inch wire shelves x 15
Rubbermaid FastTrack Rail black x 4
Stalwart wall mounted tool holder
South Shore Karbon storage cabinet in black/charcoal
Flash Furniture Drafting Stool with tractor seat in white
Make sure to pin it for later!


click in case you missed:


I can’t remember where you live, but if it freezes there, your paints
May not make it through the winter. It will freeze. The label will tell you how to store it.
Good catch Shelly, but if you look carefully you can see we installed a space heater in the garage, and she mentions at the end that she will share more on how we made it warm. So don’t you worry, we have it covered! Its nice and cozy all winter long!
Ah, I somehow missed that part!😀 I have lost a lot of paint, spray paint and polyurethane in the past from it freezing.
Sounds like you got it covered.
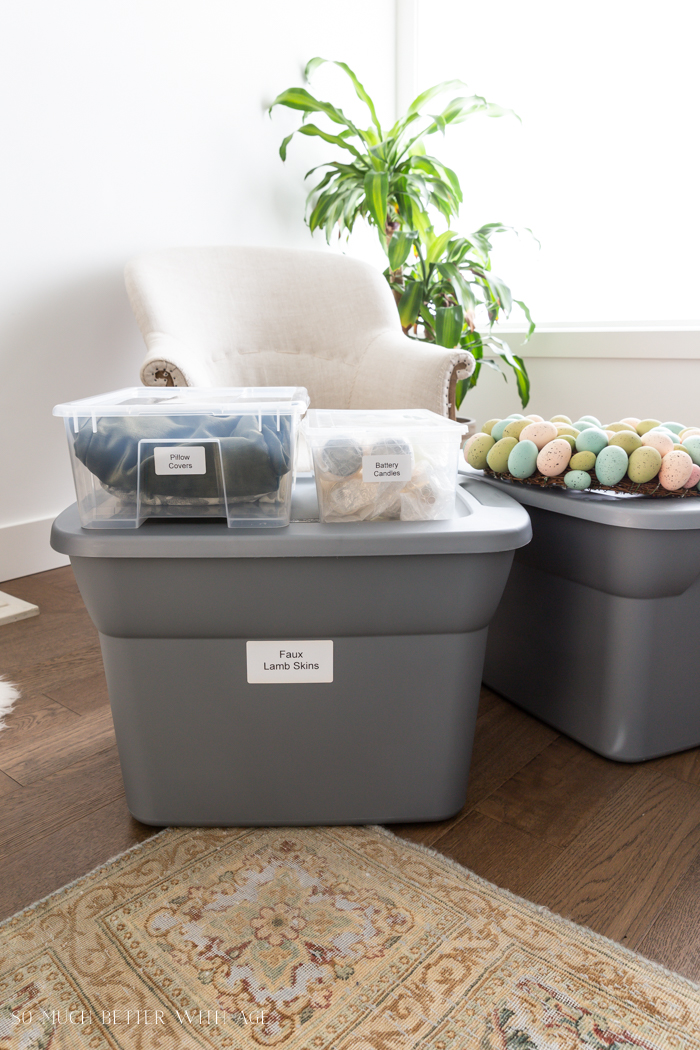
I envy you the garage space! I am retired into a one-bedroom apartment and have rented two storage units but so often comment that I’d love to have a studio where I could keep all of my faux florals, seasonal décor and other craft materials. Your space looks great!
Teddee, I know what that’s like! It’s hard when we have hobbies! I made a craft cabinet in my previous house. Thank you for your sweet comment.
Hugs, Jamie
So far it looks great. What will you do for lighting and electrical hookups? I didn’t see outlets or lighting, Doing a great job. Care to come do mine?
Good eye Carly!
There are only 4 outlets total in the garage and one is up on the ceiling for the garage door opener and another is a new one I had wired in up high in the corner by the garage door for a future outdoor security camera (and maybe Christmas lights :)). The other two outlets are on the left and right side of the back of the garage. The left side is used for the built in vac and the air compressor so that leaves ONE outlet for everything else! I will be building a custom tool and hardware organizer around the window and above the bench that will include an LED tube light as well as a power bar that will stay plugged in to that socket near by. We will have an easy place to plug the light boxes in for filming and direct lighting on to the workbench.
Thanks for the comment and feedback! And, I would love to come do yours but I’m afraid Jamie has me pretty busy here!
I’m so thrilled with the way this turned out! I can’t wait to customize the work space and bench area with more tool and hardware organization.
Love you wife!
Aww thanks for making this space a dream come true, babe!
What did you put on the floor to brighten it up?
We will share that with you very soon! Stay tuned!!
Jamie and Aaron you did a fabulous job 👏🏻Now you have a place for everything!
Thanks so much, Judy!
Hugs, Jamie
This looks great. So much more organized and functional. I like how you’ve kept everything up off the floor too. It looks spacious.
Thanks so much, Jen! I love everything off the ground too!
Hugs, Jamie
What is the product on the floor?
stay tuned for a new post on that amazing floor product!
Looks fabulous Jamie! and organized garage is such a dream….
Thanks so much, Krista!
Hugs, Jamie
It looks amazing, Jamie!! Beautifully organized, and so functional too! You guys have to be loving it. Thanks so much for the inspiration!
~Abby =)
Thanks Abby! You inspired me with your amazing garage makeover!
Hugs, Jamie
Wow, Jamie! Such a hugely useful and functional space now!! Can you come do mine, please? 😉
Anytime Jenna!!
Thanks Jenna! Love all the extra room now!
Hugs, Jamie
Your garage looks so great!!! Can you come do mine next?! ❤️
You got it April!
It’s amazing, Jamie! I can’t believe you fit so much into that space. Well done!!
Thanks so much, Rachel! We love our garage now!