
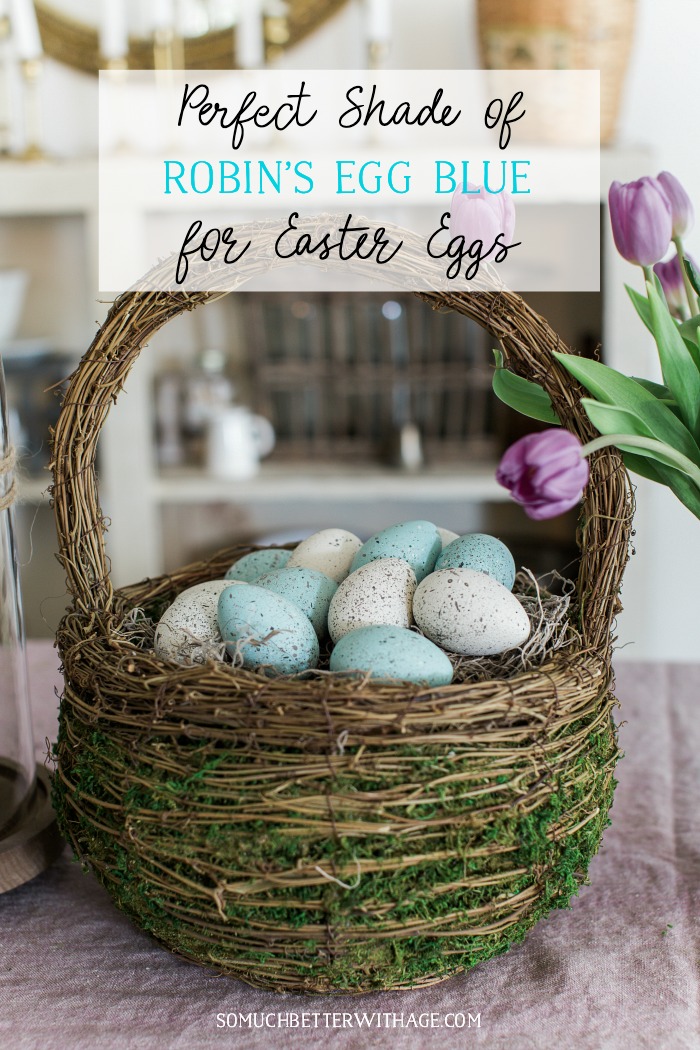
The Perfect Shade of Robin’s Egg Blue for Easter Eggs + Video
Today I’m showing you how to get the perfect shade of robin’s egg blue for Easter eggs.
Who knew that trying to find the perfect shade of robin’s egg blue was going to be so difficult? So many paints claim to be the perfect robin’s egg blue color but turn out to be more turquoise or aqua than robin’s eggs blue. I have tried many different brands but I think the thing that helped the most was this simple trick that I discovered.
This post contains affiliate links for your shopping convenience. Click to read my full disclosure policy.
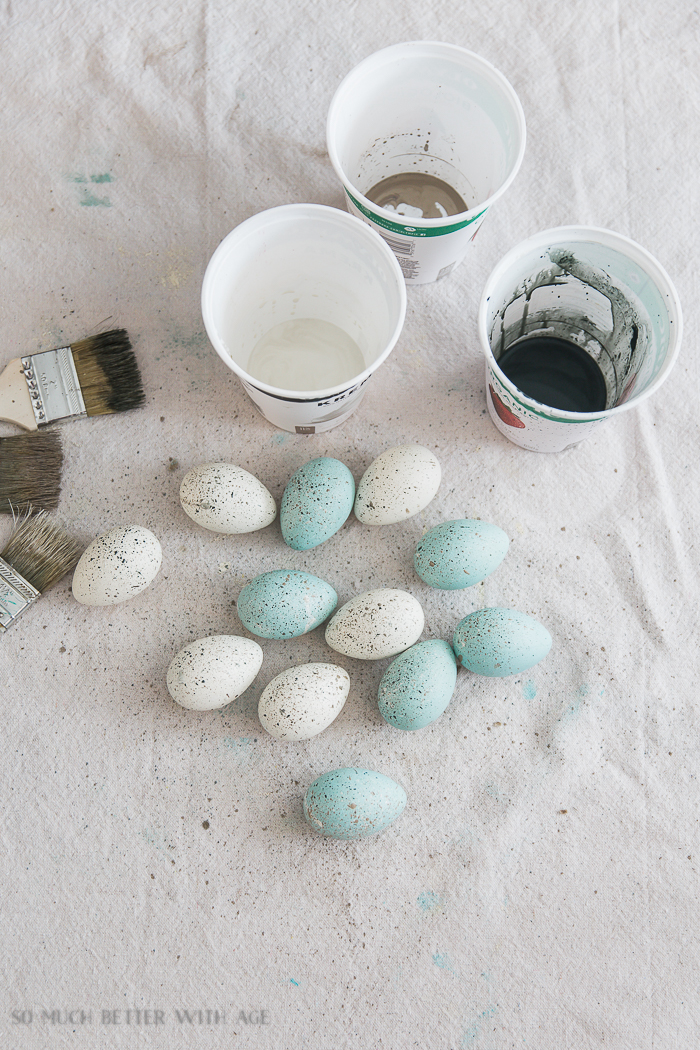
Supplies:
- paintbrush for painting eggs (sponge brush works great)
- 3 chip brushes (for splattering)
- craft eggs
- ‘Robin egg’s blue’ from craft store (I picked this small tube up from Michael’s or Fusion Mineral Paint – Little Teapot)
- Fusion Mineral Paint- Inglenook
- creamy-white paint (I used FMP-Limestone)
- light brown paint (I used FMP-Algonquin)
- dark brown or black paint
- paper plate
- 3 plastic containers (yogurt containers are perfect!)
- disposable gloves, optional if you don’t want messy hands

Directions:
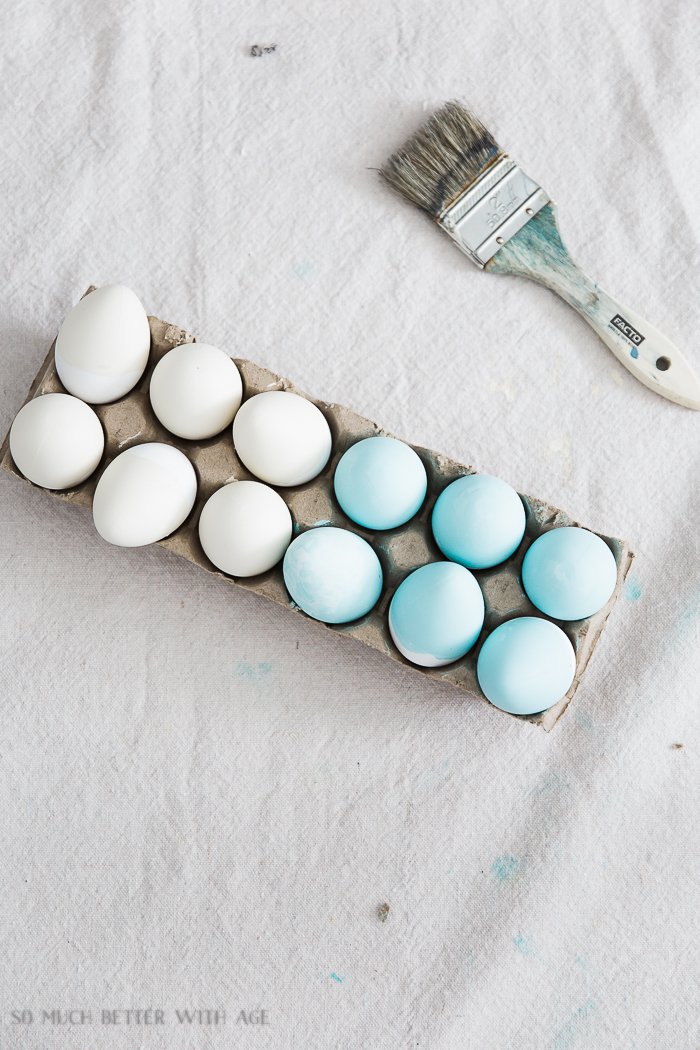
I painted half the eggs blue and half the eggs creamy-white. As soon as I painted the eggs with the robin’s egg blue paint, I knew they weren’t the right color so I played around until I found the perfect mix!
- Paint the eggs with a robin’s egg blue paint.
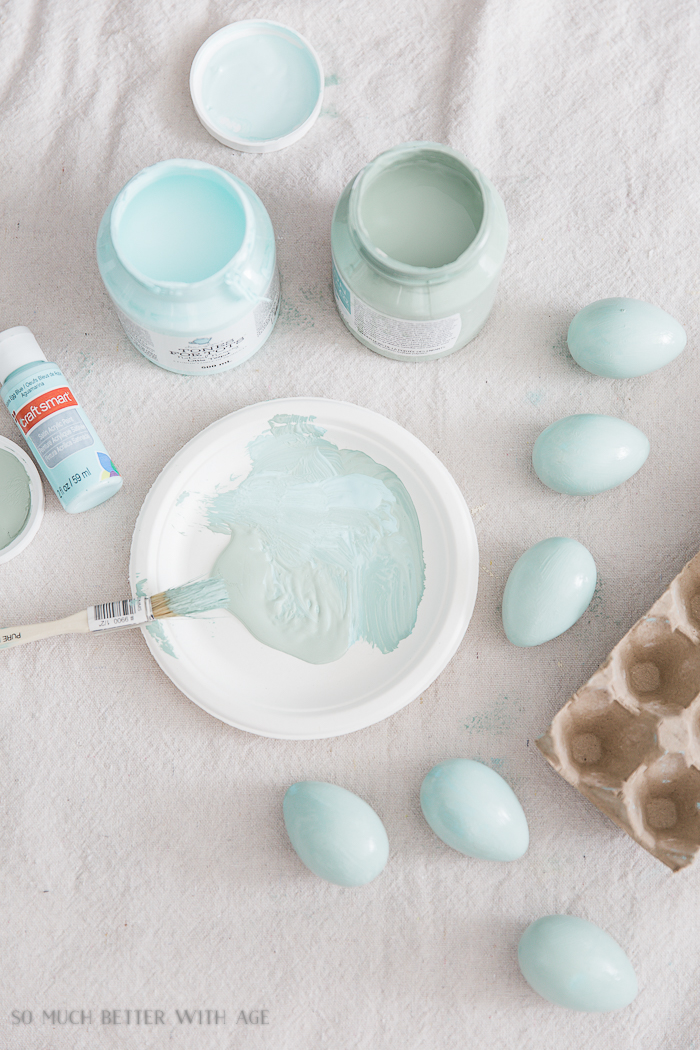
2. I used my favorite Inglenook from Fusion Mineral Paint and didn’t mix it in completely. Put a little puddle of paint on either side of a paper plate then mix it a bit in the middle. Paint the slightly mixed color all over the egg. The two different colours not entirely mixed together give the egg dimension and also give it the perfect shade of robin’s egg blue. Paint the eggs a few times in different directions and let dry between coats.
3. Put about about a teaspoon of light brown paint in a plastic container along with the same amount of water (1:1 ratio). Dip the chip brush into the paint mixture and run one of your fingers along the edges of the chip brush to splatter the paint all over the eggs. Wait to dry (should only be about 10 minutes) then turn the eggs over and repeat.
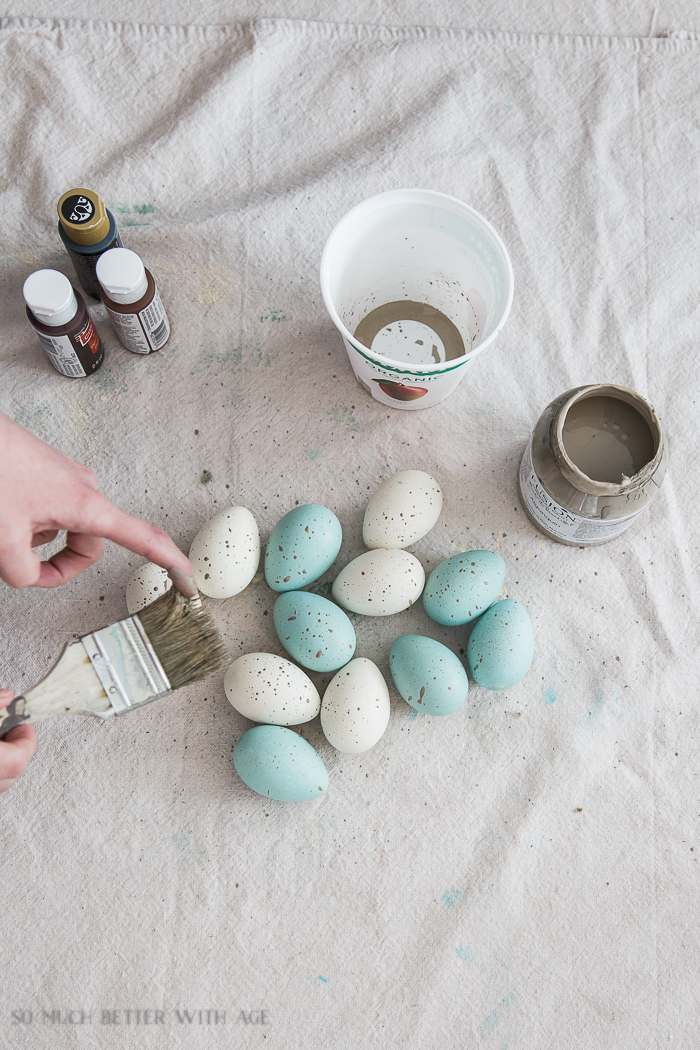
4. Repeat the same process using the dark brown/black paint and the creamy-white paint, drying a bit in between and making sure to get all around the eggs.
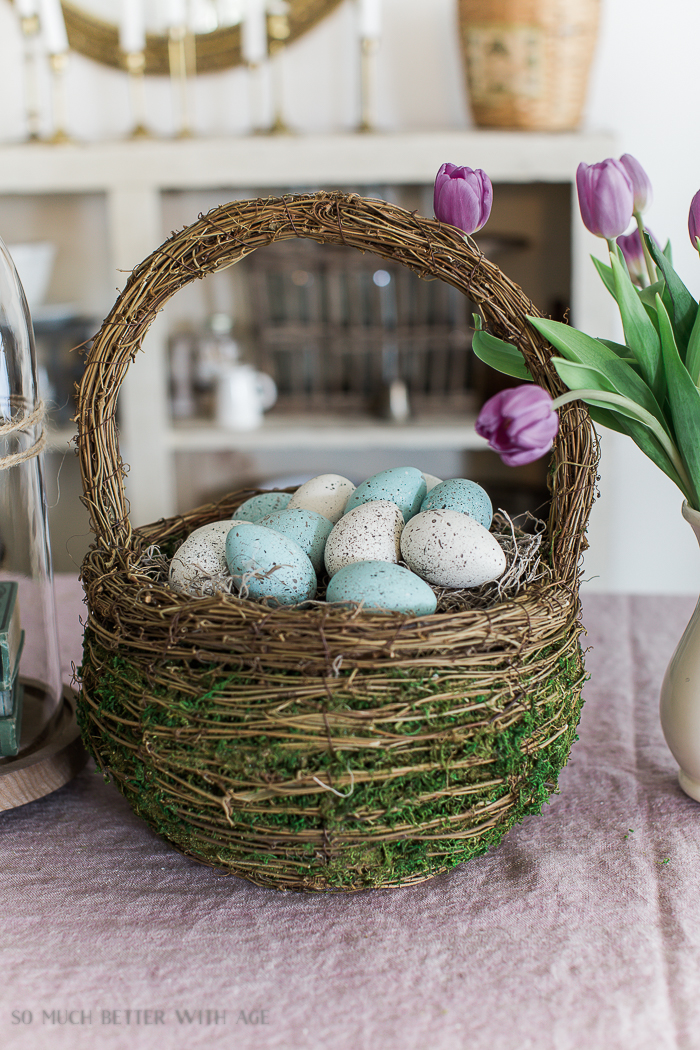
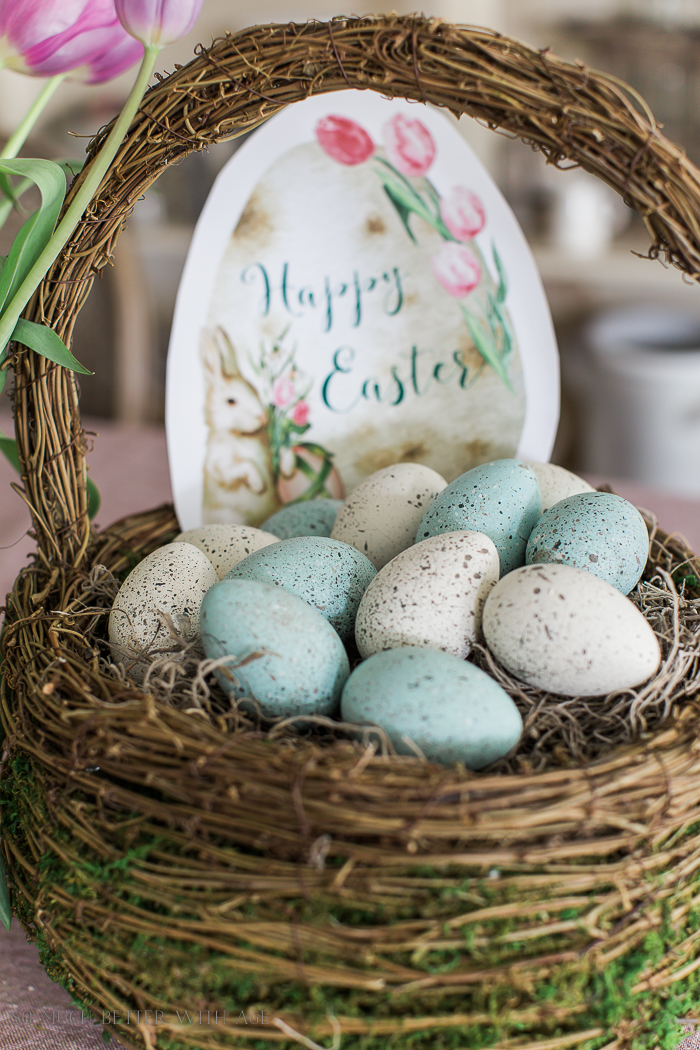
Your eggs are now the perfect shade of robin’s egg blue and they look great with some cream eggs added to a display for Easter.
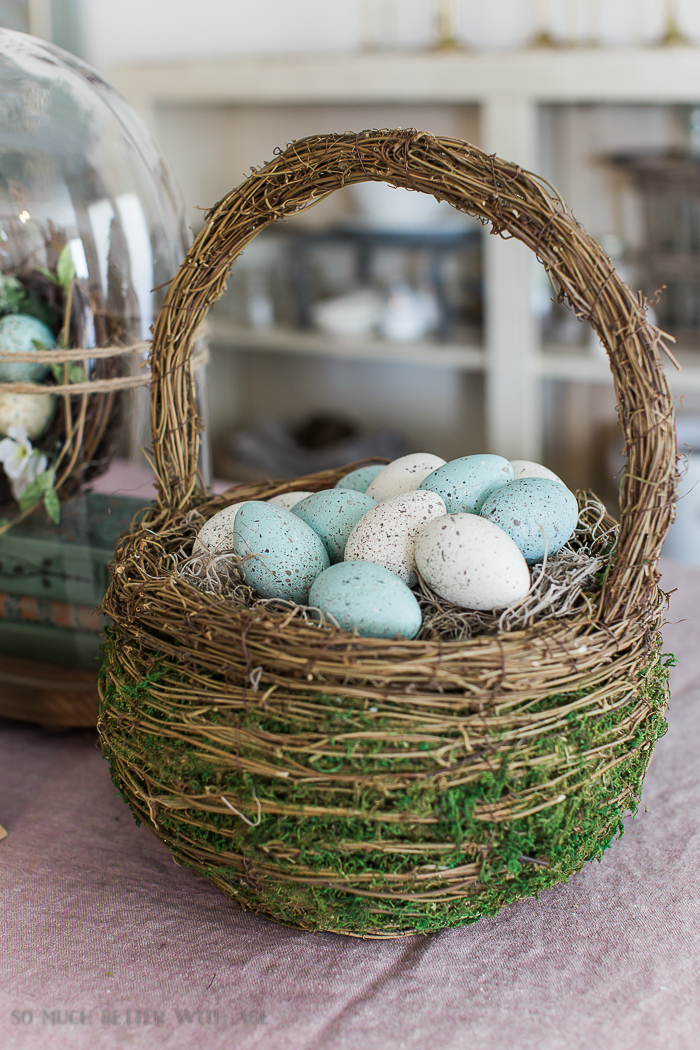
The best part about using craft eggs is that you get to use them every year! Add them to an Easter basket for a beautiful display.
Let me know if you try this technique for getting the perfect shade of robin’s egg blue for your Easter eggs this year!
CHECK OUT THIS SHORT VIDEO ON 12 CREATIVE EASTER IDEAS:
Make sure to pin it for later!

Click in Case You Missed:

DIY Vintage ‘Happy Easter’ Eggs


Jamie, these eggs are so cute, and yes, the perfect colour. I also love your mossy basket! Thanks for sharing and best wishes, Julie
Thanks so much, Julie!
Hugs, Jamie
Jamie the eggs look great. I remember years ago I did the splatter technique and it is amazing the difference it makes for certain projects. I agree about the robins egg blue.
Cindy
Thanks Cindy! That splatter technique is fun, isn’t it?
Hugs, Jamie
Jamie,
Great robin’s egg blue color mix of two colors… They look fantastic in the Easter basket.
Judith
Thanks so much, Judith!
Hugs, Jamie
These are the perfect shade of robin’s egg blue!! They look fantastic! Thanks for linking up with Thursday Favorite Things, we love you joining us! I’ll be featuring you this week!
Thanks so much, Angelina!
Hugs, Jamie
Jamie I LOVE these!!! So pretty and the perfect color! And to think I’ve always bought mine – how dumb am I?! Totally going to try this!
Sheila
xo
haha, thanks Sheila!
Hugs, Jamie
wonderful blog, esp. the Easter eggs; also, FYI a tooth brush works nicely when speckling an egg; less cumbersome than a big paint brush & less expesive, too.
Thanks Susan! And that’s a great idea 😉
Hugs, Jamie