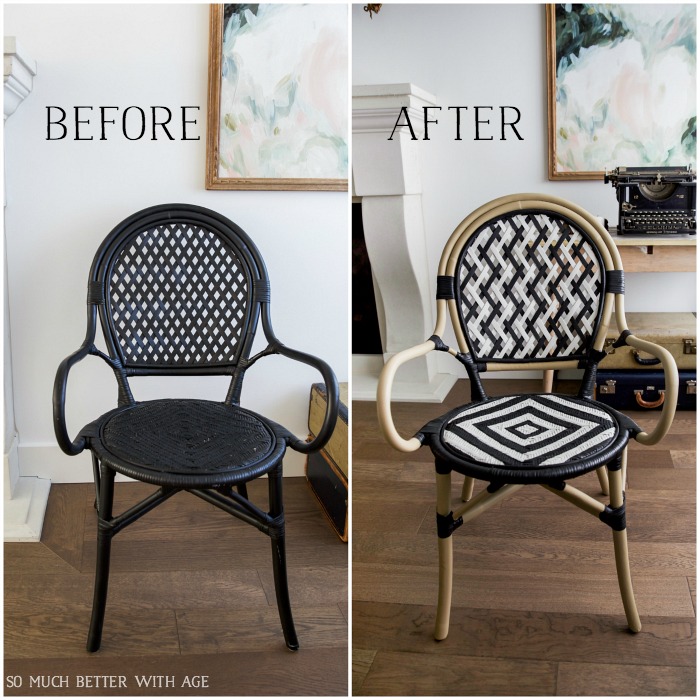
DIY French Bistro Chair
DIY a French bistro chair tutorial for an easy transformation without breaking the bank.
Who knew that French bistro chairs were a hot item right now? Not only for French decorating bloggers like myself but all types of design styles.
I thought about getting some French bistro stools for my kitchen but I didn’t want it to cut the line of sight around the island. I’ve loved them for years and knew a friend that brought some back from France 20 years ago for her French inspired kitchen.
They can be quite pricey so I thought this might be a good post for someone wanting a bistro chair but finding a cheaper way of getting the same look.
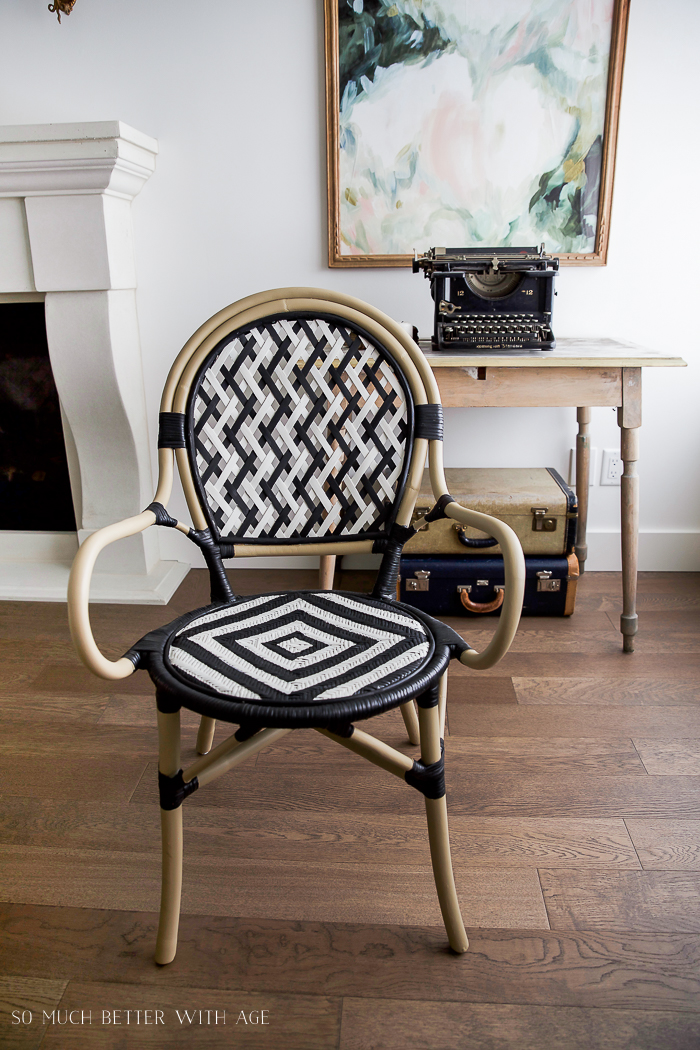
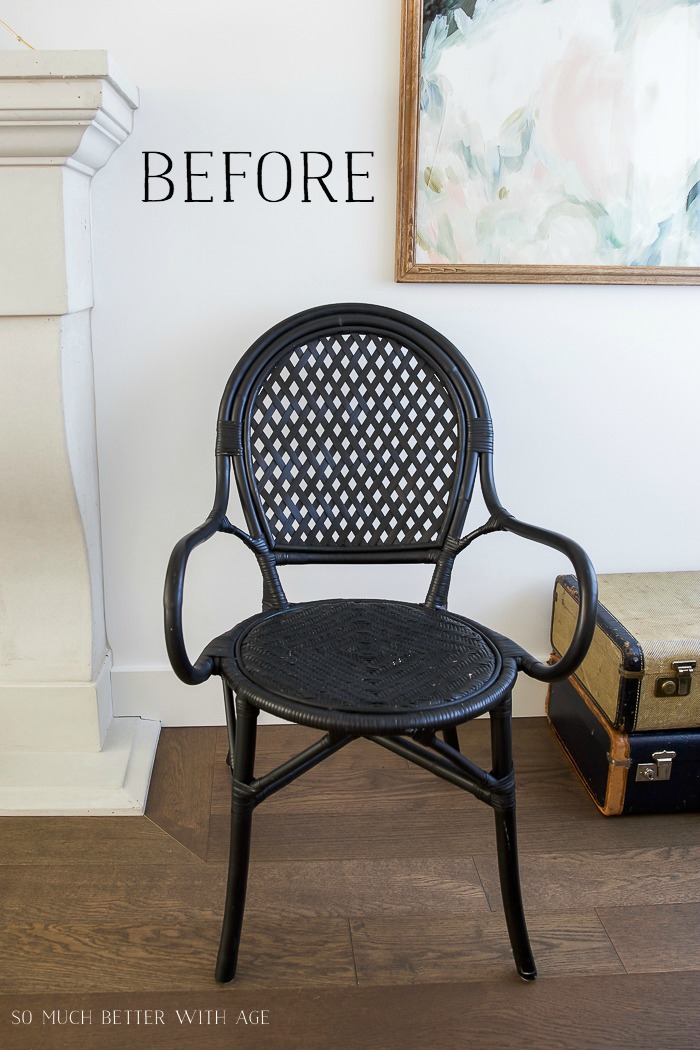
I had this chair for a couple of years and was about to give it away when I why I bought it in the first place, it looks like a French bistro chair without contrasting colours!
Let me show you how I took a plain black chair (and where you can buy it!) and paint it to look identical to a French bistro chair.
And the best part is I’ve kept this chair black and white so you don’t have to paint the black parts!
Disclosure: I received compensation to complete this project using FrogTape painter’s tape. All opinions and ideas are my own. To confirm, you can read the little story I share at the end of this post.
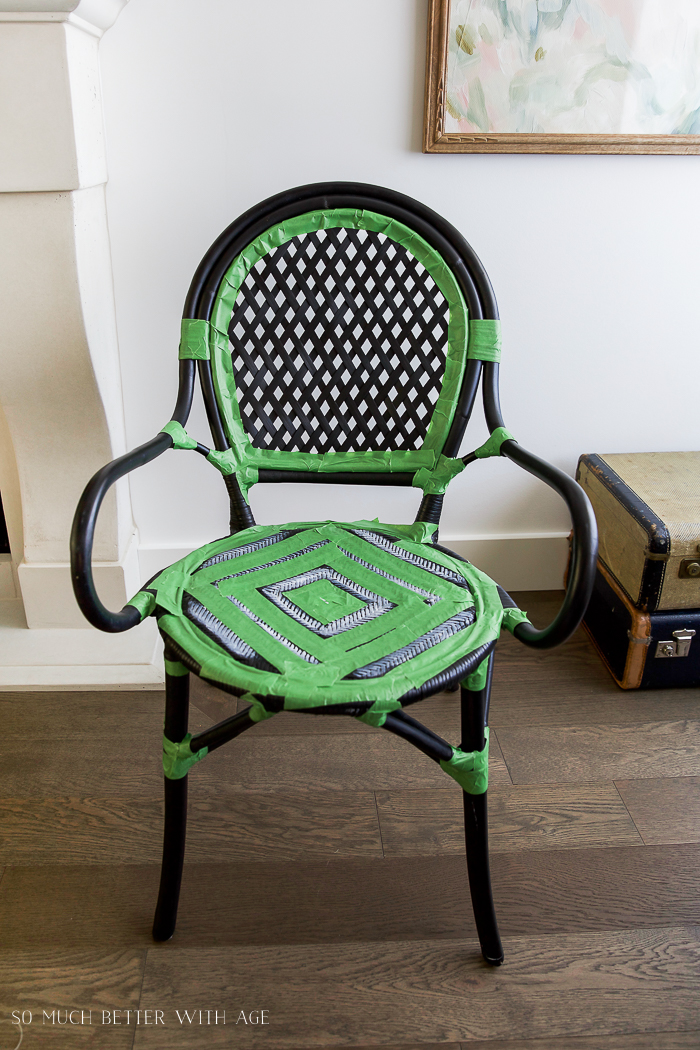
Here is the black chair I had – the Almsta rattan chair from Ikea. It was just begging to be a French bistro chair.

Supplies:
- Frog Tape Painter’s Tape – 1.41 in width
- Frog Tape Painter’s Tape – .94 in width
- Black Almsta chair from Ikea or similar
- Primer (I love Zinsser 1-2-3)
- 1/2 beige paint mixed with 1/2 mustard colour paint for rattan color (I used 1/2 Algonquin and 1/2 Mustard mixed together)
- Creamy white paint (I used Raw Silk)
- Black acryclic craft paint
- Polyurethane spray, satin or matte finish
- Angled craft brushes
- Flat rounded brushes
Directions:
- Tape all the parts of the rattan that will remain black with the 1.41 inch FrogTape. You won’t need to paint the parts you cover up, only touch up afterwards. Find the pattern in the rattan seat (I did a quick paintbrush pattern just to visualize it) and tape it up with the .94 inch FrogTape.
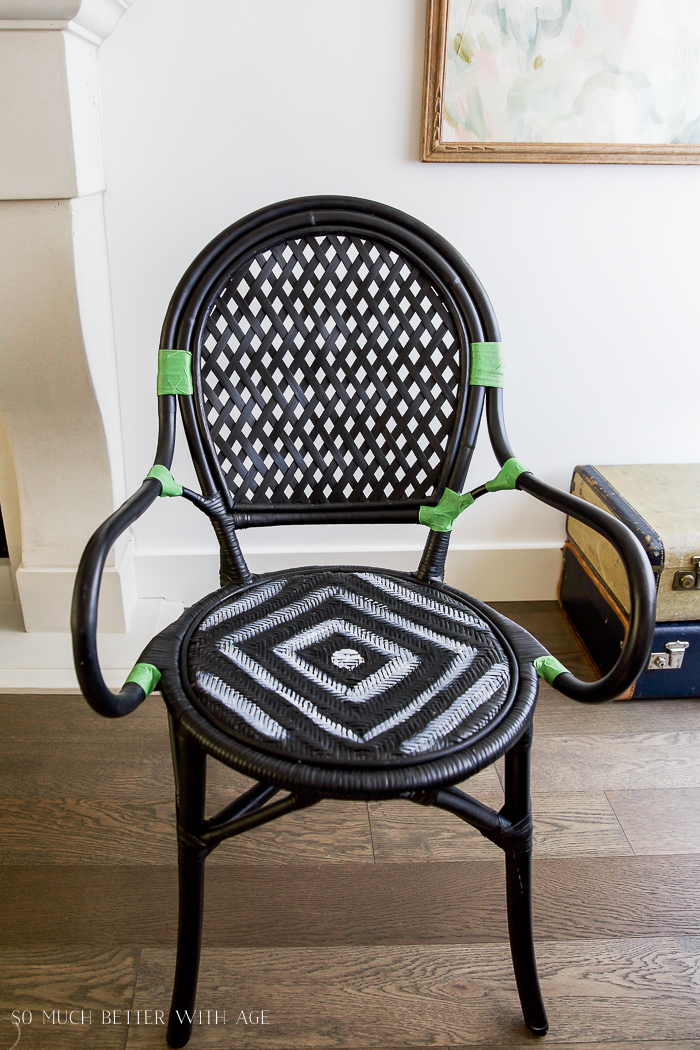
I didn’t have the .94 tape when I took these photos. I ended up redoing the seat as the tape needed to be thinner.
This is the most important part so take your time to cover the wrapped rattan parts with FrogTape.
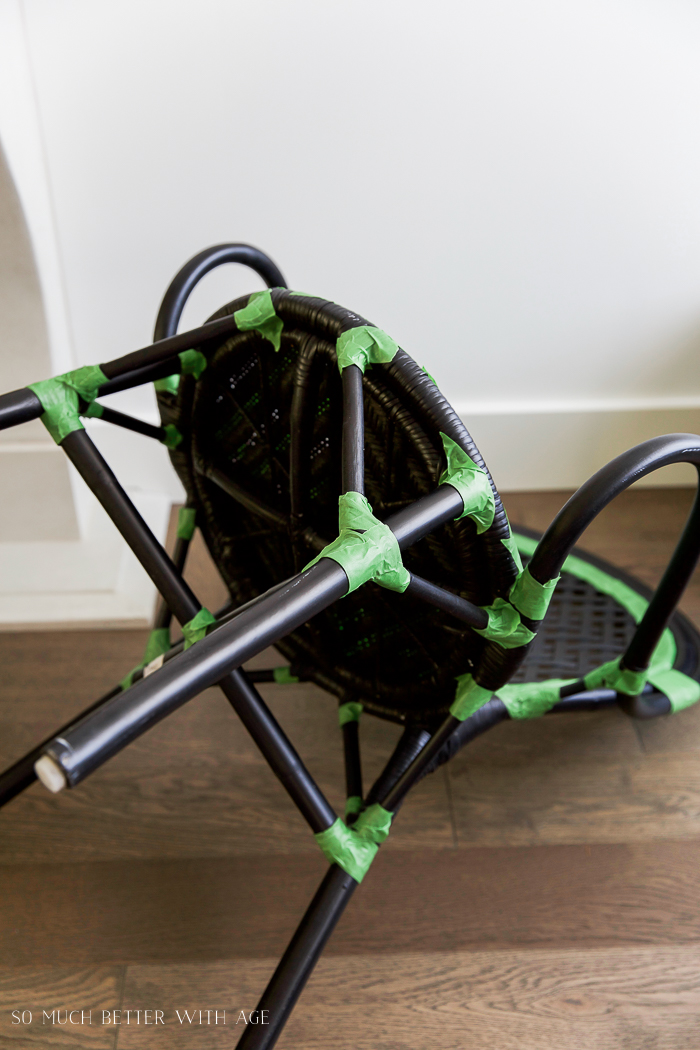
You won’t need to cover all of it as you can see in my photos. Only the parts that are going to come in contact with your paint brush.
2. Prime the parts that will be painted. Leave the lattice work last.
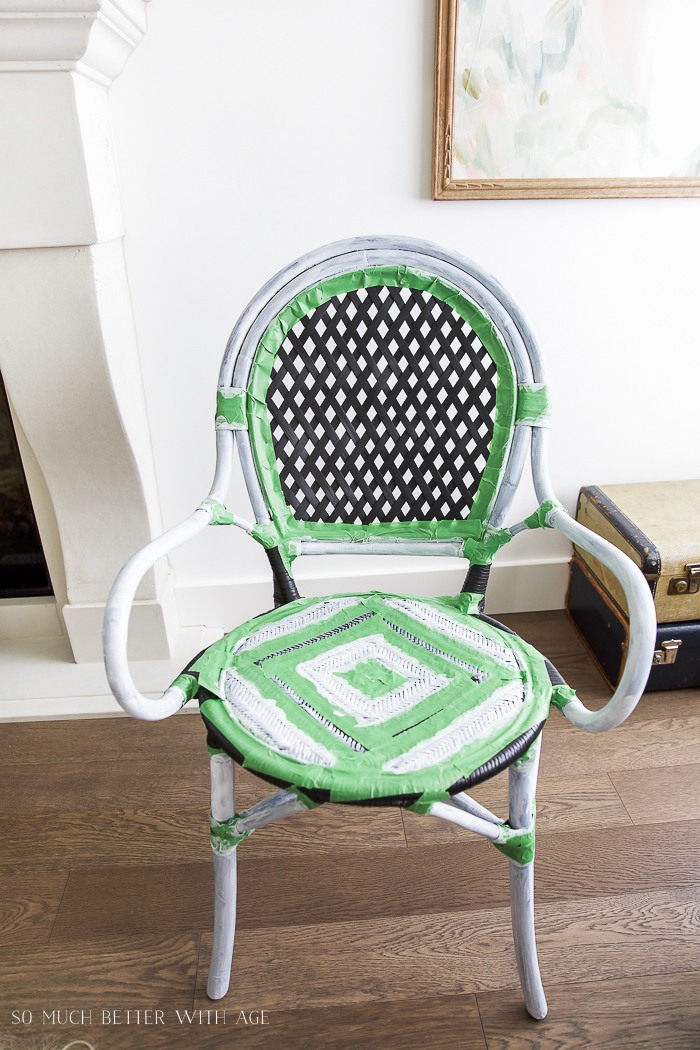
3. Paint all the parts that should be the rattan/bamboo part of the chair the beige-y mustard color with the flat round brushes. Paint two coats, drying between coats. It took me a few tries to get that paint colour correct as you can see from the photo below.
4. The lattice part is the trickiest. If you wanted to make this project easier, you could just leave the lattice work black. The only way to paint it is by free-hand. Find each long strip of wicker in the pattern and alternate painting every second one. Make sure to paint the same white one on the back the same as the front. This is where you’ll need the black acrylic craft paint for touch-ups. It’s impossible to not touch the other black pieces.
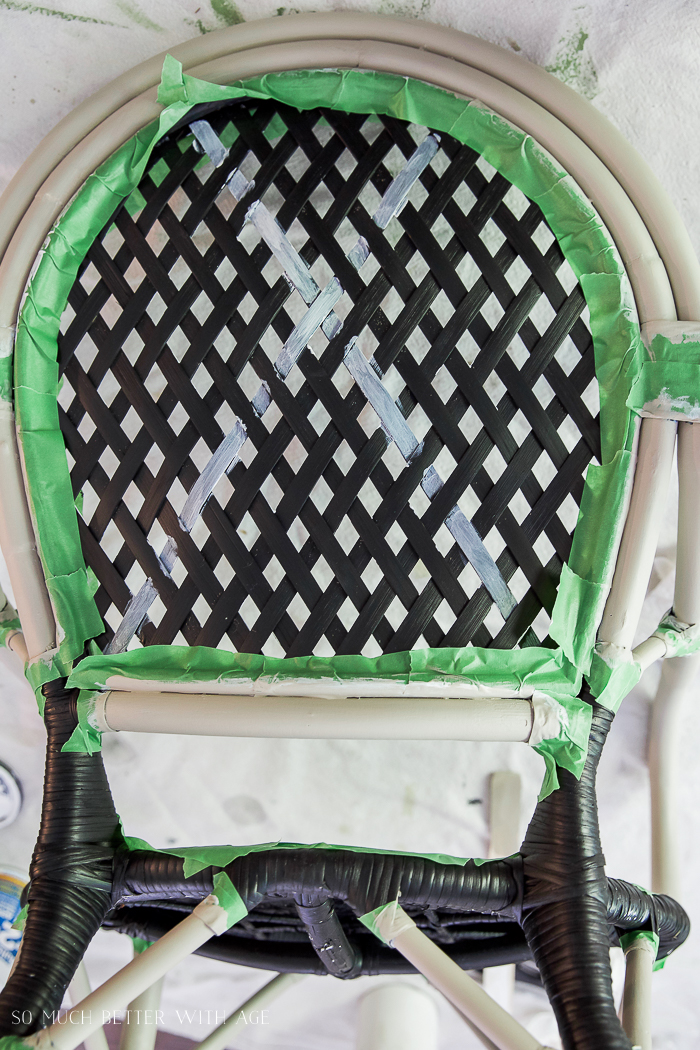
5. For the lattice work as every other part, prime once and paint two coats of the creamy white colour. Do all the white at once then after you just need to touch up with the black. You can see that I messed up a few strips and had to fix them. I had to go back and forth with the white and black a few times before I find the right technique. I was using the large flat brushes initially until I bought the stiffer angled brushes. So be sure to use the flat angled brushes for the lattice work and seat.
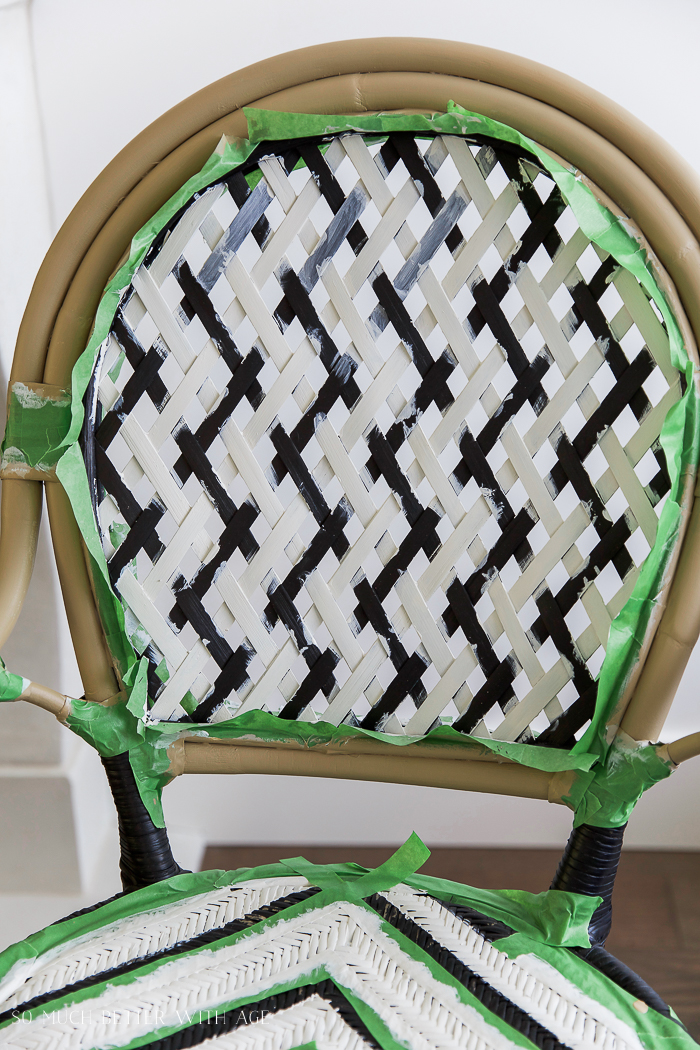
6. For the seat, the FrogTape does peel a little bit of the rattan paint off so I touched it up with the black craft paint but I had to touch it up anyway with some slip ups. It didn’t peel off anywhere else on the chair and I should add that I’ve had that chair for a few years now so it may have just been regular wear and tear from usage.
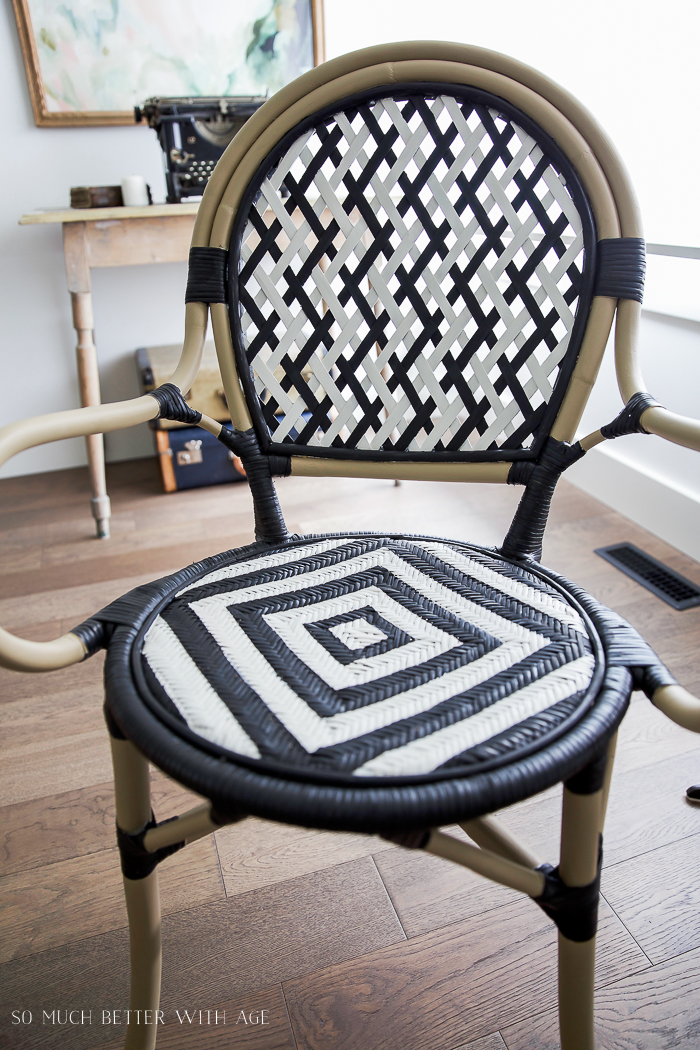
7. For the last step, be sure to finish with a polyurethane spray. Spray it outdoors or in a well ventilated area.

I’m so happy it turned out!! You just never know when you have an idea if it’s going to actually work.


I’ll also say this although I certainly don’t have to. I LOVE FrogTape. It’s the only stuff I use when I’m painting. I painted my concrete patio slab to look like an outdoor rug using FrogTape and it was NOT a sponsored post. When I saw FrogTape at the Haven Conference again this year, I was like DOH! I should have used you guys for my patio post, what I was thinking asI often just do posts without thinking of getting them sponsored. So I just use what works and what I like but I’ve got to start making some money on this little blog of mine and thinking like a business woman.
Also I just wanted to share that with you so you knew I genuinely love the brand and only love sharing with you stuff I love (and actually works!).
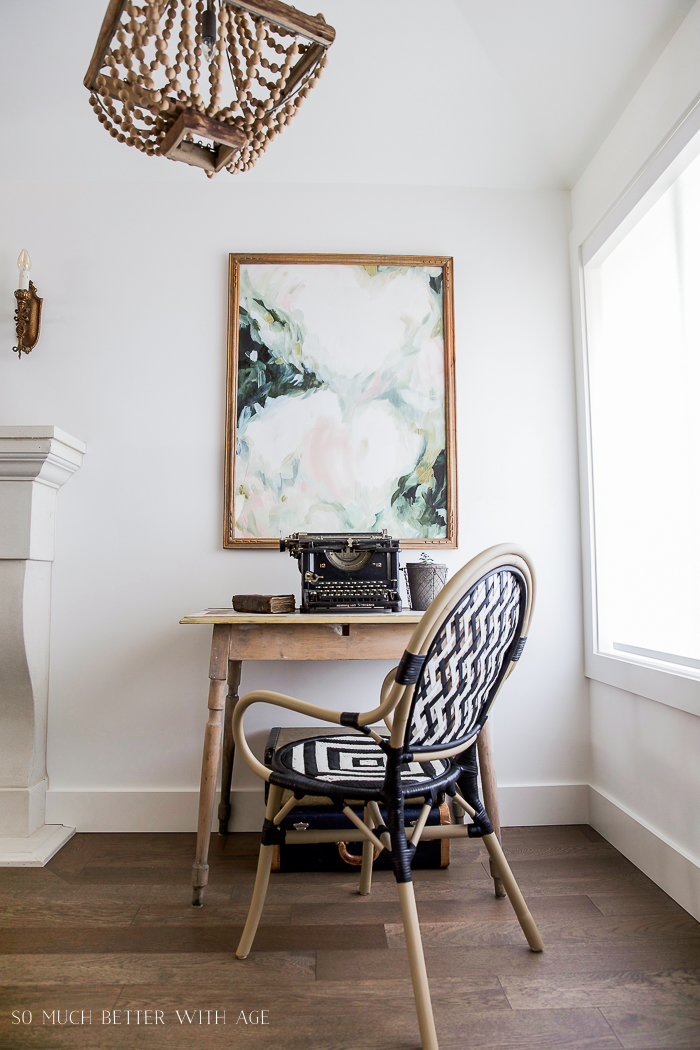
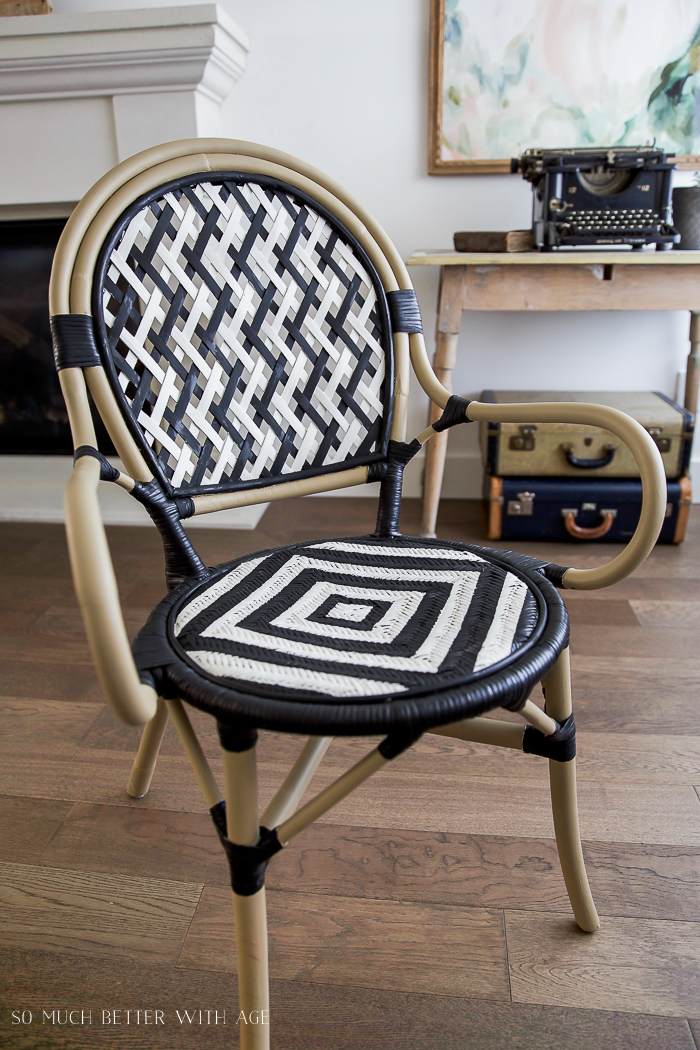
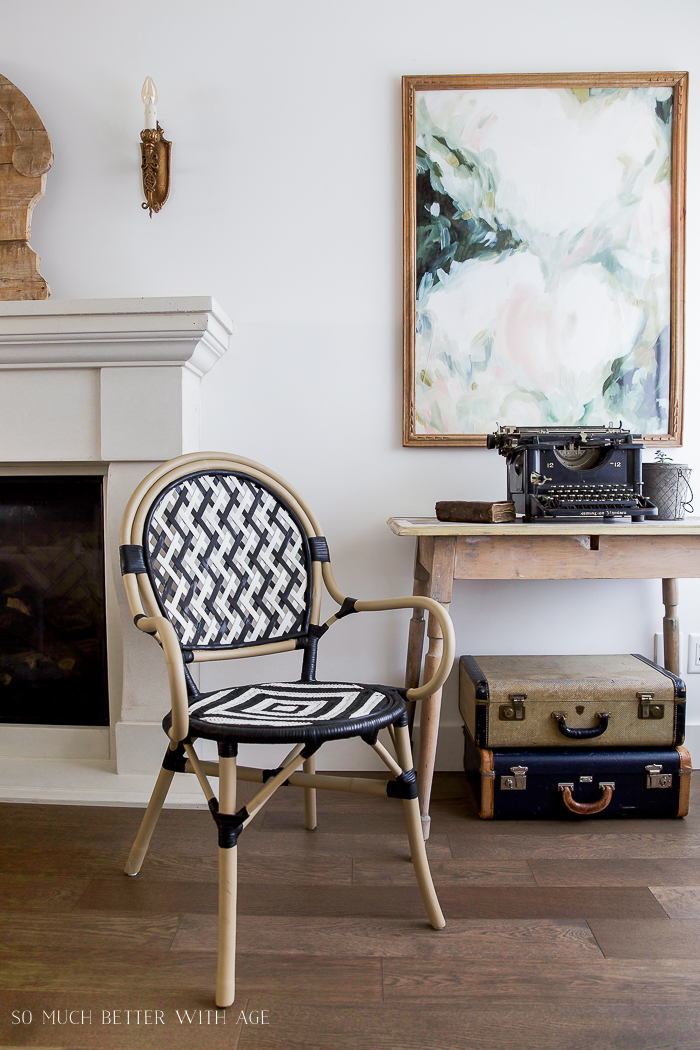
I hope you feel confident enough now to tackle your own French bistro chair makeover. Put some love into your project and you’ll feel so good you did it all on your own!


That turned out so well! I would have never guessed that frame isn’t real wood. Love the design you made!
Thanks Lauren!
Hugs, Jamie
I’m with Lauren. It turned out awesome!
Thanks hon! xo
This turned out so cute! Great job.
Thanks Julie!
Hugs, Jamie
Great job on the chair… It looks great!!
Thanks Pamela!
Hugs, Jamie
This came out SO amazing, I love the chair. Pinning!
Thanks so much, Roxanne! I love the way it turned out too!
Hugs, Jamie
Wow, what an amazing transformation! I love it!
Thank you, Leen!
Hugs, Jamie
Seriously Jamie, this is amazing! I can not believe you painted this…it looks so good! pinned!
Thank you so much, Deb! I love how it turned out.
Hugs, Jamie
Wow! You took something that looks very complicated and made is seem simple and easy to do. Love the way it looks with the desk, typewriter, and suit cases! Great job!
Thanks Bridgette. I’m loving it too!
Hugs, Jamie
You did a great job, looks awesome.
Thanks Marlene!
Hugs, Jamie
Looks fantastic BUT I won’t be attempting that anytime soon! Yikes! You have the patience of a saint! 🤣
haha thanks Rebecca! Yes, it did take some patience.
Hugs, Jamie
I absolutely adore this chair! What an amazing job!
Thanks so much, Wendy!
Hugs, Jamie
Wow, beautiful chair! Love how you painted it. I’m not sure I’d have quite the patience but it looks amazing!! Visiting from BFF Party.
Thanks so much, Victoria!
Hugs, Jamie
I love this! My mom took is to France several years agoand and she has wanted bistro chairs ever since. Thanks for linking up to #HomeMattersParty
Thanks so much, Emily! I’ve always wanted one too since my first trip to France many years ago.
Hugs, Jamie
wow! looks amazing, and i love that whole area, with the luggage.
b
Thanks so much!
Hugs, Jamie
Hey, Jamie! Just wanted to let you know that we loved your DIY French Bistro Chair so much when you shared it at the #HomeMattersParty last week, we’ve FEATURED it THIS WEEK! Hope you can check it out when you get a sec. Happy Friday!!!
http://lifewithlorelai.com/2017/08/24/home-matters-linky-party-150/
~Lorelai
Life With Lorelai / Home Matters Linky Party
Thank you so much for the feature, Lorelai!
Hugs, Jamie
But where did you get the framed print? That’s a show stealer in this pic, and I’ve notice you’ve used several of these wooden framed pics throughout. Source?
Hi Jan, I love that art piece too! It’s from Minted and I have the direct source in this post: https://somuchbetterwithage.com/2017/04/how-to-pick-art-french-vintage-vibe/
Hugs, Jamie
Thanks for the quick response!
What brand paint did you use? (Algonquin & mustard)? Im trying to redo 4 bistro chairs that i inherited from a friend.
Hi Betty,
I’m sorry for taking so long to getting back to you! The brand of paint I used was Fusion Mineral Paint. Good luck!
Hugs, Jamie