
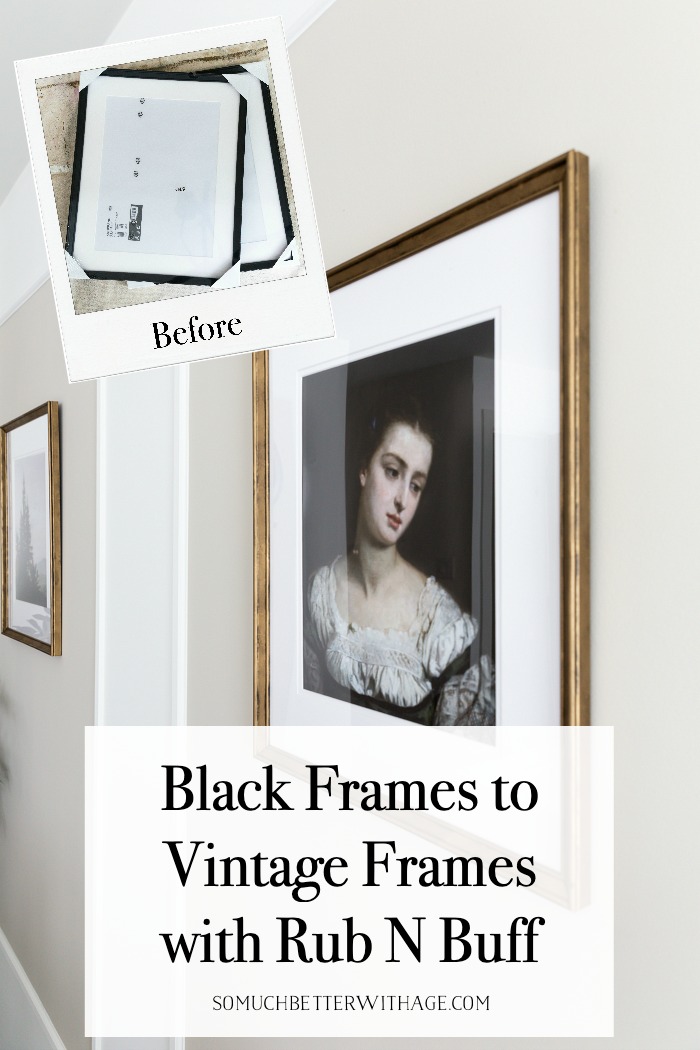
Black Frames to Vintage Gold Frames with Rub n Buff
I turned black frames into vintage gold frames with beautiful patina. Check out how!
Disclosure: This post may contain affiliate links. Please read my disclosure policy.
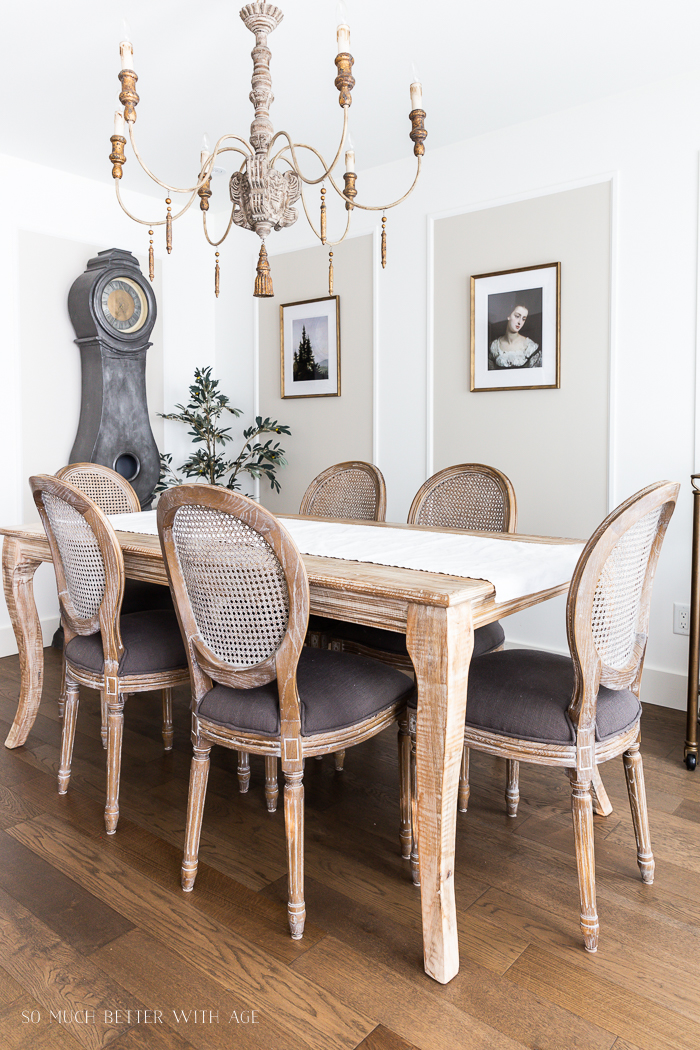
If you’ve been following along on my mini dining room transformation, you’ll remember that I removed the cabinet with my collectibles in it, that we installed the picture frame moulding, then we painted the inside of the frames and now the last step is we need the art!
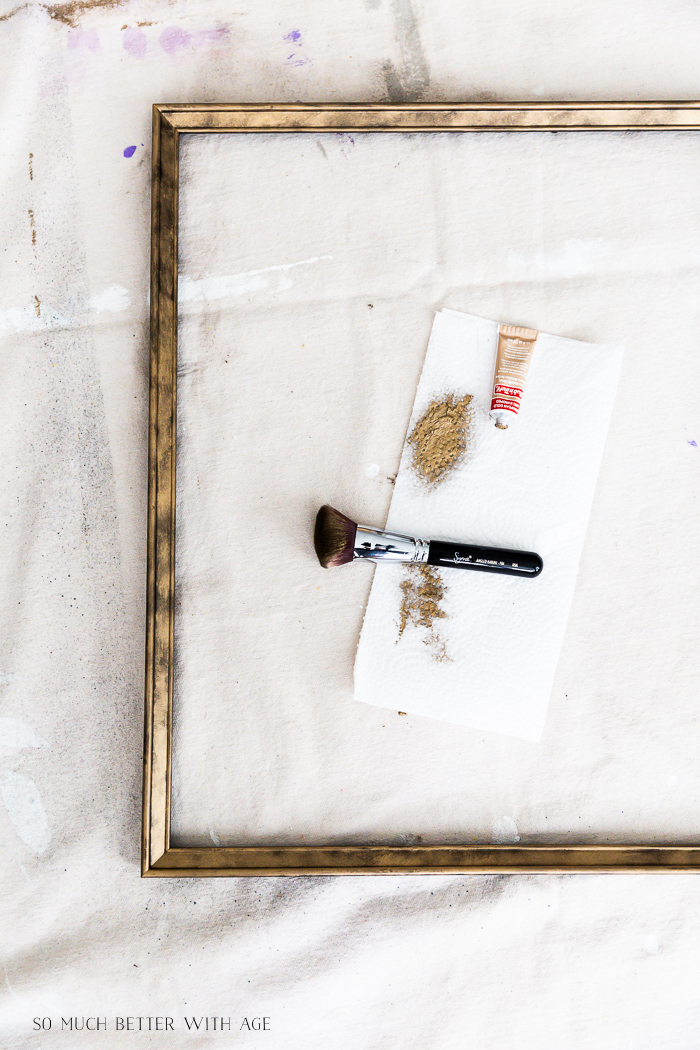
I’ve used Rub n Buff quite a bit but had no idea the transformation over black! If you’re unfamiliar with Rub n Buff, it’s a metallic wax paste that can be applied on furniture, glass, metal and more.
There was a project I did using Rub n Buff for my book, French Vintage Decor, where I took a very shiny brass candelabra and added the wax over it to create less of a shine.
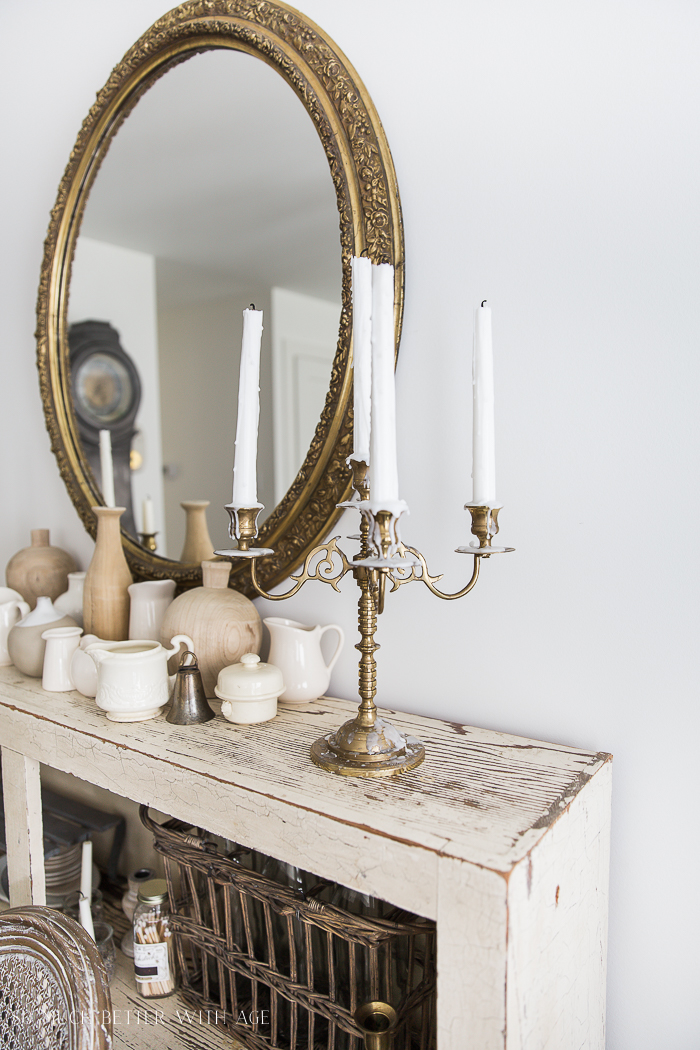
I’ve also rubbed the wax on old dresser handles for a different patina.

But I had no idea the impact it would create over black!
Jenna Sue has a great tutorial! She took brass light fixtures, spray painted them black and then added Rub n Buff. So I was curious if I just started out with something black already if it would do the same trick.
But first, you may be asking…
Why not just buy gold frames?
Plain gold frames are beautiful, don’t get me wrong. But you know I love vintage looking items and I think frames that looked like old gold would be better than new gold for my dining room.
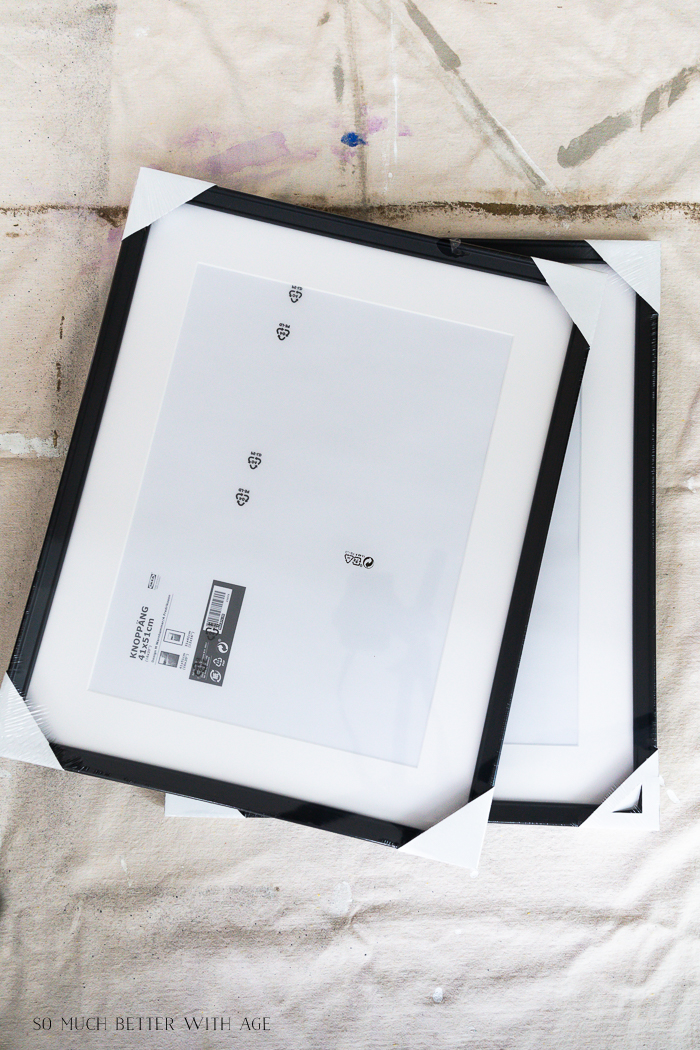
Supplies:
- inexpensive black frames from Ikea (I bought 3 Knoppang 16×20 frames)
- Rub n Buff in my favorite European Gold
- stencil or makeup brush (any brush that has very compact bristles)
- paper towel

How to Wax the Frames
1.First you put a very little amount of wax onto a paper towel and rub your brush into it.
2. Dab the brush over the frame.
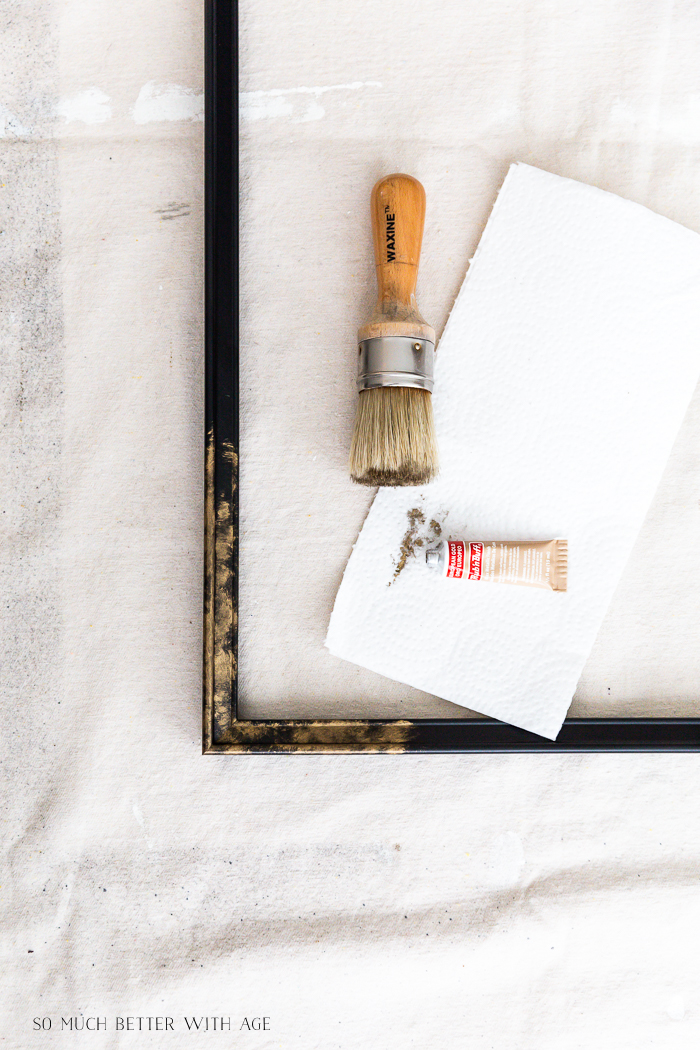
3. This is pretty much the entire tutorial but I’ll explain more. I switched to the make-up brush like Jenna used as the round shape got into all the crevices.
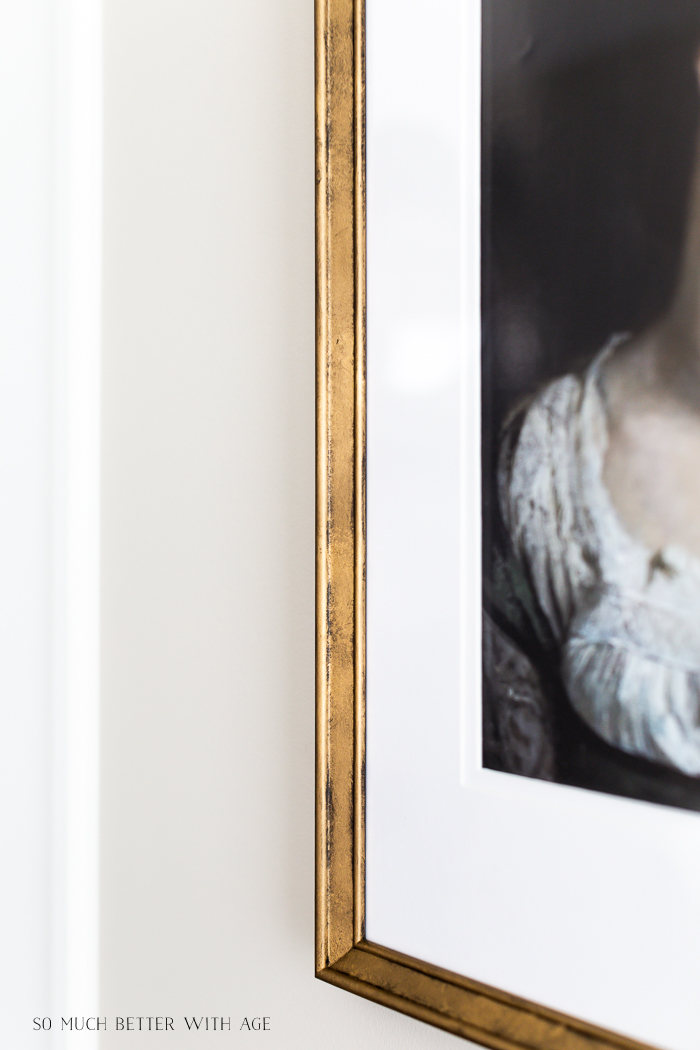
4. Continue to dab all over the frame and go back over it again any number of times until you get the look you want. You do want some of the black showing to give it that patina. But even rubbing the gold wax all over the black will still have some of the black showing through.
Waxing Tips
Do not put a big blog of wax on the frame, rub it in and call it a day. You will see NO black and will be left with entirely gold frames. Go ahead and do that if that’s the look you were wanting but you will need more wax and you might as well buy gold frames.
It is hard to get the wax off once you put it on. You can wipe it off and a tiny bit will come off but once it’s on, it’s pretty much on for good so by adding a little bit at a time in layers will help you achieve the look you want.
Art Tip
I purchased my artwork via Etsy as downloadable art. Once I purchased the inexpensive but beautiful art, I downloaded it to my computer then uploaded it on the Staples.ca website. I couldn’t get the prints printed on thick card stock so I ordered them just as prints but they were way too flimsy and looked funny in the frames. I used a spray adhesive and sprayed the glue directly onto watercolor paper (because that’s what I had on hand, large card stock paper is good too) and spread the artwork onto the watercolor paper then cut them to size. They looked better in the frames and not so smushed to the glass/plexiglass.
*Update* I ordered these exact prints from Posterjack.ca and used the fine art paper option and the quality was much better and I didn’t need to stick it to card stock!
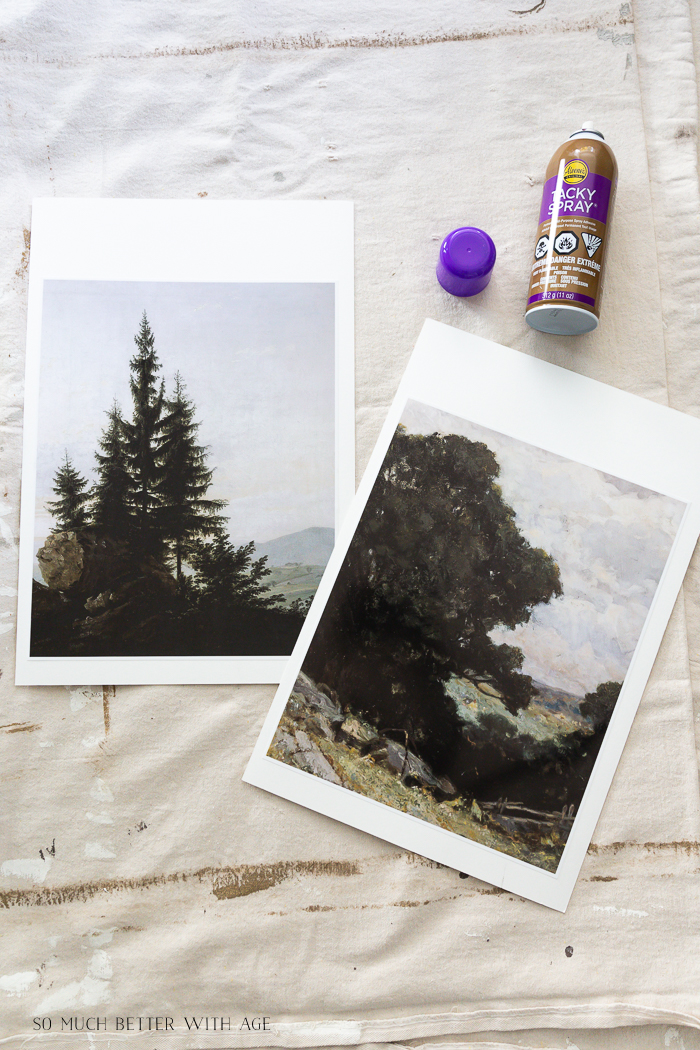
I purchased the art through Heirloom Print Shop.
I also bought new mattes for the frames from Michael’s. The mattes that come with the frames from Ikea are odd sizes.
For the 16 x 20 inch frames, I bought mattes with a 11 x 14 inset.
The reveal
And now here are the finished frames! Aren’t they gorgeous?
I love the patina and they go so well with in the dining room.
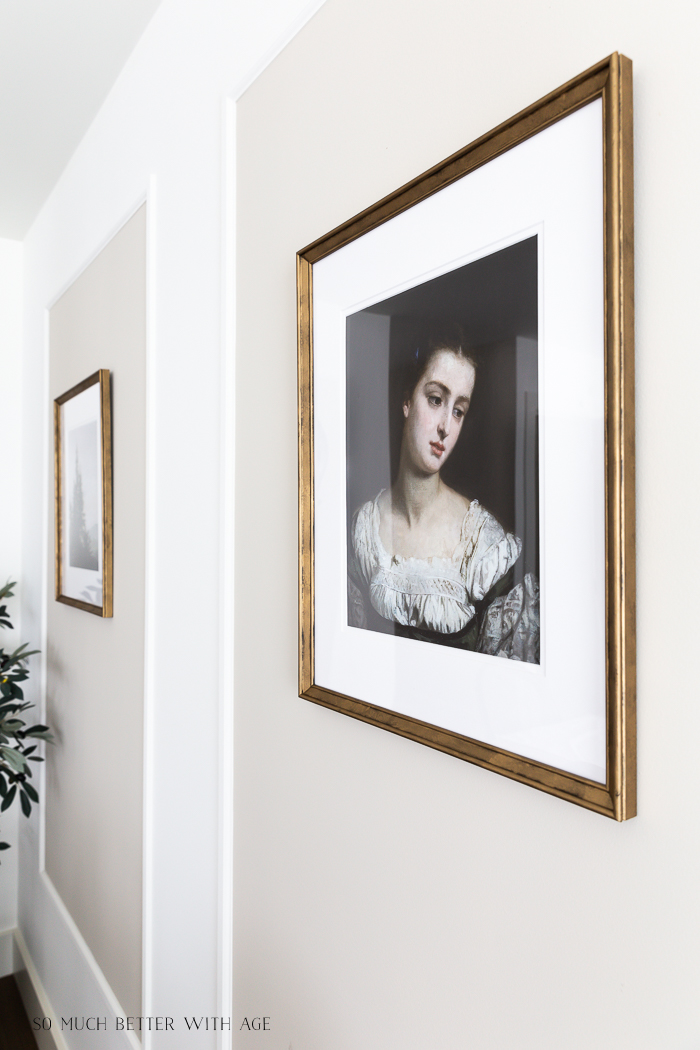

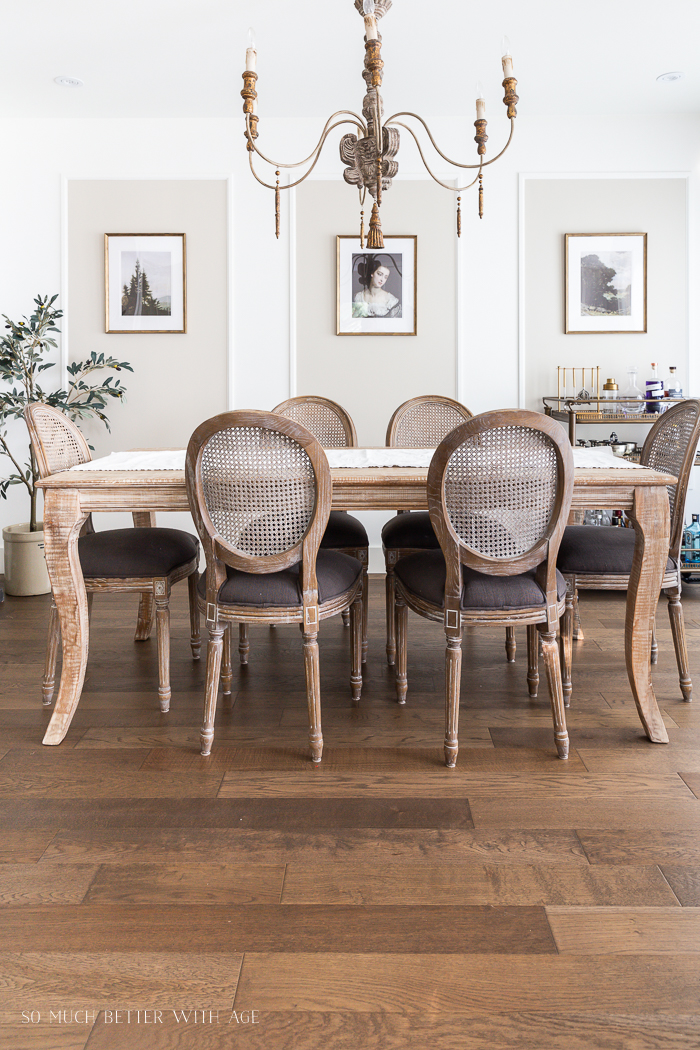
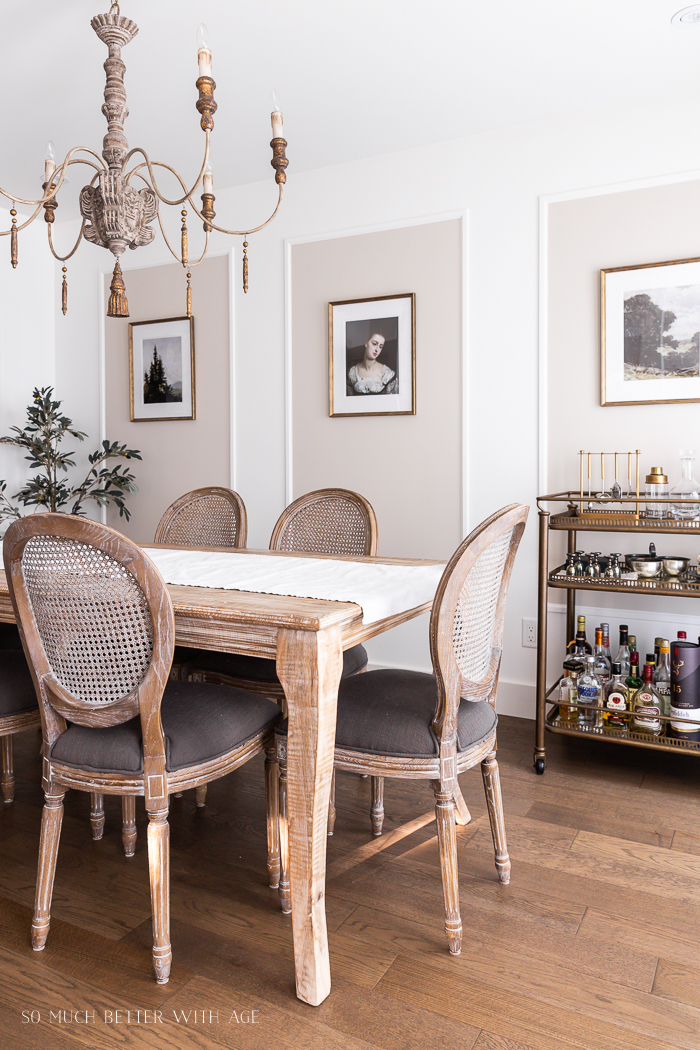
Dining Room Sources:
- Wall color – Simply White OC-117 by Benjamin Moore (Regal matte)
- Hardwood (manufactured wood) throughout – Dansk Hardwood Monterey Wire Brushed Weathered Saddle (Oak)
- Dining table – Renaissance Home (found a similar table at Wayfair)
- Dining chairs – Renaissance Home (found similar chair at Wayfair)
- Chandelier – Aidan Gray 6 light candle chandelier (no longer available)
- Bar cart – Soft Surroundings (no longer available)
- Mora clock – Restoration Hardware outlet
- artwork from Heirloom Print Shop
- frames from Ikea
- Rub n Buff in European Gold
Make sure to pin it for later!

click in case you missed:
Where to Find Downloadable Vintage Art

How to Install Simple Picture Frame Moulding

My Favorite Greige Edgecomb Gray


I love rub n buff I have used it for years and like you on picture frames, metal sconces, cast iron pieces. Love how your black frames turned out
Dara
Thanks Dara! Isn’t that stuff the best?
Hugs, Jamie
Lovely Jamie! Also, a good way to rehab chipped and scratched frames. They fit perfectly in your dining room.
That’s a great idea, Claudia! And thank you.
Hugs,
Jamie
Wow Jamie, these frames are gorgeous. 👏🏻 Would this technique work on dark brown wood? I am thinking a mirror.
Oooh that sounds like a great idea, Valarie! Let me know how it turns out!
Hugs, Jamie
What great art at a fraction of what it would cost to buy like that.
Well done – looks great in that pretty space!
Thanks Michele! I know, I was so happy how it turned out! Who doesn’t love inexpensive art 🙂
Hugs, Jamie
Great DYI – thank you. Your dining room looks stunning with the changes you’ve made! Makes me want to remove some furniture and see if I can get a cleaner look at my home. I enjoy your blog.
Thanks so much, Anne! I’m loving the cleaner look too.
Hugs, Jamie
I love Rub n buff. It really is such a fast and easy way to get the look you want when you can’t find it in the stores.
Yes! Isn’t it the best? And you don’t need much of it!
Hugs, Jamie
Could you please explain what you mean by “sprayed directly on to watercolor paper”? I’m not understanding what you did. Thank-you.
Hi Mary,
Sorry I didn’t explain that part well. I took some spray glue and sprayed watercolor paper then spread out the art that I had downloaded and printed. Let me know if that’s still unclear.
Hugs, Jamie
Hello Jamie!
What material are the original IKEA frames? Wondering if this technique would work over some cheap plastic black frames I have. Thanks!
Hi JoAnna,
You could definitely try it over plastic. I’m almost positive it would work.
Hugs, Jamie
can you give more details on the waxing part? what kind of wax, and how did you apply it? did you just run a candle on it?
Hi Rachael, the Rub n Buff is the actual wax!