
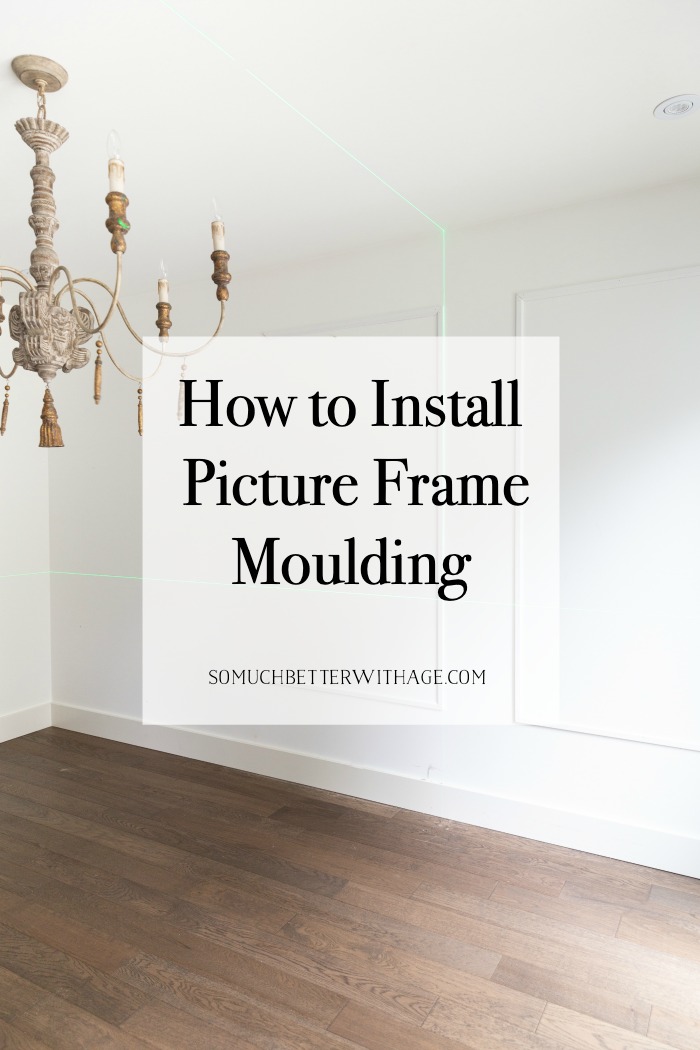
How to Install Simple Picture Frame Moulding
Here is an easy tutorial to install simple picture frame moulding to any room.
Disclosure: This post may contain affiliate links. Please read my disclosure policy.
At the start of COVID, we put up some picture frame moulding in our dining room. It was something that I’ve been wanting to do for awhile and while we had time during self-isolation, we got it done right away! I thought it was finally time to show you how we installed it.
My plan is also to paint the insides of the molding so I’m going to share some paint samples as well.
What you need to get started
To save on costs, we opted for very simple mouldings.
I measured the mouldings and they are about 1/4″ x 1 1/4″ in size similar to this one but they came primed in white.
This casing moulding is also similar that’s already primed white. These ones are a bit wider in size to the ones we got.
You will still need to paint it afterwards but it’s much easier when it’s already primed.
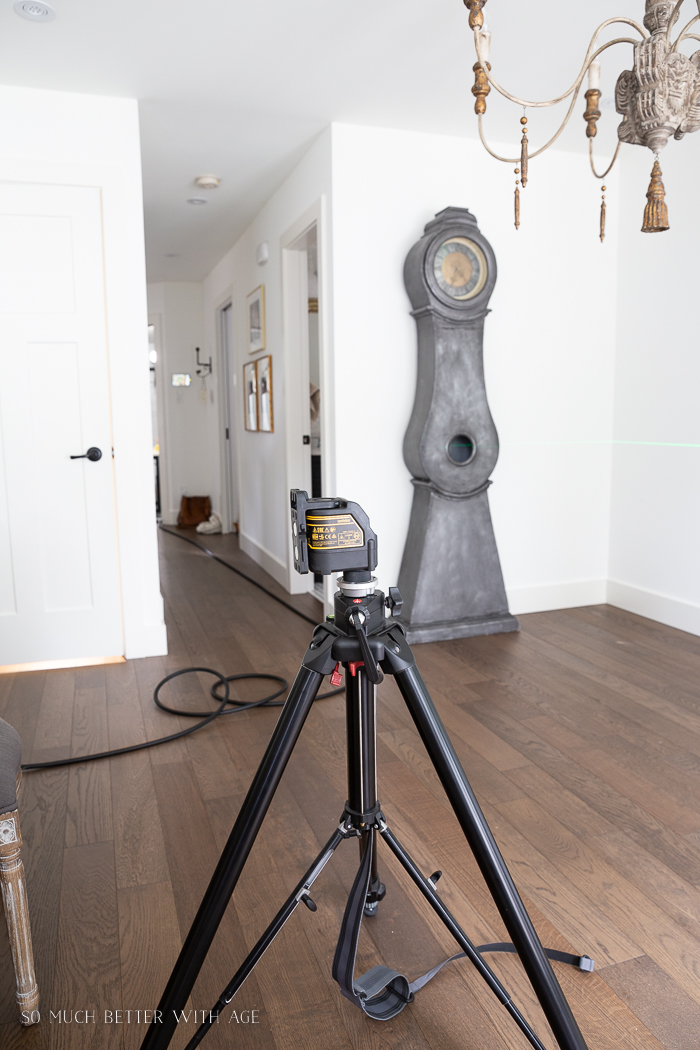
A self-leveling laser level was the best thing to make this job go smoothly! I can’t recommend one enough for this job! This three-plane cross line laser level was perfect for this job! We attached it to my camera tripod and set it up.
Plan and Measure First
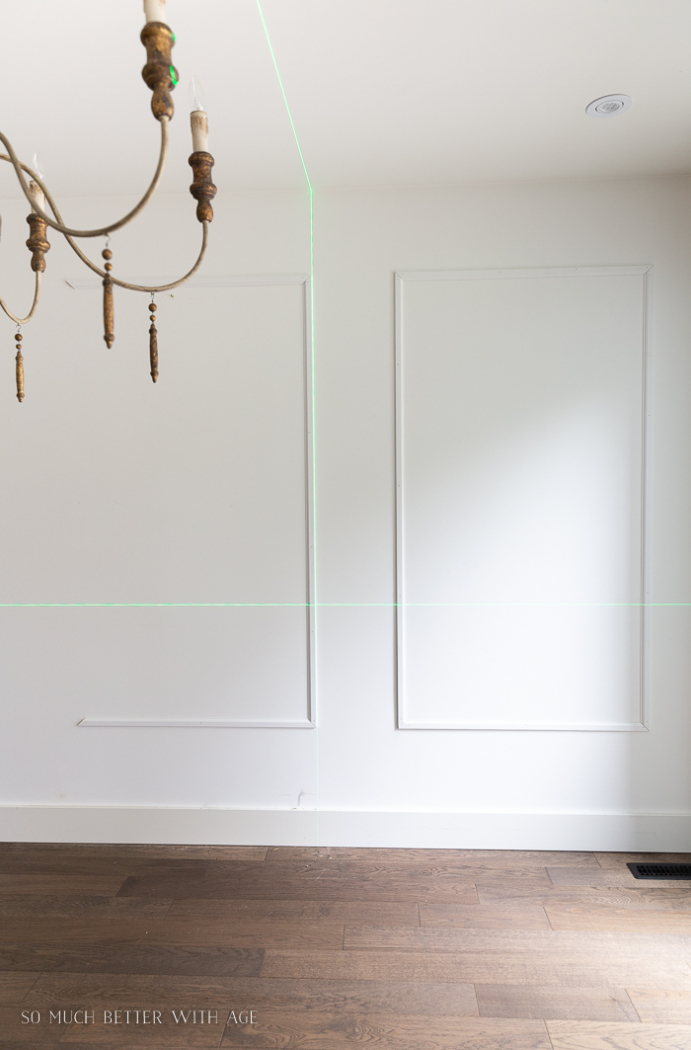
For the one large wall, we measured the wall horizontally and vertically. Using a sketch pad, we drew rectangles within the wall dimensions to see how many squares would look best. We decided on three squares for the main wall and one for the side wall.
Next, we needed to determine how big the squares should be. The inside dimensions were not as important to us as making sure everything was even. Playing around with the measuring tape, we just eyed what we thought looked good. We decided that 12 inches was the perfect dimension so we used that dimension (12 inches) from the ceiling, 12 inches from the top of the baseboard up, and 12 inches from in between each square.
For the side wall, to keep things consistent, we decided to use the same dimensions as the other rectangles even though technically that rectangle could be made bigger. Instead of 12 inches or 1 foot from the edges, this rectangle worked out to be to be 3 feet from the edges.
Once it was all measured, we put pencil marks on the wall where the mouldings were to go using the laser level to make sure everything was square.
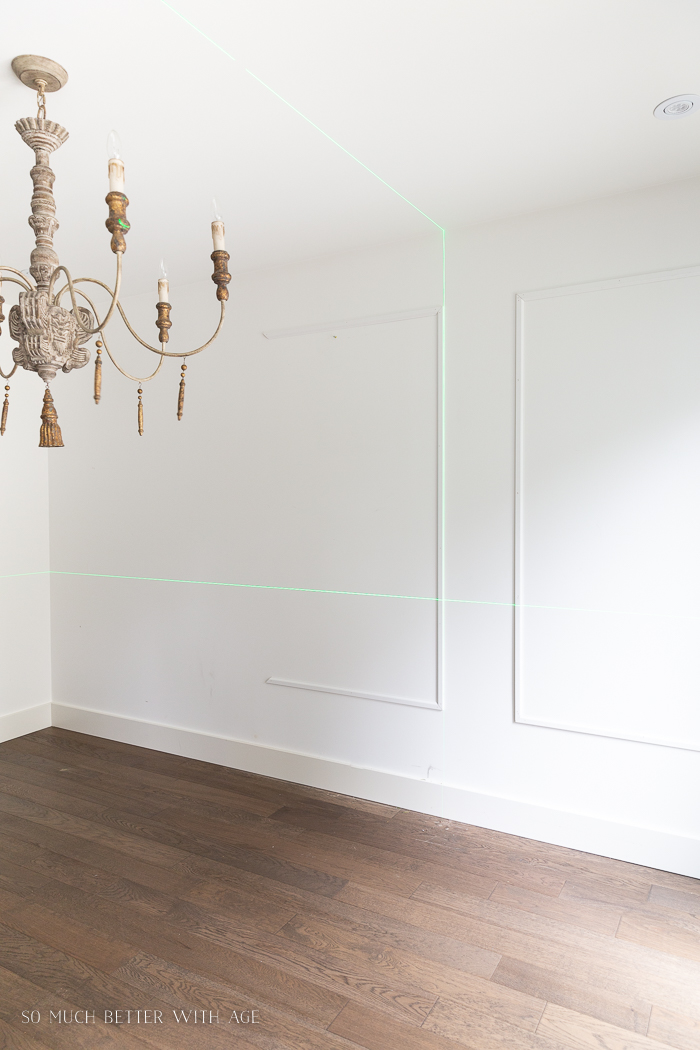
If you don’t have a laser level, you will need a level and a square.
NOTE: Walls and ceilings are often not perfectly square so pick a corner or end and work across. Your eye is more likely to notice the frames out of square if they aren’t perfectly plumb to the ceiling.
Cutting and installing the Moulding
We used a mitre box and saw to cut the moulding. Because are mouldings were small, a mitre box and saw was fine! You could also use an electric saw especially if using larger mouldings.
After measuring out the mouldings, cut each one on 45 degree angles.
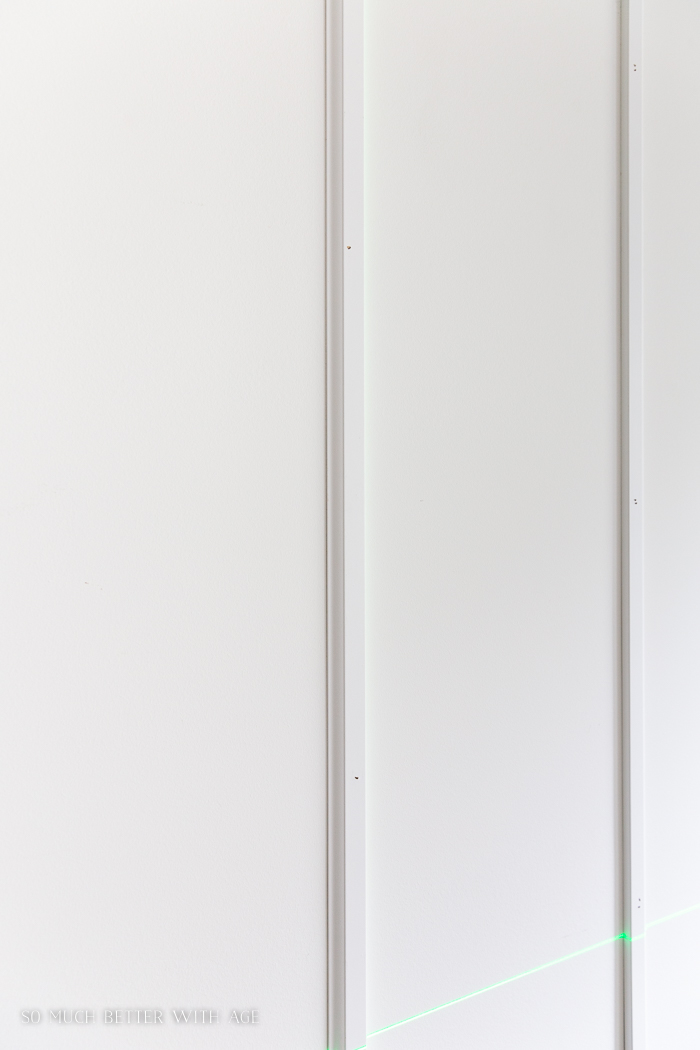
We used a brad nailer to install the mouldings but you could also use finishing nails and hammer. You could also use glue which would prevent you from having to fill in nail holes after.
You can see how using a laser level makes this job very easy to install!
In the photo below you can see how there are little holes now from where the nail was installed that need to be filled.
You’ll also need to fill the tiny gap where the corners meet.
You’ll need to use drywall mud or joint compound after to fill these holes corners.

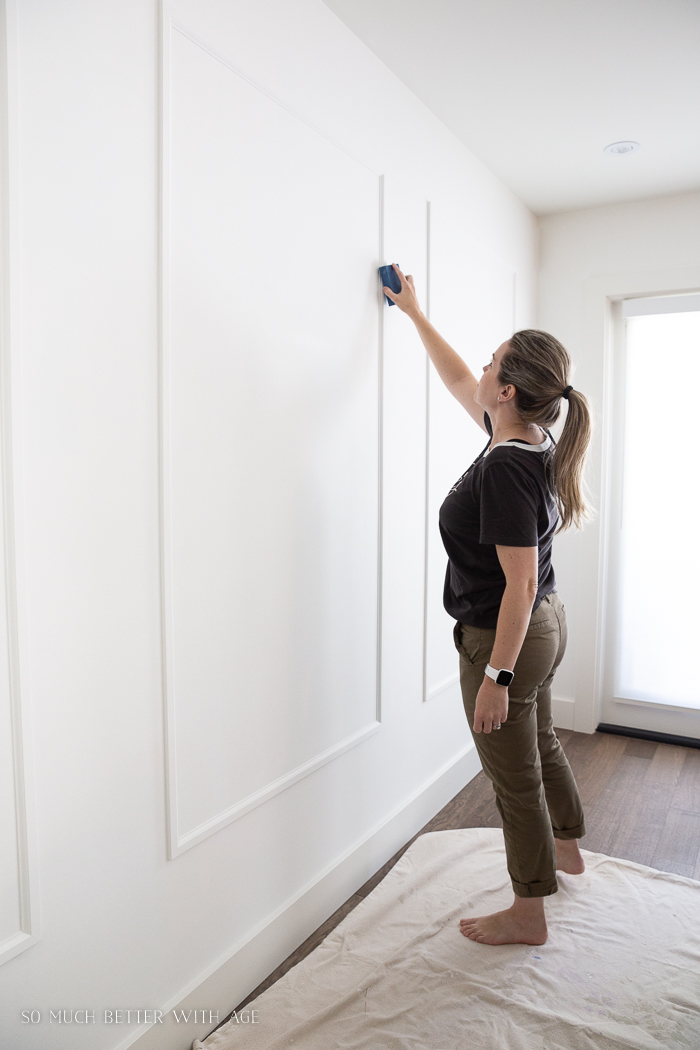
Once the putty is dry, sand down with a fine sanding sponge for a smooth finish. You may need to do another coat of mud if you can still see the cracks or holes.
If you mud again, wait to dry and sand again for a smooth finish.
Lastly fill all along the edges of the trim (both sides) with moulding and trim sealant. Run a very thing bead along the edges and using an edging tool (or your finger), wipe away the access.
This stuff dries very quick so make sure to run a bead down one side at a time then smooth it out before moving on.
Also, cut a very small hole at the top as you only need a very thin bead along the trim.
Follow the directions for drying time this moulding and trim sealant only takes 30 minutes to dry.
Now paint the trim and you are done!
NOTE: Some silicones/sealants are NOT paintable so make sure to buy the correct one.

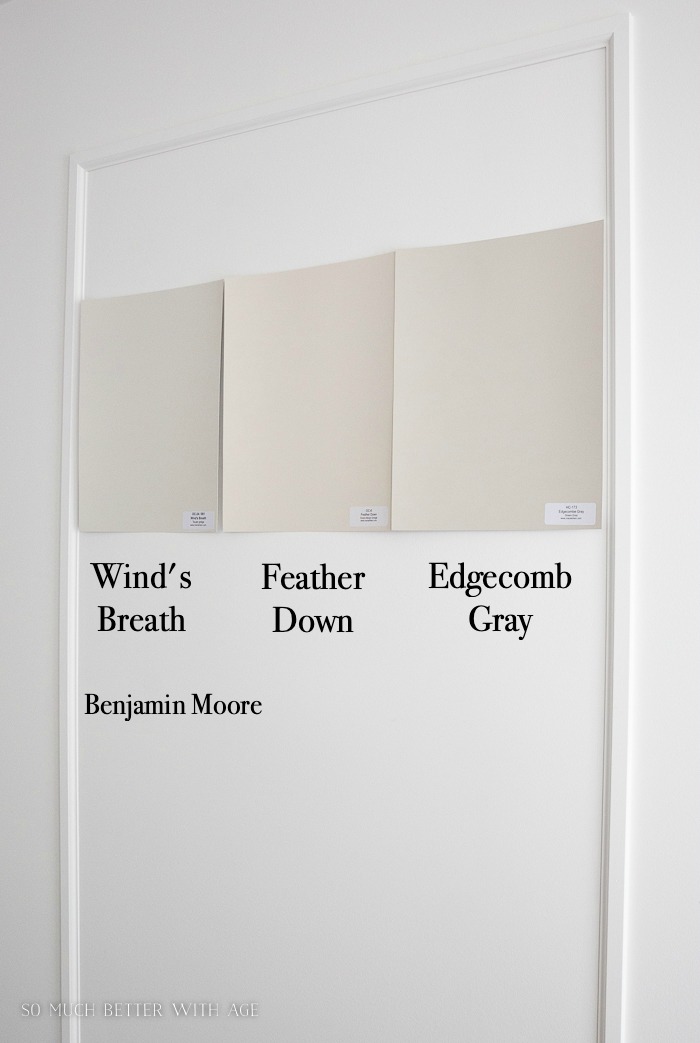
Paint color Options
This week I put up many paint samples to see which paint color I’d like to paint inside the rectangles.
These paint samples are all from Benjamin Moore. This is the paint color I chose!
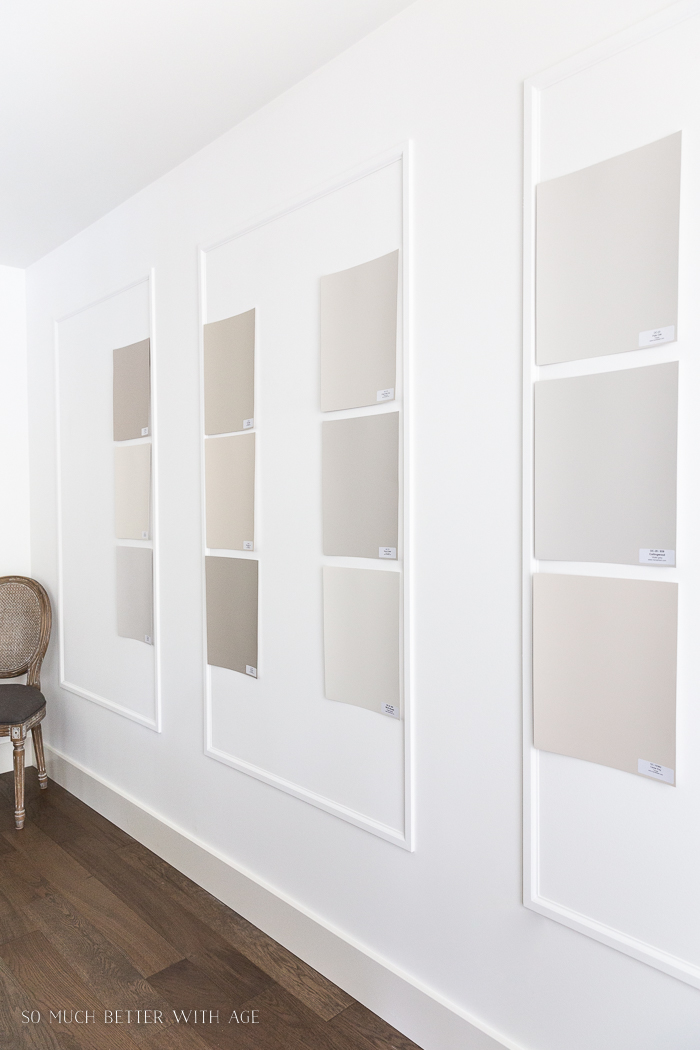
I’ll give you a hint, I narrowed it down to these three.
I hope this helps you to create your own simple picture frame mouldings in your home.
Sources:
- casing moulding 1/4″ x 1 1/4″ in size similar to this one or this casing moulding, primed white
- self-leveling laser level or a level and a square
- mitre box and saw
- brad nailer or hammer and finishing nails
- joint compound
- steel joint knife
- sanding sponge, fine grit
- moulding and trim sealant
- caulking gun

Make sure to pin it for later!

click in case you missed:
The Best Greige Paint Colors from Benjamin Moore


Dining Room – Before and After


Oh, I can’t wait to see this project finished! Looks beautiful so far. We’ve been wanting to add trim to our TV room. Thanks for the tips!
Beautiful! I’d love to know where your chandelier is from? Thanks!
Hi Elizabeth,
It’s an Aidan Gray chandelier but I don’t think they sell this exact one anymore. You can find similar from different places like Wayfair.
Hugs, Jamie
Hi Jamie,
I love this idea! Did you to do the whole room? Or how would you do it around your windows?
Is wood filler ok to use to seal the gaps in each corner?
Yes that should be fine!
Hugs, Jamie
What color is the white on the wall?
Simply White by Benjamin Moore.
https://somuchbetterwithage.com/simply-white-benjamin-moore-best-white-paint/
Hugs, Jamie
On the other walls tat we’re not as large, did you make the squares smaller, or just do less of them? Like you show three squares on the wall, would you do less of the same size if those walls were smaller? Or do smaller boxes?