
Change Your Decorative Pillow Covers Seasonally + Pillow Cover Tutorial
Do you like to change your decorative throw pillows seasonally but don’t want to store lots of pillows? Rather than storing the whole pillow, store the pillow covers and I’ll show you how to make your own!

I’m sure I’m like many of you who like to change your decorative throw pillows with the seasons. The problem that I have is limited space to store lots of seasonal pillows.
I came up with a creative way of storing my seasonal pillows – making decorating pillows covers and only storing the covers! So much easier to store covers rather than whole pillows, right?
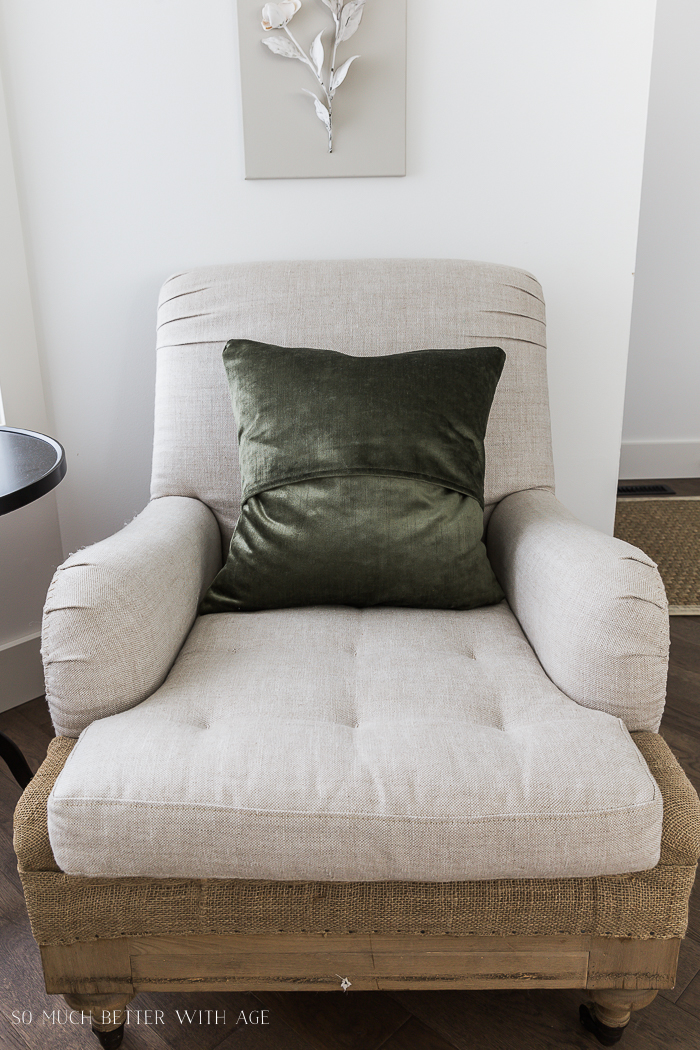
Let me show you my new beautiful green velvet pillows I made and how you can make your own decorative pillow covers to change with the seasons.
How to Easily Change Your Decorative Pillows Seasonally
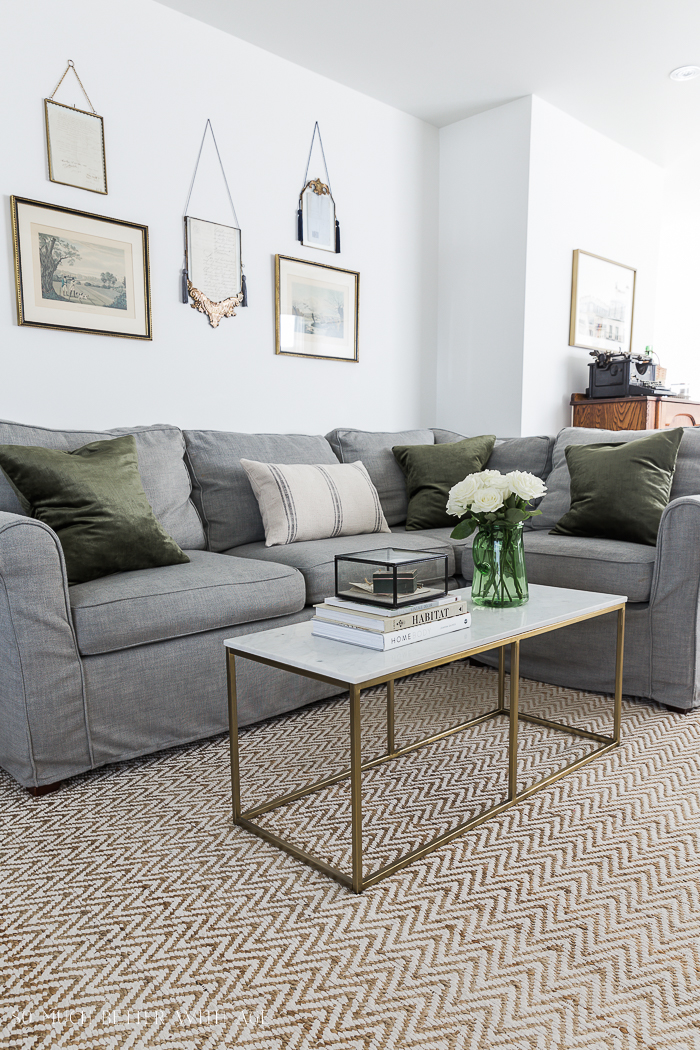
Lately, I’ve been really wanting a green velvet couch and since green is my favourite color I know I wouldn’t get tired of it. But that’s a major expense right now so I thought making green velvet pillows would satisfy that decorating urge.

I used my DIY envelope pillow cover tutorial but I’ll also share with you below how I made them.
This is the front of the pillow cover.

And here is the back. The envelope style pillow cover is easy to sew (no zippers!) and an easy way to insert a pillow.
Here are some other pillow covers I’ve made that are now easy to store. The covers take up such little amount of storage space!

This post contains affiliate links for your shopping convenience. Click to read my full disclosure policy.
How to Make an Envelope Pillow Cover
1. Measure the size of the pillow inserts. My pillow inserts are 20 x 20 inches. Make the pillow the same size so the pillow insert stays puffy inside the pillow cover.
2. Cut out fabric 20 x 20″. If you are making more than one pillow cover, cut out as many pieces as you need now. I use a 36 x 24″ cutting mat and rotary cutter and acrylic ruler as a guide which makes cutting fabric so easy. I used the beautiful green velvet fabric.
3. For the back piece, cut fabric 20 x 28. Adding an extra 8 inches to this piece will allow extra overhang to make the envelope.
4. Cut multiple pieces for as many pillows you have.

5. Cut the back piece (the longer piece) in half.
6. Place the fabric right side down of the piece you just cut in half. Fold over 1/2 inch on the long side and iron. Fold over again 1/2 inch and iron. Repeat for both half pieces.
7. Sew that seam. Now lay the 20 x 20″ square right side up and lay the piece you just sewed overtop with the hem in the middle. Pin in place and sew all three sides.
8. Place the second half piece down (right side down) overlapping the first half. Pin in place and sew those three sides. Turn inside out and insert the pillow.

I love the updated look of the pillows on my couch now.
I also purchased the Delaney marble and gold coffee table a couple of months ago and love it! It’s small but fits our small living room perfectly.
My tufted ottoman is now in the basement with my other couch.

I love my new velvet pillow covers. They have similar ones at Pottery Barn if you would rather buy your own decorative pillow covers.

Of course I have to leave a copy of my book, French Vintage Decor out.
Habitat and Home Body are two favorite books of mine too.


I hope this post has inspired you to change your decorative pillows seasonally and not have to worry about storing a bunch of bulky pillows!
Shop My Living Room


Make sure to pin it for later!


Yes, I change my pillows and window curtains. It’s a lot of work but I love the change! Even my decor gets changed out.
Oooh window curtains! I never thought about changing that seasonally!
Sounds like fun!
Hugs, Jamie
My wife is looking to get more pillows for our living room. As you said here, having a cover to store is a lot easier than the whole pillow. I’ll for sure show her that as I think it would be a good way to save on space.
Jamie, I always wanted to do this. It is really very easy sewing, even for a beginner, I can’t wait to get started. I really like the green fabric you used. Something to do when we are “staying in place” Why don’t you do a tutorial on making face masks? Stay healthy Jamie! Claudia
Thanks so much, Claudia! I’m glad you liked the tutorial. My sister is making masks right now!
Hugs, Jamie