
DIY Pallet Sign with Stain and Drywall Mud
How to create your own pallet sign with stain and drywall mud.

I had fun making this pallet sign. It can be used for so many things and making it so you can quickly interchange items on it makes it useful all year round. Think of all the printables you can put on this?
I recently was at a market selling some vintage items and I had a poster printed and I taped it to this sign.
It’s also so easy to make, let me show you how I made this pallet sign.

This post contains affiliate links for your shopping convenience. Click to read my full disclosure policy.
Supplies:
- boards from a pallet (I was given a Pallet in a Box from Amy Howard but I’m not sure if they still sell them)
- board sizes: 4 boards + 1 board I cut to make braces on the back
- 22 x 5 1/2″ | each brace 21″ long
- stain (general brown color is fine)
- foam brush or paintbrush or rag
- drywall mud (premixed or mix it yourself)
- putty scraper
- jigsaw, saw or handsaw
- all-purpose adhesive like Liquid Nails
- caulking gun
- rags
- disposable gloves
Directions:
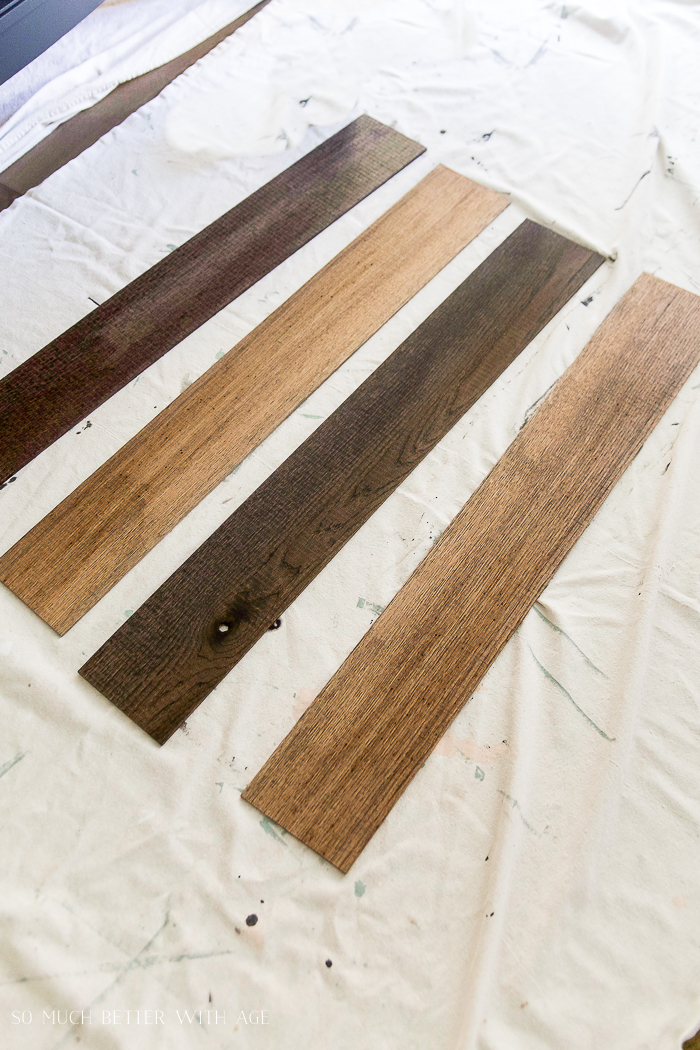
1. First I stained the boards using a foam brush and I actually only used ONE stain! The boards soaked up different colours. You could try one stain or a few stains depending on the look you’re going for but you won’t know if your boards change color on each one until you actually stain. Let dry at least 12-24 hours (until it’s not tacking to the touch).
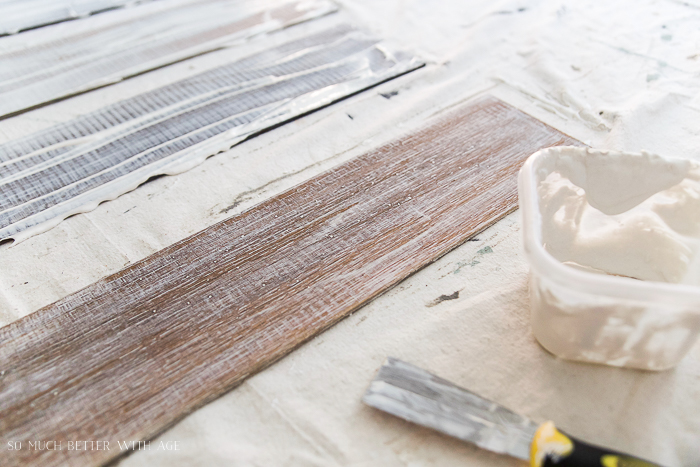
2. Mix your drywall mud (if you bought one that wasn’t premixed) and spread it all over your boards with a putty scraper. You’ll want to spread it on quite thick while pushing it into all those little cracks and grooves.


3. After I was done with spreading on the drywall mud, I went back to the first board I did and scraped it off with a putty scraper and rags. Try to get most of it off as it will turn whiter than this when it dries.
4. Next you’ll need to measure for the two braces in the back. It’s just slightly smaller than the width of the four boards together.
5. Cut the boards (if these are not pre-cut). I used a jigsaw (as this is all I currently have) with a table and a vice in my garage.

6. Laying the four boards side by side, run a fair bit of Liquid Nails on the back of the first brace and place it about 3/4 of the way up on the backside. Repeat this for the second brace near the bottom.

7. Place books or something heavy on top of the braces (I used bricks) overnight or 24 hours to make sure you have a solid seal.

Now you have your very own pallet sign to do whatever you want with!

You can add my Happy Easter printable to it as well as my Easter bunny printable.

Click here if you’d also like to make these vintage Easter egg ornaments.

I hope you feel inspired to make your own pallet sign with stain and drywall mud. Now you can have a sign for any seasonal idea you come up with!

Click in Case You Missed:
Bunny Easter Sign – Free Printable!
How to Easily Update Furniture Legs


Great Idea! This turned out really nice babe!
Thanks babe xo
hey girl- love the sign ! So cool!
Thanks Shawnna!
Hugs, Jamie
Did you vary the length of time on stain for difference in colors?
HI Vicky, the different color came out that way I guess because the wood was a little different which I thought was really cool. Sorry for the delay in my response.
Hugs, Jamie